Introducción
¿Tus pies MacBook Pro han visto días mejores? Utiliza esta guía para darle a tu MacBook Pro de principios de 2015 un nuevo par de pies.
Qué necesitas
-
-
Quitar los siguientes diez tornillos que unen la tapa inferior con el cuerpo:
-
Dos tornillos Pentalobe P5 de 2.3mm
-
Ocho tornillos Pentalobe P5 de 3.0mm
-
-
-
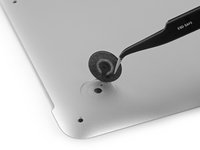
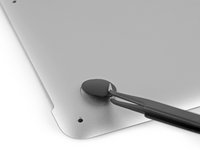
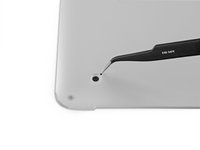
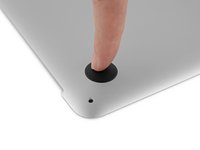
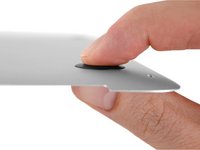
Despegue cualquier pegatina de la parte trasera de la tapa trasera cubriendo las patas que haya decidido reemplazar.
-
-


Para volver a armar tu dispositivo, sigue estas instrucciones en orden inverso.
Para volver a armar tu dispositivo, sigue estas instrucciones en orden inverso.
Cancelar: No complete esta guía.
60 personas más completaron esta guía.
Un agradecimiento especial a estos traductores:
100%


Estos traductores nos están ayudando a reparar el mundo! ¿Quieres contribuir?
Empezar a traducir ›

8 comentarios
On the inside of the cover of my A1502 Early 2015 MBP, two of the four feet are covered by large black stickers. So, how do we remove the little piece left behind when we remove any foot that is damaged? Do we just cut through the large black sticker or remove it?
This review was helpful, but it didn’t mention the black stickers on the inside of the lower case. I ended up poking a small hole through the black stickers to get the remaining pieces of previous feet out.
Just peel them back as far as needed, then re-stick them back when you're done. In my case, one did re-stick easily, while the other one didn't, I used a small piece of electrical tape to stick it back. It doesn't really matter that much, either way.
I picked the broken pieces caught underneath the stickers through the little hole from the outer side of the case with pointy tweezers.
Bernhard -
Jason and Taylor, the stickers you mention are on Step 4 of this guide.