Saltar al contenido principal
Únete a la Comunidad de Reparación - Crear Cuenta

ProntoTec Axius Camera Replacement

Qué necesitas

  1. ProntoTec Axius Camera Replacement, Camera: paso 1, imagen 1 de 1
    • Make sure the device is completely turned off before you begging taking it apart to avoid electrocution risks.

    • Place the tablet face-up on a flat table.

    Pregunta a FixBot
  2. ProntoTec Axius Camera Replacement: paso 2, imagen 1 de 1
    • Starting near the headphone port, fit the flat end of the spudger in between the screen and back case.

    • Pry the back case from the screen around each point on the device to release the clips securing the case halves to each other.

    Pregunta a FixBot
  3. ProntoTec Axius Camera Replacement: paso 3, imagen 1 de 1
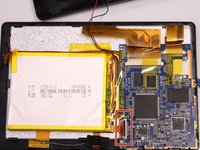
    • Gently remove the back case of the device and lay it in a flat surface as shown in the photo.

    • Make sure not to sever the wires (red and black) connected to the speaker that is located in the back case.

    Pregunta a FixBot
  4. ProntoTec Axius Camera Replacement: paso 4, imagen 1 de 1
    • Remove only the yellow tape that touches the battery.

    • Be careful not to cut or damage the wires (red and black) that are under the yellow tape.'

    Pregunta a FixBot
  5. ProntoTec Axius Camera Replacement: paso 5, imagen 1 de 2 ProntoTec Axius Camera Replacement: paso 5, imagen 2 de 2
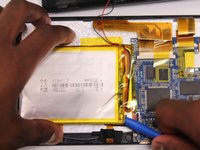
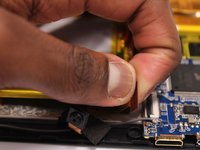
    • Use the flat end of the spudger to gently pry the top left corner battery from the back of the screen in order to access the camera.

    Pregunta a FixBot
  6. ProntoTec Axius Camera Replacement: paso 6, imagen 1 de 3 ProntoTec Axius Camera Replacement: paso 6, imagen 2 de 3 ProntoTec Axius Camera Replacement: paso 6, imagen 3 de 3
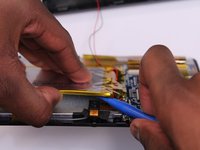
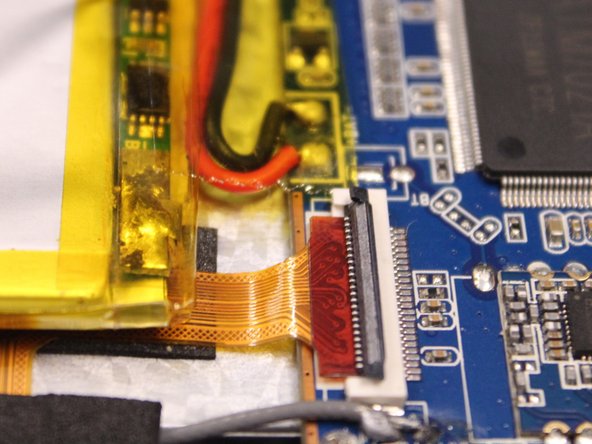
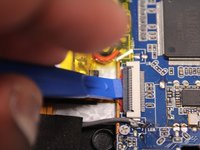
    • Use the spudger to lift the black clamp as shown in the photo to disconnect the camera from the motherboard.

    Pregunta a FixBot
  7. ProntoTec Axius Camera Replacement: paso 7, imagen 1 de 2 ProntoTec Axius Camera Replacement: paso 7, imagen 2 de 2
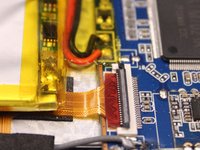
    • Disconet the camera from the motherboard.

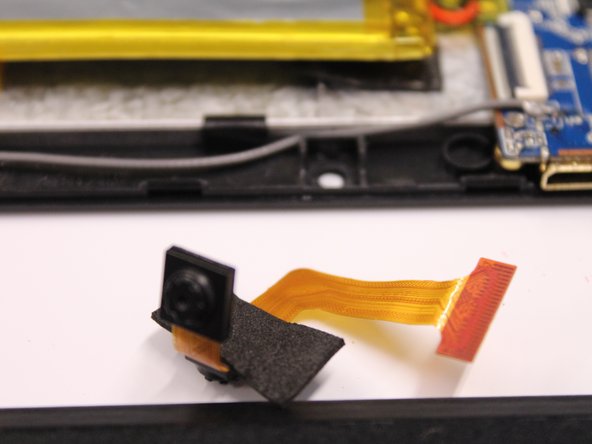
    • Pull the camera from the back of the screen.

    Pregunta a FixBot
Conclusión

To reassemble your device, follow these instructions in reverse order.

Una persona más ha completado esta guía.

Equipo

UMass Dartmouth, Team 5-3, Martin Fall 2016 Miembro de UMass Dartmouth, Team 5-3, Martin Fall 2016

UMASSD-MARTIN-F16S5G3

Miembros de 3

10 Guías creadas

0Guía Comentarios

Agregar Comentario

Ver Estadísticas:

Ultimas 24 horas: 2

Ultimos 7 días: 7

Ultimos 30 días: 37

Todo El Tiempo: 388