Saltar al contenido principal

Polaroid Flash Unit Shell Replacement

Qué necesitas

  1. Polaroid Flash Unit Shell Replacement, Before you begin: paso 1, imagen 1 de 1
    • If you have any film left, take some photos! Then remove the cartridge. Disassembly will expose any leftover film.

    • Unplug all cables from your camera.

  2. Polaroid Flash Unit Shell Replacement, Open your camera: paso 2, imagen 1 de 2 Polaroid Flash Unit Shell Replacement, Open your camera: paso 2, imagen 2 de 2
    • Fully open the flash unit at the front of your camera.

  3. Polaroid Flash Unit Shell Replacement, Remove the screw cover: paso 3, imagen 1 de 3 Polaroid Flash Unit Shell Replacement, Remove the screw cover: paso 3, imagen 2 de 3 Polaroid Flash Unit Shell Replacement, Remove the screw cover: paso 3, imagen 3 de 3
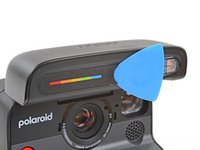
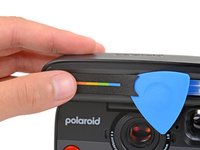
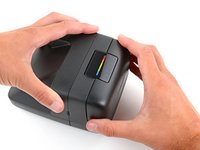
    • Slide the tip of an opening pick under the right edge of the screw cover, near the flash.

    • Leave the pick inserted under the cover for the next step.

  4. Polaroid Flash Unit Shell Replacement: paso 4, imagen 1 de 3 Polaroid Flash Unit Shell Replacement: paso 4, imagen 2 de 3 Polaroid Flash Unit Shell Replacement: paso 4, imagen 3 de 3
    • Slide the cover towards the flash to release the clips securing it.

    • Your pick might fall out—that's fine.

    • Pull the cover straight away from the camera and remove it.

  5. Polaroid Flash Unit Shell Replacement, Remove the flash unit shell screws: paso 5, imagen 1 de 3 Polaroid Flash Unit Shell Replacement, Remove the flash unit shell screws: paso 5, imagen 2 de 3 Polaroid Flash Unit Shell Replacement, Remove the flash unit shell screws: paso 5, imagen 3 de 3
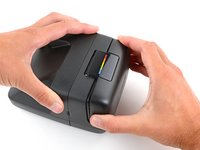
    • Hold the flash unit open with one hand.

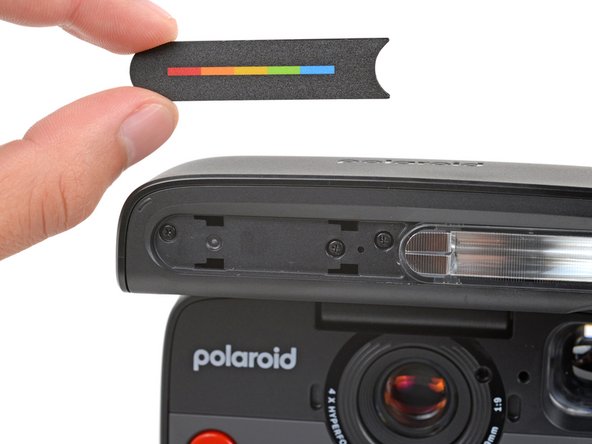
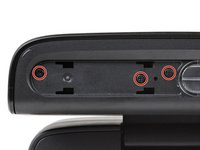
    • With your free hand, use a Phillips screwdriver to remove the three 5.9 mm‑long screws securing the flash unit shell.

  6. Polaroid Flash Unit Shell Replacement, Remove the flash unit shell: paso 6, imagen 1 de 3 Polaroid Flash Unit Shell Replacement, Remove the flash unit shell: paso 6, imagen 2 de 3 Polaroid Flash Unit Shell Replacement, Remove the flash unit shell: paso 6, imagen 3 de 3
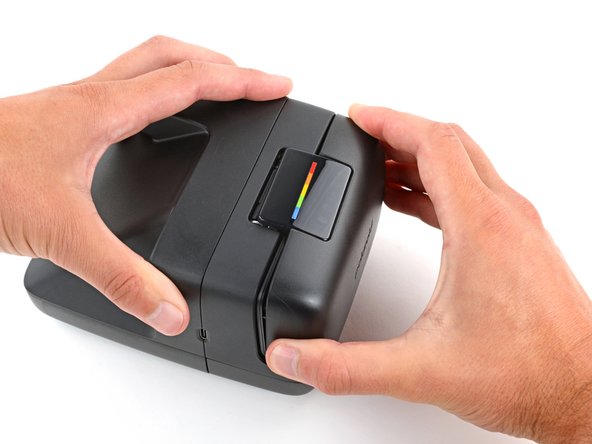
    • Fully close the flash unit for a better grip on the shell.

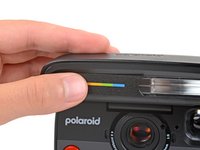
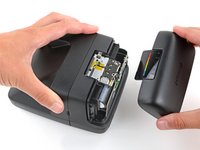
    • Secure the camera with one hand, and firmly grip the flash unit shell with the other.

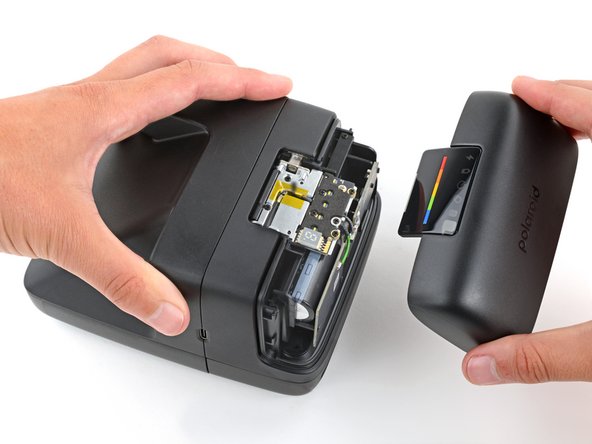
    • Lift the right edge of the shell (the side closest to the charging port) to release the clips securing it.

    • You should feel and hear "clicks" as the clips release.

    • Pull the shell up and away from the camera to remove it.

    • During reassembly, put the shell in place and push down firmly to engage the clips.

Conclusión

To reassemble your device, follow these instructions in reverse order.

Repair didn’t go as planned? Try some basic troubleshooting, or ask our Answers community for help.

Spencer Day

Miembro Desde 09/14/22

149,269 Reputación

995 Guías creadas

Equipo

iFixit Miembro de iFixit

Staff

Miembros de 123

23,608 Guías creadas

0Guía Comentarios

Agregar Comentario

Ver Estadísticas:

Ultimas 24 horas: 0

Ultimos 7 días: 1

Ultimos 30 días: 12

Todo El Tiempo: 176