Saltar al contenido principal

Nintendo Switch Pro Controller Buttons / D-Pad Replacement

Qué necesitas

  1. Nintendo Switch Pro Controller Buttons / D-Pad Replacement, Remove the screws: paso 1, imagen 1 de 1
    • Flip the controller over so the model stickers face the ceiling.

    • Use a JIS #00 screwdriver to remove the two black 8.4 mm screws that secure the handles, located at the ends of the handles.

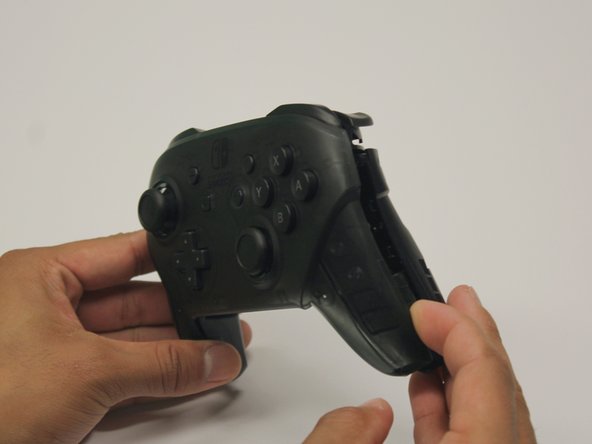
  2. Nintendo Switch Pro Controller Buttons / D-Pad Replacement, Remove the handle covers: paso 2, imagen 1 de 3 Nintendo Switch Pro Controller Buttons / D-Pad Replacement, Remove the handle covers: paso 2, imagen 2 de 3 Nintendo Switch Pro Controller Buttons / D-Pad Replacement, Remove the handle covers: paso 2, imagen 3 de 3
    • Carefully remove the handle covers by pulling them away from the main body.

  3. Nintendo Switch Pro Controller Buttons / D-Pad Replacement, Remove the screws: paso 3, imagen 1 de 1
    • Use a JIS #00 screwdriver to remove the four silver 6.8 mm screws that secure the clear back plastic cover.

  4. Nintendo Switch Pro Controller Buttons / D-Pad Replacement, Unclip the plastic cover: paso 4, imagen 1 de 3 Nintendo Switch Pro Controller Buttons / D-Pad Replacement, Unclip the plastic cover: paso 4, imagen 2 de 3 Nintendo Switch Pro Controller Buttons / D-Pad Replacement, Unclip the plastic cover: paso 4, imagen 3 de 3
    • Carefully pry away the clear plastic cover using your fingernail.

  5. Nintendo Switch Pro Controller Buttons / D-Pad Replacement, Remove the clear plastic cover: paso 5, imagen 1 de 1
    • Remove the clear plastic cover.

  6. Nintendo Switch Pro Controller Buttons / D-Pad Replacement, Remove the battery: paso 6, imagen 1 de 3 Nintendo Switch Pro Controller Buttons / D-Pad Replacement, Remove the battery: paso 6, imagen 2 de 3 Nintendo Switch Pro Controller Buttons / D-Pad Replacement, Remove the battery: paso 6, imagen 3 de 3
    • Remove the lithium-ion battery by using a fingernail or plastic opening tool to pry it up on the left side.

    • Only a small amount of force is needed.

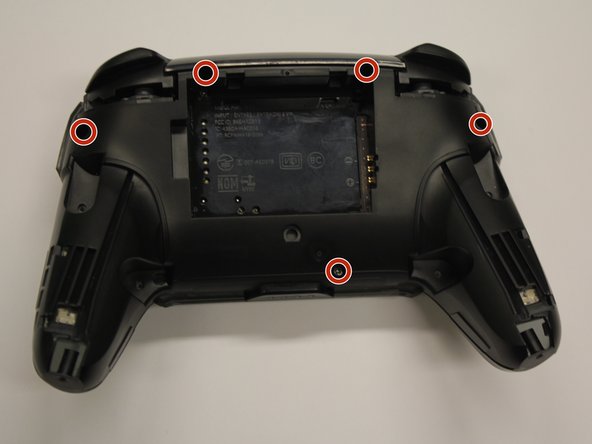
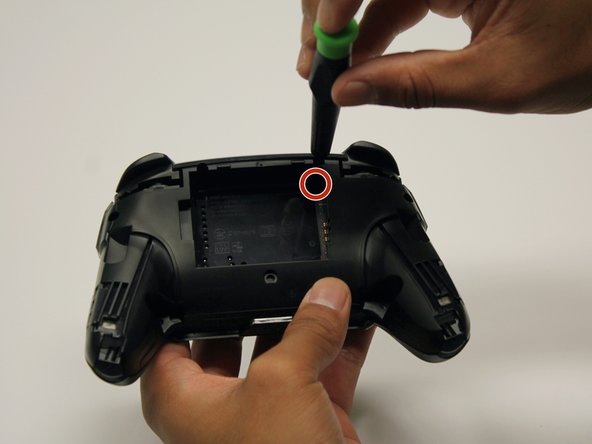
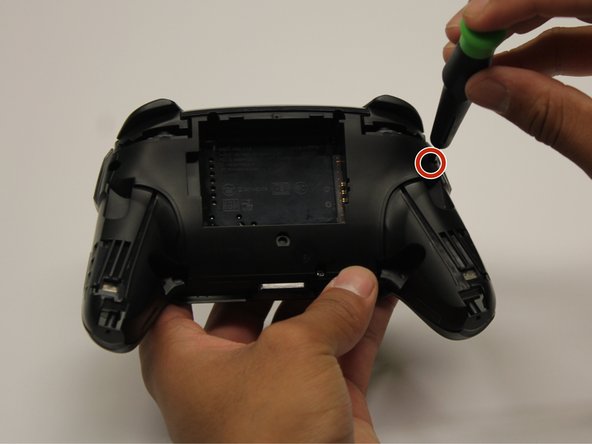
  7. Nintendo Switch Pro Controller Buttons / D-Pad Replacement, Buttons / D-Pad: paso 7, imagen 1 de 3 Nintendo Switch Pro Controller Buttons / D-Pad Replacement, Buttons / D-Pad: paso 7, imagen 2 de 3 Nintendo Switch Pro Controller Buttons / D-Pad Replacement, Buttons / D-Pad: paso 7, imagen 3 de 3
    • Remove the five 5mm roundhead screws with the Phillips #00 screwdriver.

  8. Nintendo Switch Pro Controller Buttons / D-Pad Replacement: paso 8, imagen 1 de 2 Nintendo Switch Pro Controller Buttons / D-Pad Replacement: paso 8, imagen 2 de 2
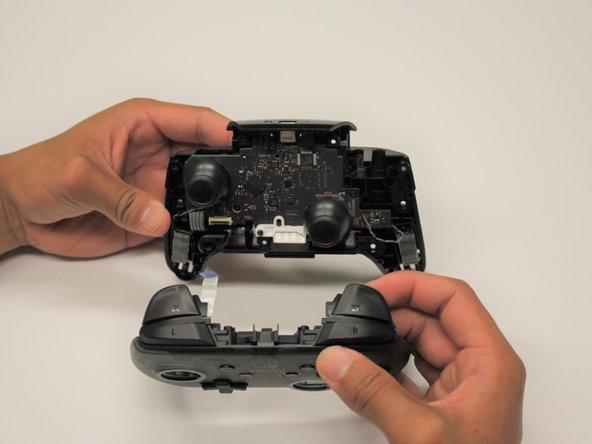
    • Carefully pry the front plate off of the body using an iFixit opening tool.

    • Separate the plastic covers by pulling it apart from the controller body.

    • Avoid using excessive force when pulling the cover off to prevent damage to the white ribbon cable.

  9. Nintendo Switch Pro Controller Buttons / D-Pad Replacement: paso 9, imagen 1 de 3 Nintendo Switch Pro Controller Buttons / D-Pad Replacement: paso 9, imagen 2 de 3 Nintendo Switch Pro Controller Buttons / D-Pad Replacement: paso 9, imagen 3 de 3
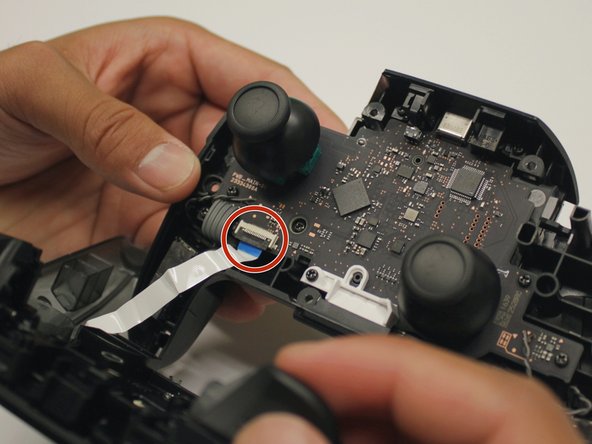
    • Use your fingernail to lift the black ribbon cable clip.

    • Carefully remove the ribbon cable from the connector.

    • Only a small amount of force should be needed to remove the ribbon cable.

  10. Nintendo Switch Pro Controller Buttons / D-Pad Replacement: paso 10, imagen 1 de 3 Nintendo Switch Pro Controller Buttons / D-Pad Replacement: paso 10, imagen 2 de 3 Nintendo Switch Pro Controller Buttons / D-Pad Replacement: paso 10, imagen 3 de 3
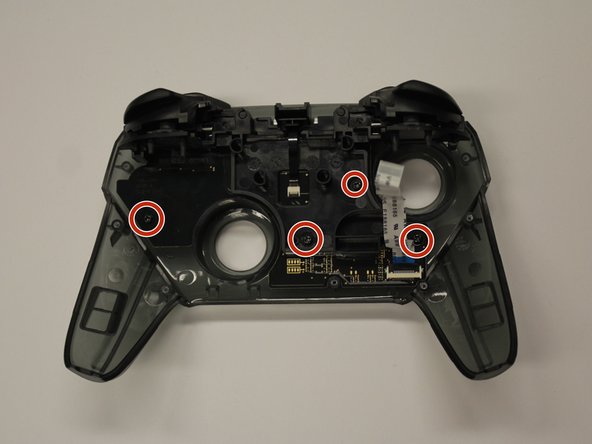
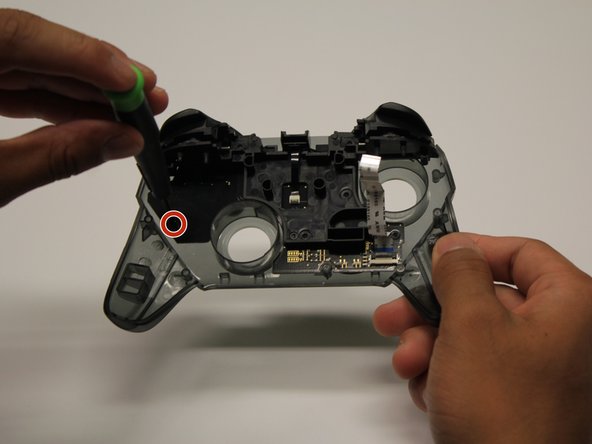
    • Remove the four screws on the top circuit board using a Phillips #00 screwdriver.

  11. Nintendo Switch Pro Controller Buttons / D-Pad Replacement: paso 11, imagen 1 de 1
    • Remove the top circuit board.

  12. Nintendo Switch Pro Controller Buttons / D-Pad Replacement: paso 12, imagen 1 de 3 Nintendo Switch Pro Controller Buttons / D-Pad Replacement: paso 12, imagen 2 de 3 Nintendo Switch Pro Controller Buttons / D-Pad Replacement: paso 12, imagen 3 de 3
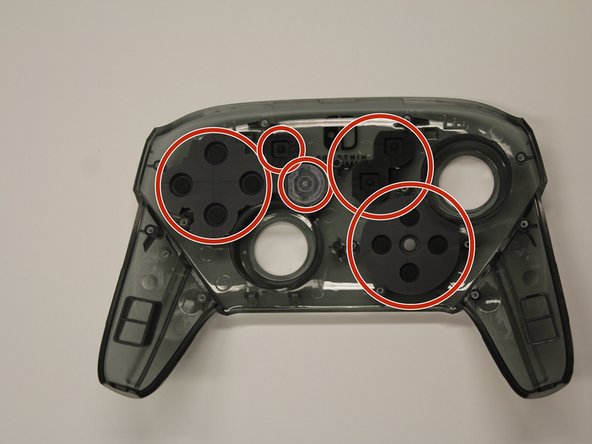
    • Remove the button you wish to replace by pulling it out of its slot

Conclusión

To reassemble your device, follow these instructions in reverse order.

21 personas más completaron esta guía.

Equipo

Cal Poly, Team S11-G2, Regan Fall 2019 Miembro de Cal Poly, Team S11-G2, Regan Fall 2019

CPSU-REGAN-F19S11G2

5 Miembros

42 Guías creadas

3 comentarios

On re-assembly, you may have trouble getting the top circuit board and shoulder button support structure to snap into place. It’s easiest to get the circuit board around the right analog stick hole, and push it all the way down until it is in place, then to secure the shoulder button support structure.

Make sure the “Home” button clear plastic light spreader (a clear irregular circle-shaped piece) is in place on top of the home button assembly, or it will give the home button a “sunken” appearance.

nclee - Contestar

Worked well, thank you. Had a gooey X button that needed to be cleaned.

Anthony Peacock - Contestar

What about the sync button? I've been scouring the Switch Pro Controller guide all day but there's nothing on how to remove the sync button! Mine is in really bad shape from having to use paperclips to press it but i can't find a guide to repair it anywhere.

faye kim - Contestar

Agregar Comentario

Ver Estadísticas:

Ultimas 24 horas: 19

Ultimos 7 días: 117

Ultimos 30 días: 412

Todo El Tiempo: 28,740