Introducción
¿Pantalla rota? ¿El maldito digitalizador te está haciendo la vida imposible? Utiliza esta guía para sustituir el conjunto de la pantalla de tu Motorola Moto X.
Qué necesitas
Resumen del Video
-
-
Introduce la herramienta de expulsión de la tarjeta SIM en el orificio del lateral de la bandeja de la tarjeta SIM y empuja para expulsar la bandeja.
-
Retira la bandeja de la tarjeta SIM.
-
-
-
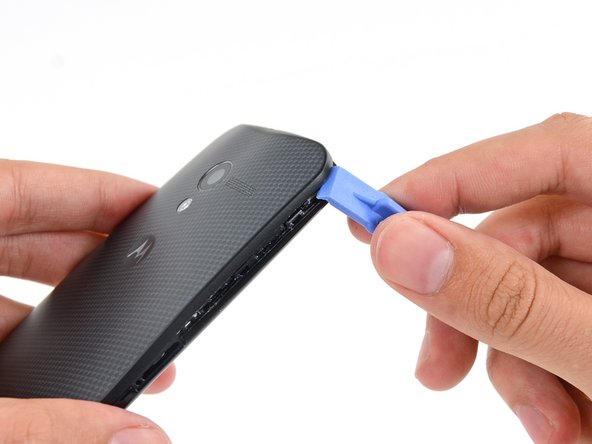
Introduce una herramienta de apertura de plástico en la costura entre las tapas delantera y trasera, cerca de la ranura para la tarjeta SIM.
-
Desliza la herramienta de apertura de plástico a lo largo de la costura hacia la esquina superior.
-
-
-
Pasa la herramienta de apertura a lo largo de la costura alrededor de los cuatro lados, separando los clips restantes que sujetan la tapa.
Be *very* careful not to push the opening tool too deep when you go around the buttons! I accidentally broke the volume rocker ribbon by doing so, and didn't even realize it until I had completely removed the cover.
When i removed the volume rocker i cant get it back in correctly seems to be in right but the volume up is not clicking and only works if i push it really hard any ideas?
-
-
-
Calienta un iOpener y colócalo sobre el teléfono durante unos 90 segundos para aflojar el adhesivo que sujeta la tapa trasera.
There is NO GLUE holding on the back of a Moto X with a wood back! That little fact just made the extra $50 I spent on the phone totally worthwhile.
Lucky for you, I have the bamboo, and plenty of adhesive.
Kelly F -
-
-
-
Empezando por el lado de la ranura SIM, despega con cuidado la tapa trasera del teléfono.
Step 15 seemed to be the hardest part for me. (step 25, the battery was also difficult). I am now not a fan of sticky stuff, "Mild adhesive" is definitely an understatement, IMHO, just saying I don't like sticky stuff, maybe I didn't do it right. The iOpener seemed to help a little, but not much.
CAUTION
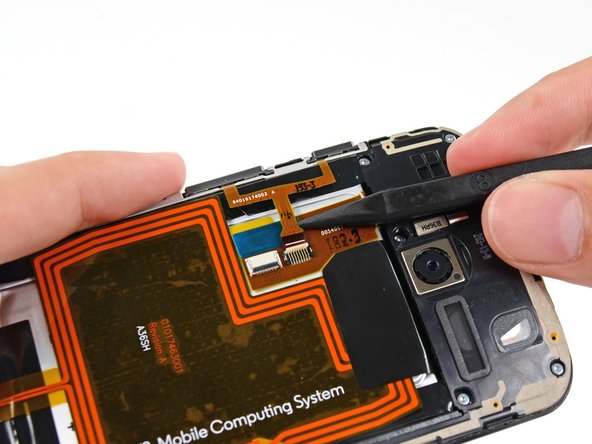
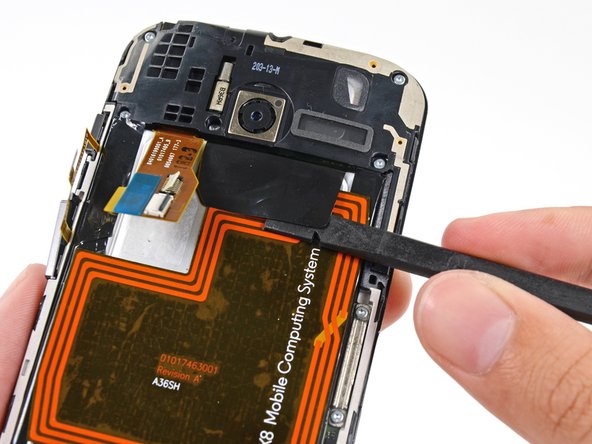
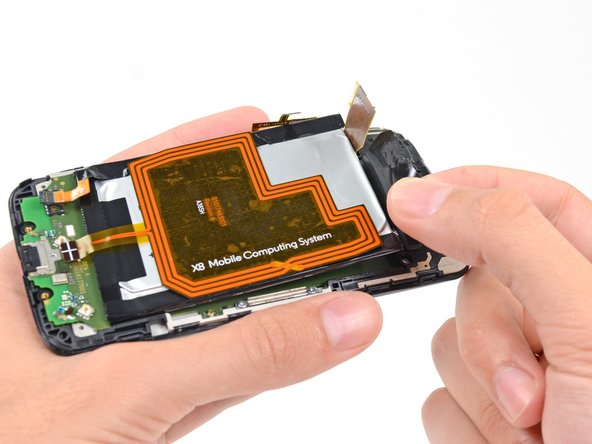
BE CAREFUL with the NFC antenna, it says "X8 Mobile Computing System" on it. The adhesive seemed stick to the the blue stuff on the back cover more and loosen up on the bottom of the antenna, the part that sticks to the battery. So in the process of peeling the back cover the antenna started to come up and was torn at the connector strip before I realized what was happening, step 19 has a good picture of the connector strip that I'm talking about. I like using NFC once in awhile, so now my next FIX will be the antenna.
Overall instructions were GREAT, I now have a camera again. Thank you.
So you are saying that there is no problem if I don't connect the NFC antenna? I'm asking this because I bought a replacement battery that don't include the NFC antenna. I would really appreciate your help with this :)
The adhesive was crazy hard on mine as well and I ended up with two small cracks on the edges of my back cover. The blue rubber piece actually separated from the back and removed it from the battery after it was open. The battery itself was also very difficult to remove (pull tab did nothing) and bent/pried the old battery out. I see no reason for all that adhesive! Other than getting the dang thing open the rest was easy. Great guide!
The adhesive holding the back very strong! In the process of removing the back, I cracked the edges of the back cover and ripped part of the NFC connector. Luckily the friend I was doing the repair for did not even know what NFC was, so she was ok with this. Take your time removing the back cover! Also, the adhesive holding the battery in place was not what I would call mild. The black tab was next to useless in removing the battery
So you are saying that there is no problem if I don't connect the NFC antenna? I'm asking this because I bought a replacement battery that don't include the NFC antenna.
-
-
-
Coloca suavemente la tapa trasera de forma que el conector del cable del flash de la cámara quede al descubierto, pero sin ejercer presión sobre él.
As I had seen in another video, my Moto X with a custom back did not have the blue sticky pad. But the back was still well-adhered in the top corners and with a strip of adhesive along the bottom. In the photo in this step you can see the only adhesive I had to deal with, which was on either side of the lens (two dark areas on the phone back) and along the bottom of the phone (dark area at the bottom of the phone back).
-
-
-
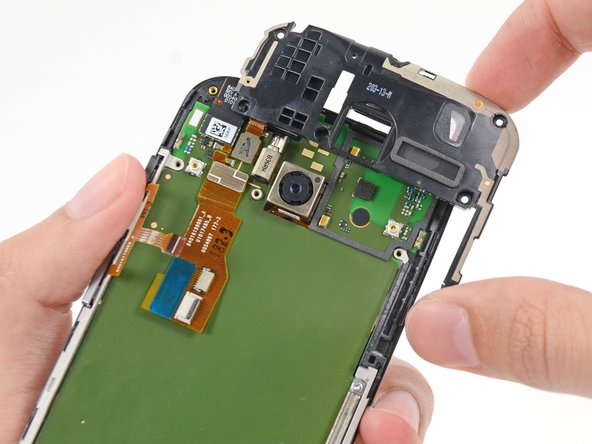
Retira los cuatro tornillos T3 Torx de 3 mm que sujetan el ensamblaje de la antena inferior al teléfono.
It turns out to be the hardest step at the moment. I ordered iOpener set, and it is almost useless. It doesn't have t3, only t5, the actual iOpener is useless. I would happily order t3 on ifixit.com, but there is no t3 in Germany, so I ordered on amazon, and it turned out to be a complete $@$*, I was not able to take a single screw out. The guide is really good, I never thought I would have an issue with a screwdriver ....
These screws were definitely incompatible with my T3 bit - it was too small. T4 worked fine. Not sure if I should attribute this to an error in the guide or inconsistency in the size of my bit set; in any case it might be handy to have a T4 handy if you're not buying the iFixit screwdriver.
Drilled out the heads. A bit scary, yes. I agree with another commenter here that my T3 isn't the best fit in these screws. My T3 was a pretty cheap eBay acquisition, so who knows where the blame should go. I wouldn't do this repair again. Phones should be easier to break open than this one. Too much adhesive (and as I mentioned above, mine didn't even have the blue adhesive pad) and T3 heads are super small and asking to be stripped and the two screws I did get out were way too tight. Oh, and also the potential butchering of the cover when prying loose the clips. Mine bent a bit around the headphone jack, but it smoothed back down and is not noticeable. Phone powered up and is charging now. Let's hope it was worth it.
On my phone, the screws were DEFINITELY T4. My advise? Try T4 first. If it's too big, nothing lost.
I nearly stripped the head on one of mine with my T3 bit because it was too small to get traction.
I use chinese version of T3 screwdriver shipped with screen and T3/T4/T5 version of MATRIX tool set - both didnt fit for Moto X 1st gen screws. Only Bernstain T3 6-658 screwdriver fits ideally! Spent 2 days to find this tool. Be aware.
I was able to do this step by grinding down a cheap T3 that I had laying around from another repair. Like others, I found that these screws seem larger than a T3 - stripped one and had to drill it out. Since the T3 screwdriver I had was tapered, I ground it down until the end was large enough to grip the remaining screws. Success!
-
-
-
Usa el extremo plano de un spudger para hacer palanca en el ensamblaje inferior de la antena y liberarlo del teléfono.
-
Retira el ensamblaje de la antena.
See that little circular rubber near the bottom right screw? This funnels the background noise to one of the noise canceling microphones. It will be destroyed when you take it off. Freaked me out when I first opened up mine.
This foam "funnel" required re-forming of the center hole (also check hole in back cover foam gasket). If this sound channel gets blocked, the noise canceling will not function properly. Before re-installing the lower antenna assembly, check the oblong 2-hole gasket on the back side of the antenna assembly which covers a sound channel to the offset microphone input hole. If deformed, gently reshape it with tweezers to assure both holes are not plugged.
my antenna going away after change battery
found networks but not registered , factory reset ,
please help me
-
-
-
-
Introduce la punta de un spudger bajo el cable de la batería, cerca del conector, para levantarlo recto de su zócalo.
-
Usa el extremo plano de un spudger para desconectar el conector del cable de la antena NFC.Texto subrayado
-
-
-
Retira los cinco tornillos Torx T3 de 3 mm del ensamblaje conector para audífonos/altavoz.
These screws appear to have some yellow locktite on them. I rounded 2 of them, so take caution and make sure your screw driver fits correctly. Otherwise you will need to find a drill press to extract them.
Is the glass glued to the LCD like the iPhone 5? Is it possible to repair a broken front glass without changing the whole assembly?
Yes and Yes. Just fixed mine.
Buy a Glass+Frame from ebay. Do steps 1-18 and 37. Then just open the bottom two torx screws, no more. They are the only ones connected to the front frame. Then heat&remove the glass, tear off the frame with pliers. Then you just need to clean the screen from residue and apply LOCA and the Glass+Frame.
All screws appear to be Torx T4.
-
-
-
Introduce un spudger bajo el mango del ensamblaje del conector para audífonos/altavoz y haz palanca para sacarlo de su hueco.
-
Insertar traducción aquí
The microphone assembly has foam tape adhesive on it and will want to separate with the headphone jack / speaker assembly.
-
-
-
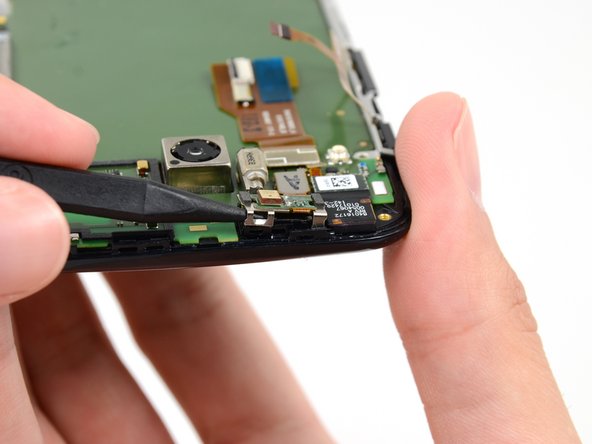
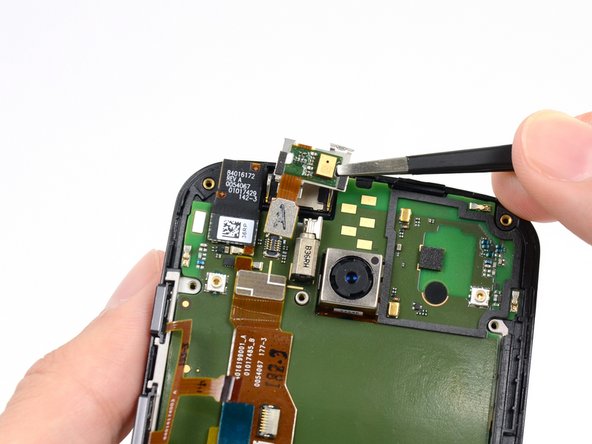
Desconecta el conector del cable de la cámara frontal.
-
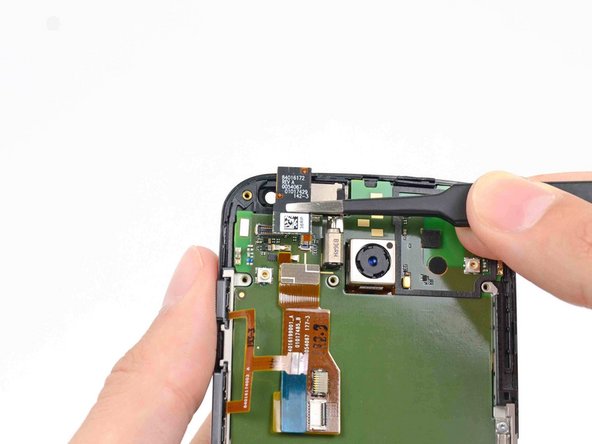
Saca la cámara frontal de su alojamiento con unas pinzas.
There is a thin black foam gasket (like a small washer) that is stuck to the front of this camera lens housing. On mine, the gasket was stuck off-center with the inner edge in the field of view of the lens. Using tweezers, I removed it and re-attached it on center. The image is now much sharper!
-
-
-
Retira los dos últimos tornillos Torx T3 de 3 mm del soporte de la ranura SIM.
On my XT1053 Developer Edition, the Torx screws on the sim slot bracket were not T3 like all the others, they were T4. Trying to use a T3 screwdriver resulted in twisting off the tip of the screwdriver. A T4 screwdriver removed them just fine.
-
-
-
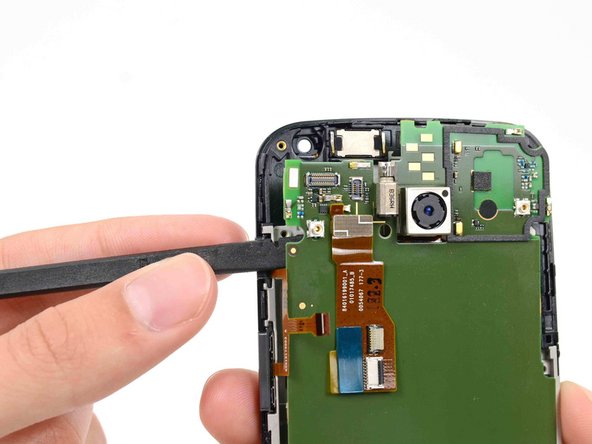
Utiliza el extremo plano de un spudger para girar la pestaña de retención del conector ZIF del cable de la pantalla.
-
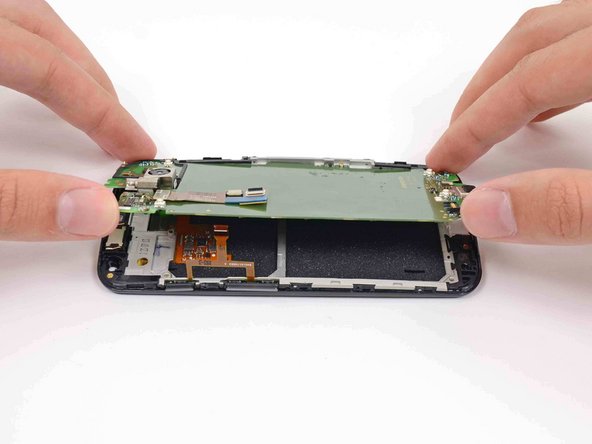
Saca con cuidado el cable de pantalla de su conector mientras retiras la placa madre del ensamblaje de pantalla.
I also struggled getting this cable back in, I actually assembled it thinking it was "in enough", only to find out I had to take it back apart and push it in further.
I found that you can lay the screen face down, with the cable upright at a 90 degree angle, then push the motherboard down onto the cable. When it goes in enough, it snaps in fairly well. If it's not in enough, it will be impossible to close the clamp.
There is a small black plastic piece which goes over the proximity sensor which can easily fall off. If it does, the sensor will malfunction and think that you are always close, which means you will not be able to hang up or do anything else with your phone while you are on a call and will just have to wait for the other person to hang up. I had to do more or less the whole job over again to reinsert this piece (I couldn't tell where it had fallen from and just hoped my phone would be alright with out it).
This is discussed in the thread here:
Can you disable the proximity sensor, Moto X?
You can see the black plastic over the proximity sensor in these two photos:
https://d3nevzfk7ii3be.cloudfront.net/ig...
https://d3nevzfk7ii3be.cloudfront.net/ig...
Whereas it is missing in this photo:
https://d3nevzfk7ii3be.cloudfront.net/ig...
(The sensor is on the lower left in this last photo).
When lifting the motherboard, note that there will be some resistance near the USB port due to an adhered foam gasket/funnel which channels sound from the tiny hole in the glass to the voice mic on the back side of the motherboard. Before re-installation of the motherboard, inspect the shape and hole in this foam gasket. It should look like cylindrical standoff about 0.1 inch tall. If it is not a clear sight to the tiny hole in the motherboard, sound will not reach the voice mic. I used the point of a spudger to re-form the hole.
-
-
-
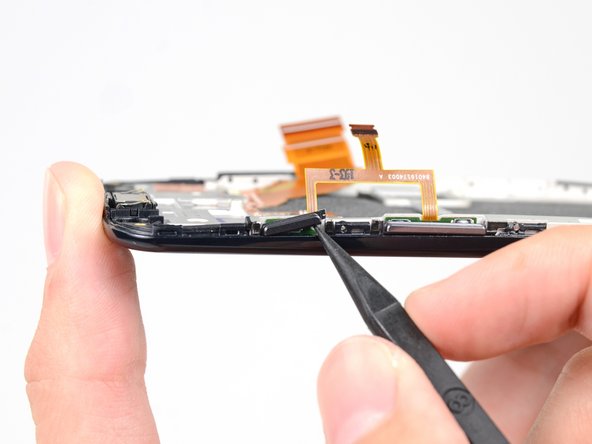
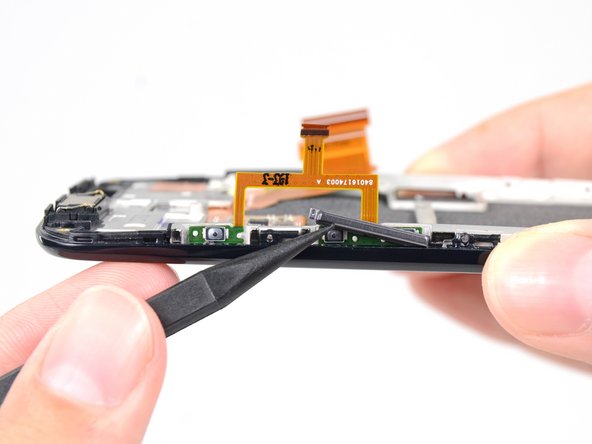
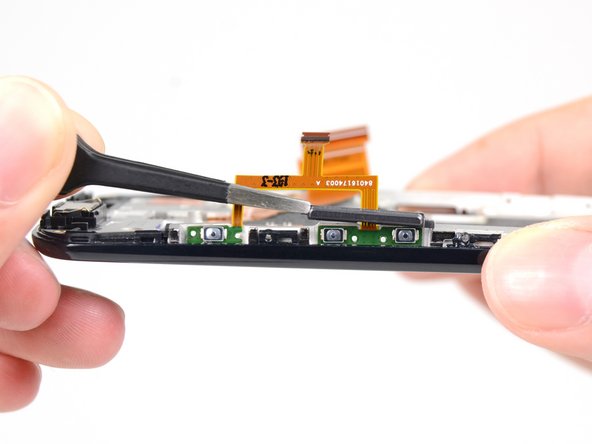
Usa la punta de un spudger para sacar el botón de encendido/reposo de su ranura en el ensamblaje de pantalla.
-
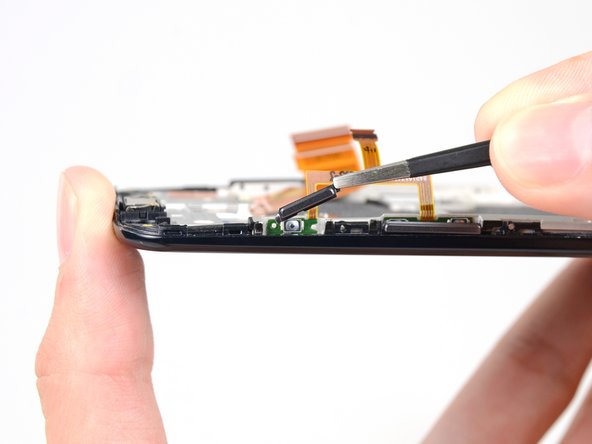
Retira la tapa del botón de encendido/reposo con unas pinzas.
Mine had a little metal clip between the buttons, a flat side that would have faced the back (since removed) and at a 90 degree angle some little fingers that ran down behind that tab between the buttons. This clip held the buttons in place despite my nudging. Taking the flat side of the spudger from the SIM card side and prying the clip up a bit at a time worked the fingers out of the slots behind the center tab.
Great description! My phone also had that little part fall out unexpectedly. Only by your post was I able to figure out where it was located.
My phone also has that. You can actually full take out that metal part, and later stick it back. Taking it out before makes it much easier to get the button out.
-
-
-
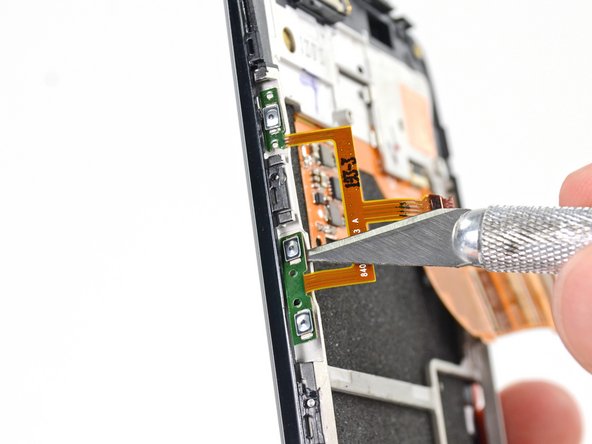
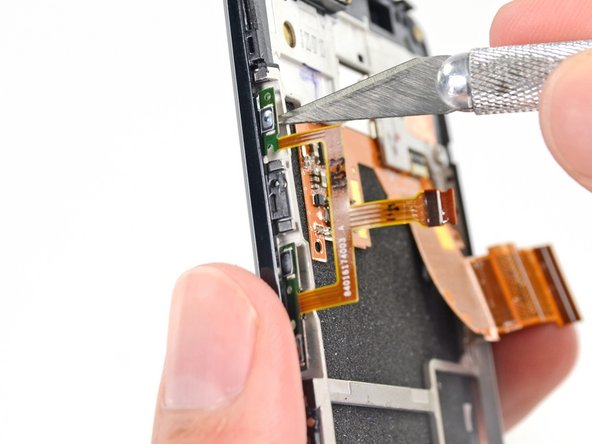
Utiliza la punta de una navaja o una herramienta de apertura de plástico para hacer palanca y despegar el ensamblaje del botón del adhesivo que lo fija a la pantalla.
The rest of the steps can be skipped if your replacement display unit doesn't have the metal frame. The frame can be removed by pushing out the 7 tiny pins from the inside. I used needle thin tweezers. You can see one of the pins in the first 2 pictures of this step. When you remove this frame the buttons and speaker come out with it. It is held on with some adhesive also.
After you remove the metal frame you will be able to transfer the shiny ear piece accent that is held in with adhesive
-
-
-
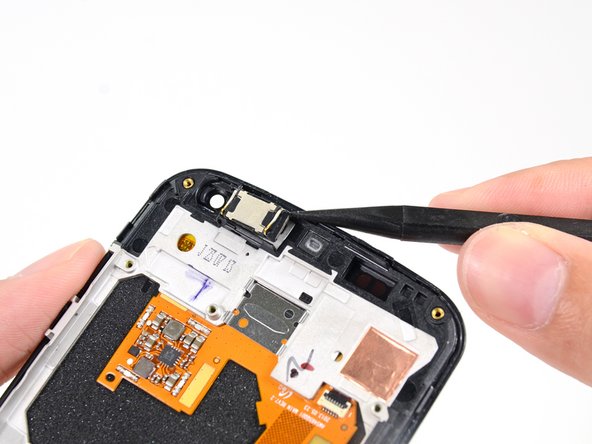
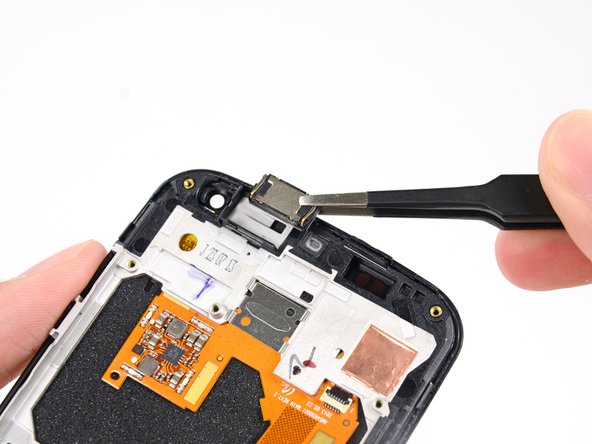
Saca el altavoz del auricular del ensamblaje de pantalla haciendo palanca con la punta de un spudger.
-
Retira el altavoz del auricular con unas pinzas.
Be EXTREMELY CAREFUL when prying the speaker off. You may accidentally separate the magnet from the speaker assembly. I got lucky in that my replacement had a speaker assembly already installed in it.
I second this, I was prying it off and my speaker split apart! BE CAREFUL
sudorc16 -
I second the second. But also, I suggest taking your new display assembly out of the bubble wrap and looking at it before you try this step; if the replacement has the speaker on it, you can skip this step (and the probable cursing). My replacement also had the button assembly on it, so I could have skipped that as well.
waitdanj -
Me three! The speaker came apart- adhesive holding it in place much too strong. Now another week before that part arrives..
where did you happen to get your display assembly from?
Zymfonic -
I recommend using a flat wide tweezer blade to remove this part. The adhesive is in the form of a mesh rectangle with adhesive on the speaker side. I believe this also serves as a keep-out for debris. You can control how the speaker lifts up to avoid separating this mesh from the speaker element.
-
-
-
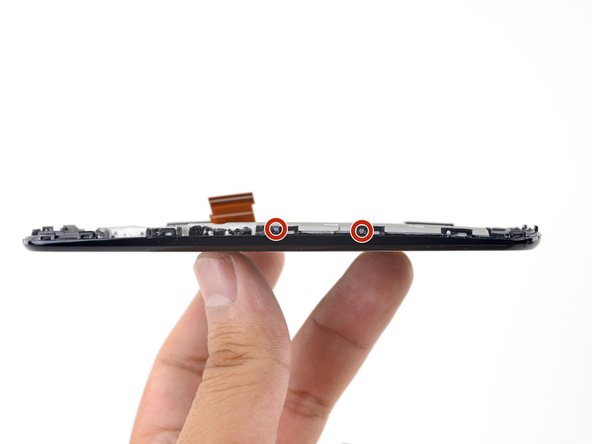
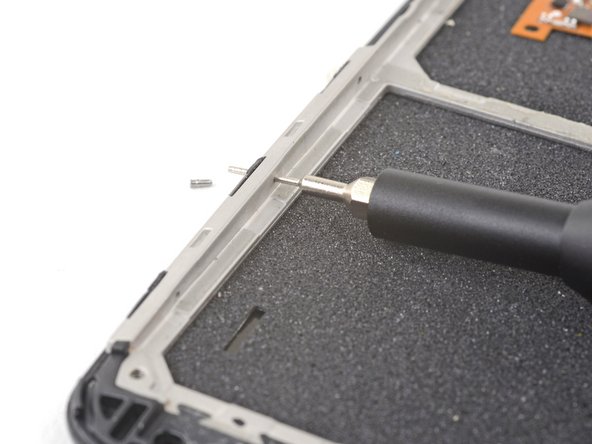
Utiliza una herramienta de expulsión de SIM, una punta de expulsión de SIM o un clip doblado para empujar suavemente la clavija hacia fuera desde el interior de la caja.
-
Repite el proceso con las clavijas restantes.
There are 7 pins in total: 4 on one side, 3 on the other.
While pushing the pins out, apply counter-pressure against the plastic from the other side to not break it off.
-
-
-
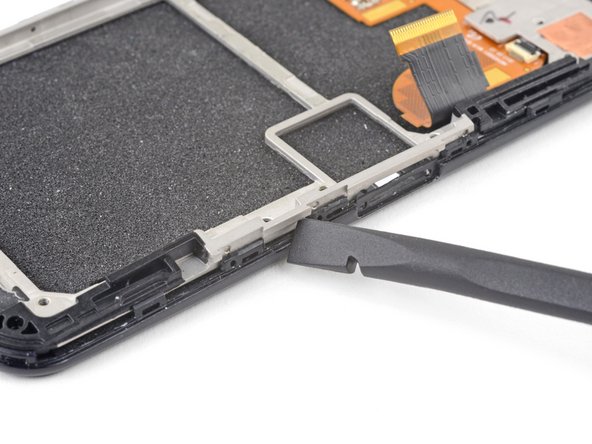
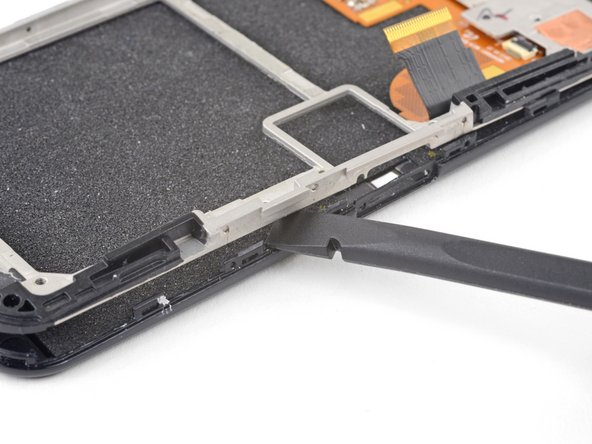
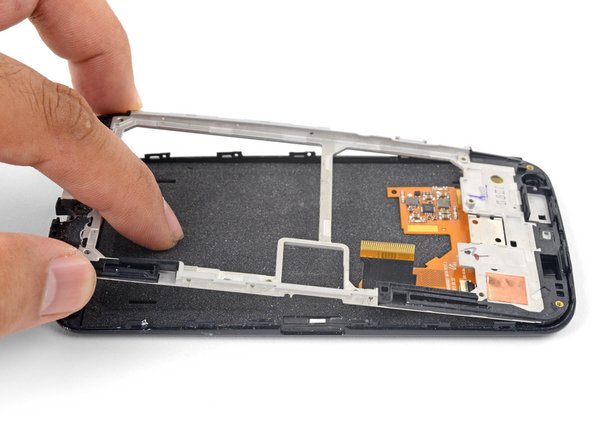
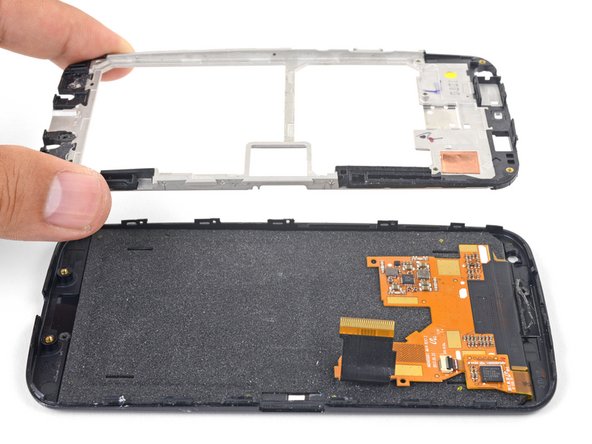
Sujeta los bordes del marco intermedio blanco y empuja contra el ensamblaje de pantalla para liberar el marco intermedio.
-
Retira el marco intermedio blanco.
-
Cuando vuelvas a montar el teléfono, sustituye el adhesivo antiguo por cinta adhesiva de doble cara o tiras de adhesivo precortadas.
-
Compara yu nueva pieza de repuesto con la pieza original. Es posible que tengas que transferir los componentes restantes o retirar los adhesivos de la nueva pieza antes de instalarla.
Para volver a montar el dispositivo, sigue estas instrucciones en orden inverso.
Lleva tus residuos electrónicos a un centro de reciclaje certificado.
¿La reparación no ha ido según lo previsto? Consulta nuestra Comunidad Motorola Moto X Respuestas para obtener ayuda sobre la solución de problemas.
Cancelar: No complete esta guía.
61 personas más completaron esta guía.
Un agradecimiento especial a estos traductores:
100%
¡ Mariana Roca nos está ayudando a reparar el mundo! ¿Quieres contribuir?
Empezar a traducir ›
20 comentarios
I was able to follow this guide, but the T3 Torx was too small. The T4 Torx was also too small. Fortunately I had a T5 Torx which worked perfectly. During removal of the back I damaged my NFC antenna and can't use my Moto Skip anymore. Be careful with that component.
BUY THIS TORX SCREWDRIVER https://www.amazon.com/Husky-74502-Torx-...
NO seriously I have done a ton of electronics projects and getting a torx screwdriver that actually works with most electronics has been a struggle this is the new version of the husky 8-1 I have the old version I believe they are the same. This thing has caught thread on screws where I had given up hope
This is insane. I'm a computer tech, I build computers for a living. I repair components. Fixing this little crappy phone is crazy complex. Look at all the comments saying "be careful of x because I destroyed it accidentally". Not a one says "wow, that was incredibly simple".
I personally wouldn't try it -- I'd just get another phone and have it swapped onto my account. And then I'd stop doing whatever I'd done to break the first one.
You should leave ifixit to the qualified. Just stick to Best Buy, kid.
Brn Mace -
Ohhh Ziiingg so hot it burns!
Guys please help, I managed to replace the screen, but touch is not working, what could I do wrong?
Reopen, then verify that the larger ribbon cable you disconnected is still connected straight. If this isn't straight the digitizer will not work as I had one that would come loose as soon as I put the two halves together, I then had to be very sure the ribbon was straight and on place before reassembling.
clgill -
I too managed to replace the screen. the touch was also working fine until I closed the back cover. as soon as I close the cover the touch is gone and when i open the back cover, the touch gets responsive again. unable to figure where is the problem exactly
Guys please help. I replaced the display and everything was working fine until I inserted my SIM card. No network on the phone now. What might be the problem?
I have the same problem. Can anyone reply to this??
I need help. We replaced the screen, but now it is vibrating and wont turn on. It seems like we missed something...any suggestion??
Did you ever figure out a solution? I have the same problem.
I have the same problem
Any one have trouble with the camera stopping to work a couple days after the repairs?
Just done it :)
Most tricky part is the removal of the back cover. Instead of the iOpener I used a hair dryer.
I got the display from this website (http://www.etradesupply.com/motorola-mot...).
A bit exspensive but the shipment was quick and the display is exactly the same as the original.
I almost killed the speaker, as the small "grid" was tightly glued, so, yes, be really carefull with that.
Thanks for the tutorial !
Just replaced my screen! Here are some tips:
- I removed the back cover with the use of the hairdryer but it was difficult because the NFC thing over the battery was stuck to the blue adhesive, and I almost ripped the connector. So be careful.
- There is a small metal clip between the power and volume buttons that holds them in, and it's not listed in the guide. Remove it and then use it later to hold the buttons in on the new display.
- You definitely need an exacto or very sharp knife to remove volume/power buttons.
- Also use an exacto to remove the speaker
- The battery requires a lot of force to pull out so be prepared
- bought screen here http://www.etradesupply.com/motorola-mot...
I use chinese version of T3 screwdriver shipped with screen and T3/T4/T5 version of MATRIX tool set - both didnt fit for Moto X 1st gen screws. Only Bernstain T3 6-658 screwdriver fits ideally! Spent 2 days to find this tool. Be aware. Bought screen on http://aliexpress.com
I did this exactly as you said, but now i got a horrible problem... When I call or play whatsapp audios the screen turns black and it doesn't turn on again. I don't know WTF could have happened. Please I would thank a lot a bit of help.



























Sim not work
Radhey Kashyap - Contestar