Saltar al contenido principal
Únete a la Comunidad de Reparación - Crear Cuenta

Merch Source Projector Entertainment II Light Bulb Replacement

Qué necesitas

    1. Merch Source Projector Entertainment II Light Bulb Replacement, Outer Casing: paso 1, imagen 1 de 2 Merch Source Projector Entertainment II Light Bulb Replacement, Outer Casing: paso 1, imagen 2 de 2
      • Flip the projector onto its back and unscrew the nine 15mm screws using the Phillips #0 screw driver.

      Pregunta a FixBot

      Agregar Comentario

    2. Merch Source Projector Entertainment II Light Bulb Replacement: paso 2, imagen 1 de 1
      • Flip the projector right side up and unscrew the two 12mm screws on the light bulb panel located at the rear of the projector with a Phillips #0 screw head.

      • The bottom right panel screw does not come completely out the panel door.

      Pregunta a FixBot

      Agregar Comentario

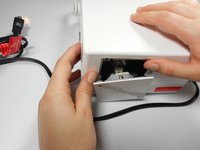
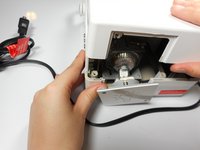
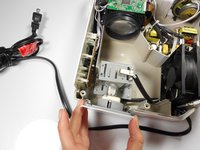
    3. Merch Source Projector Entertainment II Light Bulb Replacement: paso 3, imagen 1 de 2 Merch Source Projector Entertainment II Light Bulb Replacement: paso 3, imagen 2 de 2
      • Using your hands, gently pry the top and bottom of the projector casing apart.

      Pregunta a FixBot

      Agregar Comentario

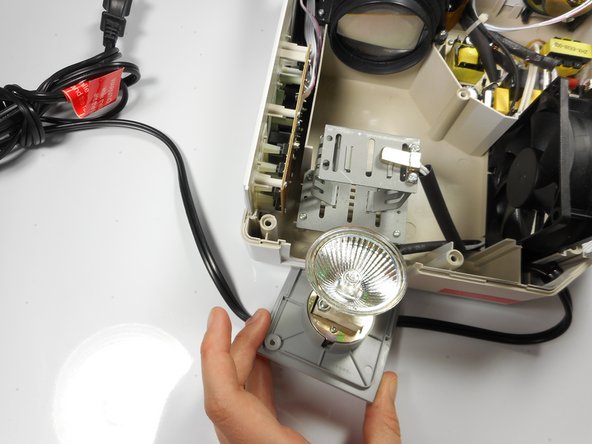
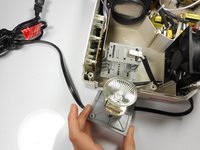
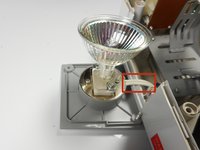
    1. Merch Source Projector Entertainment II Light Bulb Replacement, Remove light bulb assembly from housing unit: paso 4, imagen 1 de 3 Merch Source Projector Entertainment II Light Bulb Replacement, Remove light bulb assembly from housing unit: paso 4, imagen 2 de 3 Merch Source Projector Entertainment II Light Bulb Replacement, Remove light bulb assembly from housing unit: paso 4, imagen 3 de 3
      • Remove the light bulb from its housing unit.

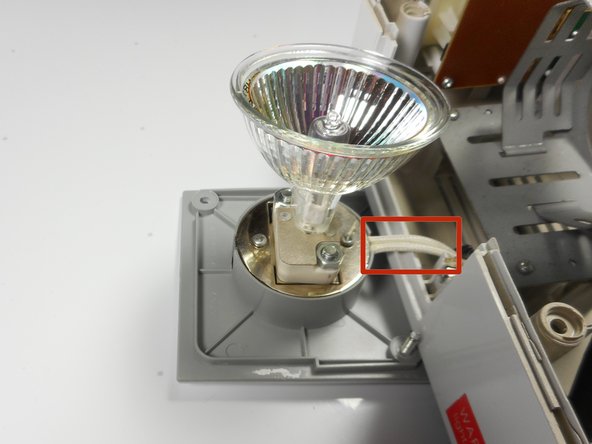
      • Do not damage the 2 white cables leading into the light bulb panel.

      Pregunta a FixBot

      Agregar Comentario

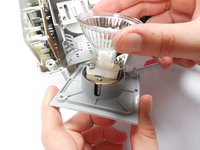
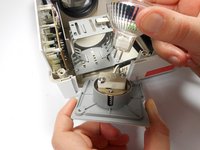
    2. Merch Source Projector Entertainment II Light Bulb Replacement, Replace light bulb: paso 5, imagen 1 de 2 Merch Source Projector Entertainment II Light Bulb Replacement, Replace light bulb: paso 5, imagen 2 de 2
      • Remove the light bulb from the door panel by gently wiggling it back and forth. Do not twist the light bulb.

      • The light blub is held into the socket with prongs, and should easily pull straight out.

      Pregunta a FixBot

      Agregar Comentario

Conclusión

To reassemble your device, follow these instructions in reverse order.

Cancelar: No complete esta guía.

Una persona más ha completado esta guía.

Stephanie

Miembro Desde 01/08/15

282 Reputación

3 Guías creadas

Equipo

Cal Poly, Team 18-3, Maness Winter 2015 Miembro de Cal Poly, Team 18-3, Maness Winter 2015

CPSU-MANESS-W15S18G3

Miembros de 3

8 Guías creadas

1Guía Comentario

Mi nuevo proyector no prende la luz ni el ventilador al conectarlo al tomacorriente y encenderlo.

JAVIER MUNOZ - Contestar Compartir

Agregar Comentario

Ver Estadísticas:

Ultimas 24 horas: 3

Ultimos 7 días: 11

Ultimos 30 días: 39

Todo El Tiempo: 2,651