Qué necesitas
-
-
-
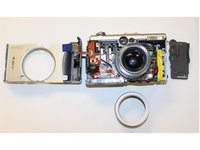
Step 2. Remove all the screws: Keep all the screws and disconnect the cables carefully.
-
Step 3. Lift: After removing all the cables, lift up and flip over the PCB.
-
-
-
-
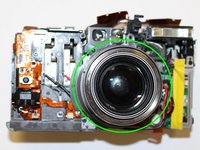
Step 4. Remove: Remove marked screws on top and around the lent.
-
**Remove all the parts, be aware that there are a lot of screws and keep count them a long the way of the dissambley **
-
-
-
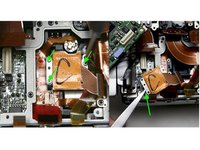
Step 5. Carefully remove as much of the glue as possible before proceeding to the next step.
-
Step 6. Remove the marked focus spacers.
-
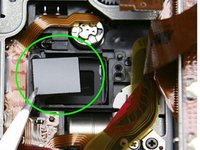
Place a bead of silicone adhesive on each side of the ir filter to fix it in position and allow to cure.
-


 Pregunta a FixBot




To reassemble your device, follow these instructions in reverse order.

Equipo

University of Memphis, Team 3-2, Kim Fall 2015 Miembro de University of Memphis, Team 3-2, Kim Fall 2015
UM-KIM-F15S3G2
Miembros de 4
6 Guías creadas
