Saltar al contenido principal

Lenovo IdeaPad 3-15IIL05 Fan Replacement

Qué necesitas

  1. Lenovo IdeaPad 3-15IIL05 Fan Replacement, Prepare your laptop for disassembly: paso 1, imagen 1 de 2 Lenovo IdeaPad 3-15IIL05 Fan Replacement, Prepare your laptop for disassembly: paso 1, imagen 2 de 2
    • Allow your laptop's battery to drain below 25% before starting this repair—a charged battery may catch fire if damaged.

    • Unplug all cables and fully shut down your laptop.

  2. Lenovo IdeaPad 3-15IIL05 Fan Replacement, Unfasten the back cover: paso 2, imagen 1 de 2 Lenovo IdeaPad 3-15IIL05 Fan Replacement, Unfasten the back cover: paso 2, imagen 2 de 2
    • Use a Phillips screwdriver to remove the ten screws securing the back cover:

    • Six 7.6 mm-long screws

    • Four 4.7 mm-long screws

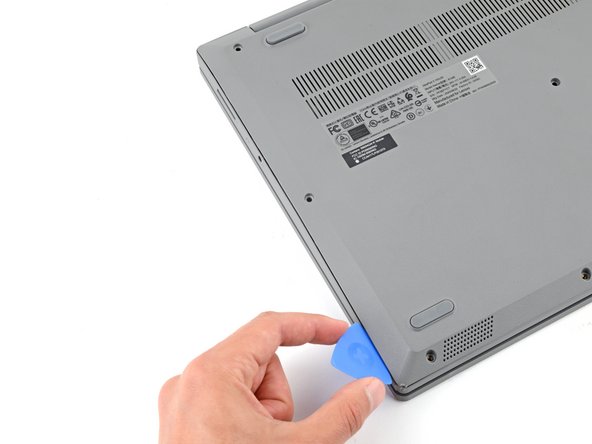
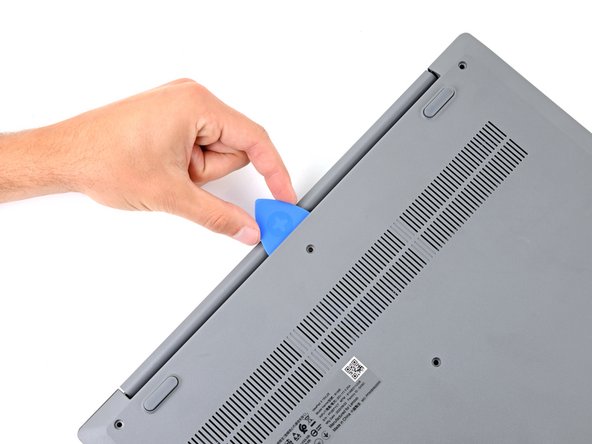
  3. Lenovo IdeaPad 3-15IIL05 Fan Replacement, Insert an opening pick: paso 3, imagen 1 de 3 Lenovo IdeaPad 3-15IIL05 Fan Replacement, Insert an opening pick: paso 3, imagen 2 de 3 Lenovo IdeaPad 3-15IIL05 Fan Replacement, Insert an opening pick: paso 3, imagen 3 de 3
    • Plastic clips secure the back cover to the frame. You'll hear and feel the clips release.

    • Insert the flat side of an opening pick between the top left corner of the back cover and frame.

    • Angle the pick down to about 45 degrees.

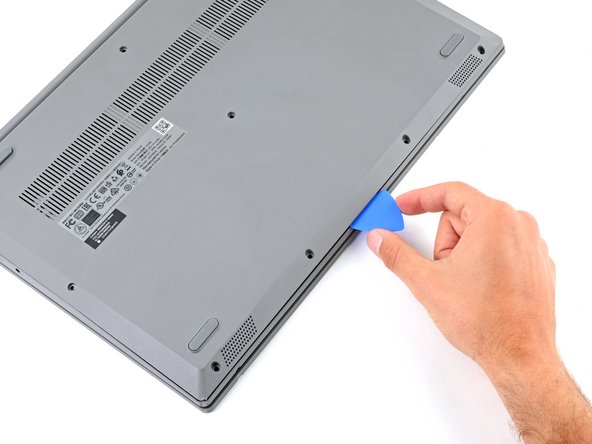
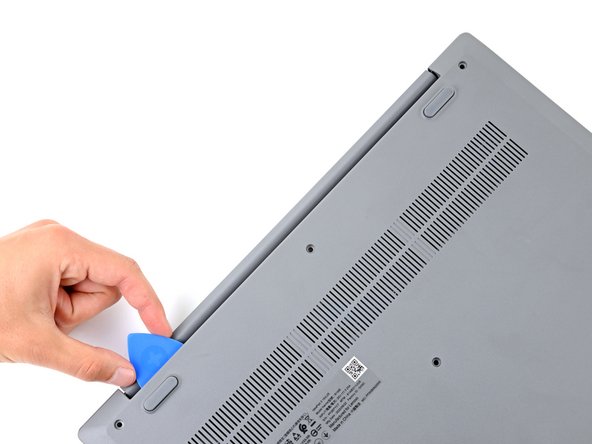
  4. Lenovo IdeaPad 3-15IIL05 Fan Replacement, Release the left clips: paso 4, imagen 1 de 3 Lenovo IdeaPad 3-15IIL05 Fan Replacement, Release the left clips: paso 4, imagen 2 de 3 Lenovo IdeaPad 3-15IIL05 Fan Replacement, Release the left clips: paso 4, imagen 3 de 3
    • Keep the opening pick angled down at about 45 degrees while sliding it along the front and side edges to help release the clips.

    • Slide the pick to the bottom left corner of the laptop to release the left clips.

  5. Lenovo IdeaPad 3-15IIL05 Fan Replacement, Release the bottom clips: paso 5, imagen 1 de 3 Lenovo IdeaPad 3-15IIL05 Fan Replacement, Release the bottom clips: paso 5, imagen 2 de 3 Lenovo IdeaPad 3-15IIL05 Fan Replacement, Release the bottom clips: paso 5, imagen 3 de 3
    • Slide the opening pick to the bottom right corner to release the bottom clips.

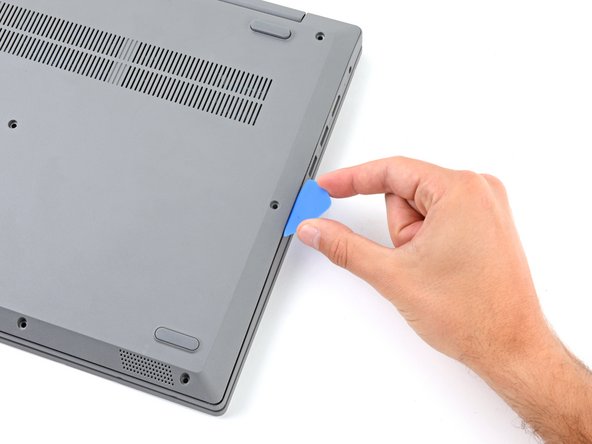
  6. Lenovo IdeaPad 3-15IIL05 Fan Replacement, Release the right clips: paso 6, imagen 1 de 3 Lenovo IdeaPad 3-15IIL05 Fan Replacement, Release the right clips: paso 6, imagen 2 de 3 Lenovo IdeaPad 3-15IIL05 Fan Replacement, Release the right clips: paso 6, imagen 3 de 3
    • Slide the opening pick to the top right corner to release the right clips.

  7. Lenovo IdeaPad 3-15IIL05 Fan Replacement, Insert an opening pick: paso 7, imagen 1 de 2 Lenovo IdeaPad 3-15IIL05 Fan Replacement, Insert an opening pick: paso 7, imagen 2 de 2
    • Insert the flat end of an opening pick between the back cover and frame, to the left of the right hinge.

    • Pry the back cover up with the pick to release the top right clips.

    • Leave the pick inserted next to the right hinge.

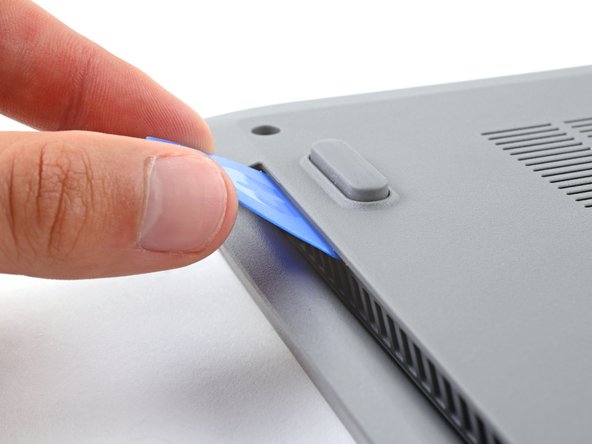
  8. Lenovo IdeaPad 3-15IIL05 Fan Replacement, Release the top clips: paso 8, imagen 1 de 3 Lenovo IdeaPad 3-15IIL05 Fan Replacement, Release the top clips: paso 8, imagen 2 de 3 Lenovo IdeaPad 3-15IIL05 Fan Replacement, Release the top clips: paso 8, imagen 3 de 3
    • Angle the pick up to about 45 degrees.

    • Slide the opening pick to the top left corner to release the remaining clips.

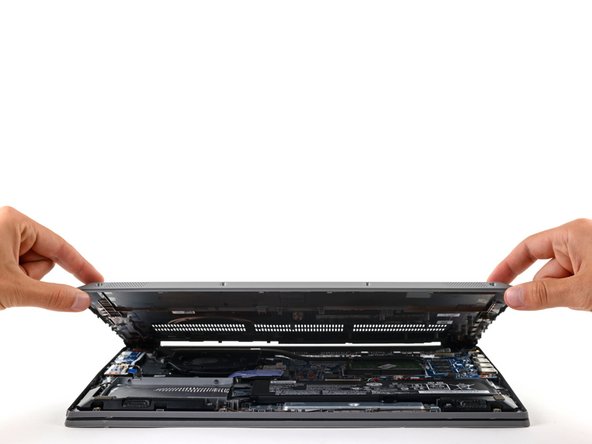
  9. Lenovo IdeaPad 3-15IIL05 Fan Replacement, Remove the back cover: paso 9, imagen 1 de 3 Lenovo IdeaPad 3-15IIL05 Fan Replacement, Remove the back cover: paso 9, imagen 2 de 3 Lenovo IdeaPad 3-15IIL05 Fan Replacement, Remove the back cover: paso 9, imagen 3 de 3
    • Remove the back cover.

    • During reassembly, lay the back cover on the frame and press firmly around the perimeter to engage all the clips.

  10. Lenovo IdeaPad 3-15IIL05 Fan Replacement, Disconnect the battery: paso 10, imagen 1 de 3 Lenovo IdeaPad 3-15IIL05 Fan Replacement, Disconnect the battery: paso 10, imagen 2 de 3 Lenovo IdeaPad 3-15IIL05 Fan Replacement, Disconnect the battery: paso 10, imagen 3 de 3
    • Use the flat end of a spudger to gently push the battery connector out of its socket on the motherboard.

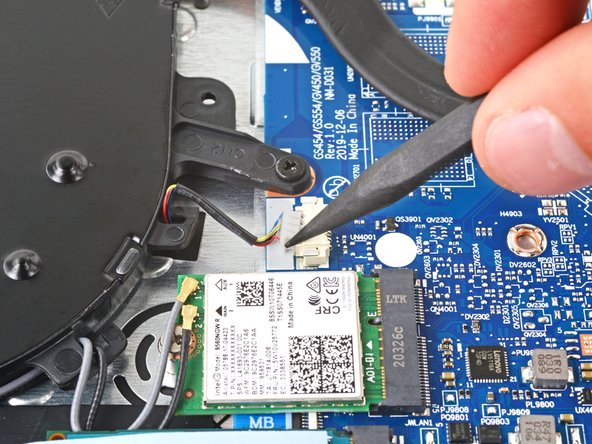
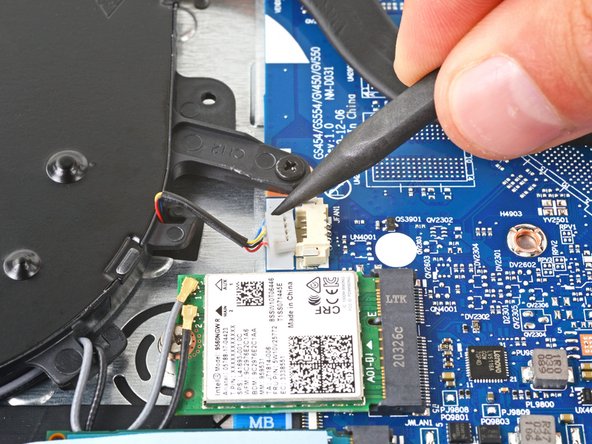
  11. Lenovo IdeaPad 3-15IIL05 Fan Replacement, Disconnect the fan: paso 11, imagen 1 de 3 Lenovo IdeaPad 3-15IIL05 Fan Replacement, Disconnect the fan: paso 11, imagen 2 de 3 Lenovo IdeaPad 3-15IIL05 Fan Replacement, Disconnect the fan: paso 11, imagen 3 de 3
    • Push on alternating sides of the fan cable connector with a spudger to "walk" it out of its socket.

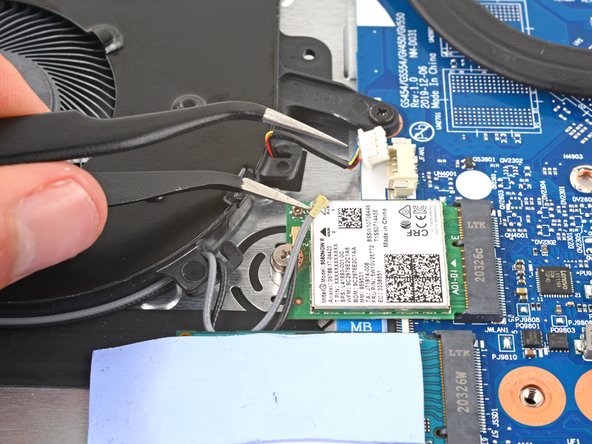
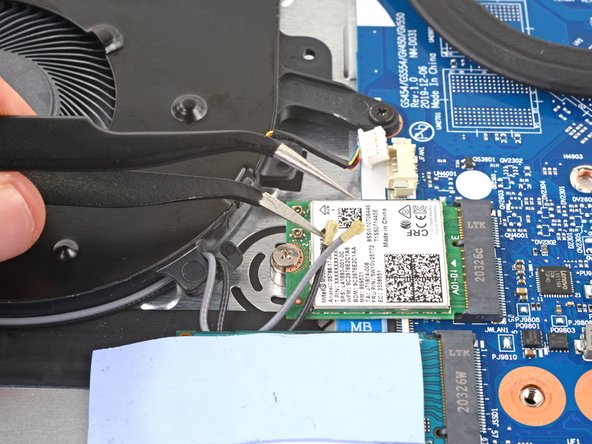
  12. Lenovo IdeaPad 3-15IIL05 Fan Replacement, Disconnect the antenna cables: paso 12, imagen 1 de 3 Lenovo IdeaPad 3-15IIL05 Fan Replacement, Disconnect the antenna cables: paso 12, imagen 2 de 3 Lenovo IdeaPad 3-15IIL05 Fan Replacement, Disconnect the antenna cables: paso 12, imagen 3 de 3
    • Slide one arm of your angled tweezers under the head of the gray antenna cable connected to the WLAN card.

    • Gently lift straight up to disconnect the cable.

    • Repeat the same process to disconnect the black antenna cable.

    • To reattach antenna connectors like these, align the connector over its socket and press down with the flat end of a spudger. The connector should snap into place. This can be tricky and may take a few tries.

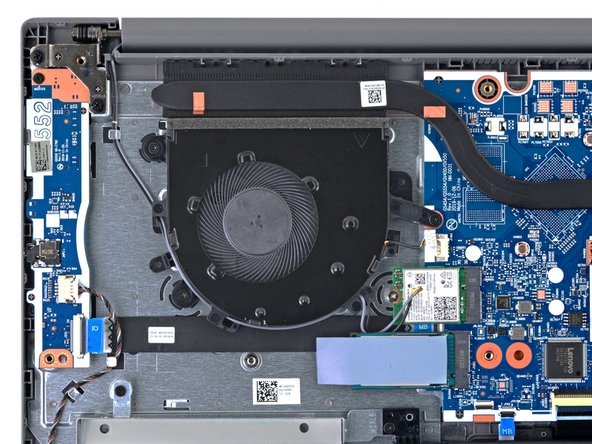
  13. Lenovo IdeaPad 3-15IIL05 Fan Replacement, Unfasten the fan: paso 13, imagen 1 de 2 Lenovo IdeaPad 3-15IIL05 Fan Replacement, Unfasten the fan: paso 13, imagen 2 de 2
    • Use a Phillips screwdriver to remove the three screws securing the fan:

    • Two 4.4 mm-long screws

    • One 5.6 mm-long screw

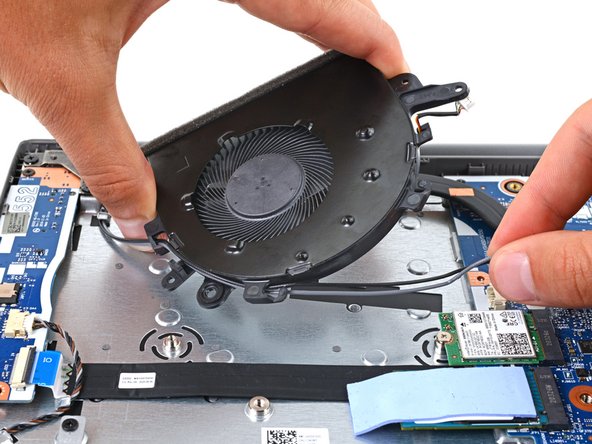
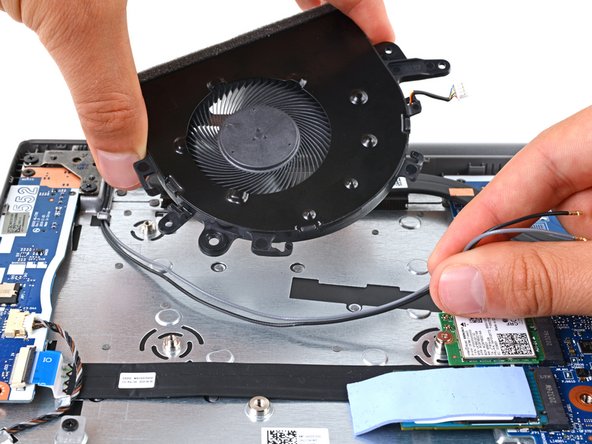
    • Before installing the screws during reassembly, make sure the black and gray antenna cables aren't under the fan.

  14. Lenovo IdeaPad 3-15IIL05 Fan Replacement, Remove the fan: paso 14, imagen 1 de 3 Lenovo IdeaPad 3-15IIL05 Fan Replacement, Remove the fan: paso 14, imagen 2 de 3 Lenovo IdeaPad 3-15IIL05 Fan Replacement, Remove the fan: paso 14, imagen 3 de 3
Conclusión

To reassemble your device, follow these instructions in reverse order.

Check your repair by running hardware tests with Lenovo Diagnostics.

Take your e-waste to an R2 or e-Stewards certified recycler.

Repair didn’t go as planned? Try some basic troubleshooting, or ask our Answers community for help.

Spencer Day

Miembro Desde 09/14/22

53,280 Reputación

389 Guías creadas

Equipo

iFixit Miembro de iFixit

Staff

135 Miembros

17,146 Guías creadas

0 comentarios

Agregar Comentario

Ver Estadísticas:

Ultimas 24 horas: 2

Ultimos 7 días: 15

Ultimos 30 días: 77

Todo El Tiempo: 866