Saltar al contenido principal
Únete a la Comunidad de Reparación - Crear Cuenta

InFocus LP540 Projector Main Fans Replacement

Qué necesitas

    1. InFocus LP540 Projector Main Fans Replacement, Main Board: paso 1, imagen 1 de 3 InFocus LP540 Projector Main Fans Replacement, Main Board: paso 1, imagen 2 de 3 InFocus LP540 Projector Main Fans Replacement, Main Board: paso 1, imagen 3 de 3
      • Flip the projector right-side up and turn it so that the back ports are facing you.

      • Remove the 7 mm metallic screws using the flat-head screwdriver.

      • Using the T10 Torx screwdriver, remove the two black 10 mm screws located at the center of the back panel.

      Pregunta a FixBot

      Agregar Comentario

    2. InFocus LP540 Projector Main Fans Replacement: paso 2, imagen 1 de 2 InFocus LP540 Projector Main Fans Replacement: paso 2, imagen 2 de 2
      • Flip the projector over.

      • Use the T10 Torx screwdriver head to remove the two 77mm screws located nearest to the back panel ports.

      • Remove the two 10mm screws located near the lens side with the T10 Torx screwdriver head.

      • Flip the projector back over.

      • Lift up the main lid cautiously to avoid ripping the electrical ribbons.

      Pregunta a FixBot

      Agregar Comentario

    3. InFocus LP540 Projector Main Fans Replacement: paso 3, imagen 1 de 3 InFocus LP540 Projector Main Fans Replacement: paso 3, imagen 2 de 3 InFocus LP540 Projector Main Fans Replacement: paso 3, imagen 3 de 3
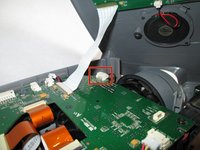
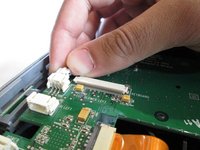
      • Unplug the speaker wire from the circuit board by simultaneously squeezing the sides and pulling.

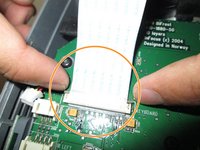
      • Pull on the brown tabs located at the sides of the white plastic ribbon holder and pull the ribbon out.

      • Remove the top cover.

      Pregunta a FixBot

      Agregar Comentario

    4. InFocus LP540 Projector Main Fans Replacement: paso 4, imagen 1 de 2 InFocus LP540 Projector Main Fans Replacement: paso 4, imagen 2 de 2
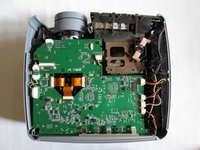
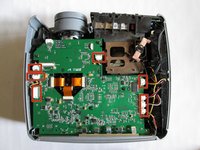
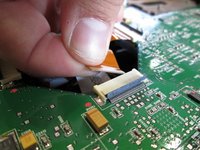
      • Hold down the release tabs to remove the cables from the white tabs.

      Pregunta a FixBot

      Agregar Comentario

    5. InFocus LP540 Projector Main Fans Replacement: paso 5, imagen 1 de 3 InFocus LP540 Projector Main Fans Replacement: paso 5, imagen 2 de 3 InFocus LP540 Projector Main Fans Replacement: paso 5, imagen 3 de 3
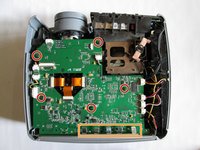
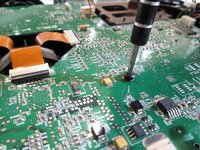
      • Use the T10 Torx screwdriver to remove the five 5mm screws located throughout the motherboard.

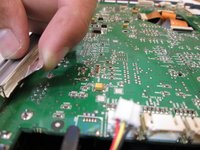
      • Pull up the five metal tabs located at the rear of the projector.

      • Do not pull up on the metal tabs too hard or too fast because they can break easily.

      Pregunta a FixBot

      Agregar Comentario

    6. InFocus LP540 Projector Main Fans Replacement: paso 6, imagen 1 de 3 InFocus LP540 Projector Main Fans Replacement: paso 6, imagen 2 de 3 InFocus LP540 Projector Main Fans Replacement: paso 6, imagen 3 de 3
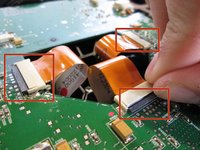
      • Remove the three gold ribbons by flipping up the black taps that hold the ribbon in place.

      • Pull the ribbons out carefully and place them under the main board.

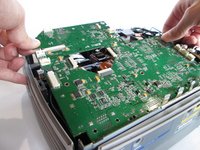
      • Carefully lift the entire main board up.

      Pregunta a FixBot

      Agregar Comentario

    1. InFocus LP540 Projector Main Fans Replacement, Main Fans: paso 7, imagen 1 de 2 InFocus LP540 Projector Main Fans Replacement, Main Fans: paso 7, imagen 2 de 2
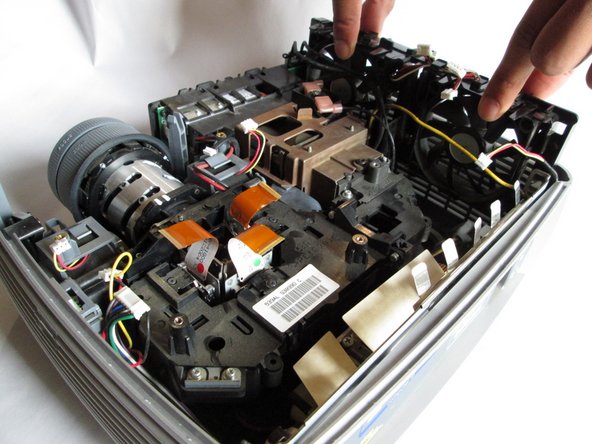
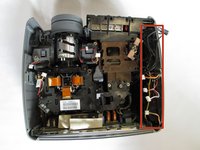
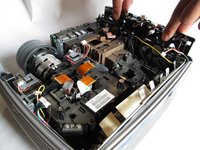
      • Once the main board has been removed, carefully lift the fans upward. Make sure no cables are tangled in the process.

      Pregunta a FixBot

      Agregar Comentario

Conclusión

To reassemble your device, follow these instructions in reverse order.

Cancelar: No complete esta guía.

Una persona más ha completado esta guía.

Equipo

Cal Poly, Team 13-17, Regan Winter 2014 Miembro de Cal Poly, Team 13-17, Regan Winter 2014

CPSU-REGAN-W14S13G17

Miembros de 6

15 Guías creadas

0Guía Comentarios

Agregar Comentario

Ver Estadísticas:

Ultimas 24 horas: 1

Ultimos 7 días: 4

Ultimos 30 días: 21

Todo El Tiempo: 1,770