Esta versión puede contener ediciones incorrectas. Cambie a la última instantánea verificada.
Qué necesitas
-
Este paso está sin traducir. Ayuda a traducirlo
-
Remove the two 13 mm screws located on the back of the printer using a screwdriver with the T10 torx bit (star-shaped).
-
-
Este paso está sin traducir. Ayuda a traducirlo
-
In the front of the printer, open the tray where the paper comes out and remove the two 13 mm screws located under the top of the printer.
-
-
-
Este paso está sin traducir. Ayuda a traducirlo
-
With the front of the printer facing you, lift and raise the left side of the panel (like opening a book in reverse) until it disconnects from the clip on the right side of the panel.
-
-
Este paso está sin traducir. Ayuda a traducirlo
-
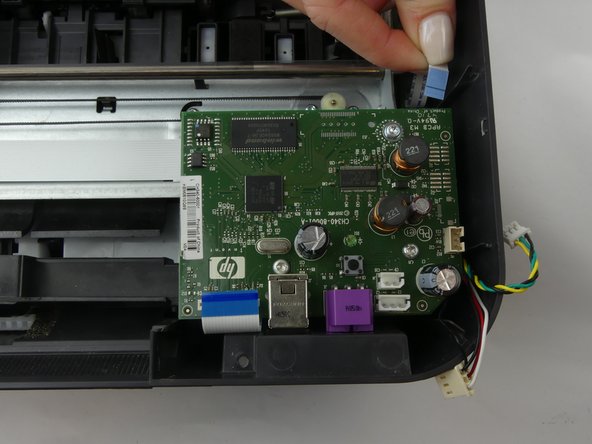
Locate and remove the two flat ribbon connectors which connect the circuit board to the other printer components.
-
-
Este paso está sin traducir. Ayuda a traducirlo
-
Locate and remove the three multicolored wire connectors which connect the circuit board to the other printer components.
-
-
Este paso está sin traducir. Ayuda a traducirlo
-
Remove the top two 13mm screws using a screwdriver with the T10 torx bit.
-
Remove the bottom 9mm screw using a screwdriver with the T10 torx bit, and remove the plug port circuit board.
-


Cancelar: No complete esta guía.
Una persona más ha completado esta guía.
Equipo

USF Tampa, Team S5-G3, Passmore Spring 2018 Miembro de USF Tampa, Team S5-G3, Passmore Spring 2018
USFT-PASSMORE-S18S5G3
4 Miembros
12 Guías creadas