Esta versión puede contener ediciones incorrectas. Cambie a la última instantánea verificada.
Qué necesitas
-
-
Calienta un iOpener y aplícalo en el borde superior de la pantalla durante dos minutos.
-
Toma nota de las siguientes regiones antes de comenzar a hacer palanca:
-
Adhesivo delgado revestido contra el panel de la pantalla
-
Adhesivo grueso
-
El panel de visualización OLED, que es muy propenso a sufrir daños
-
El cable de la pantalla, que puede dañarse al hacer palanca
-
-
-
Calienta un iOpener y aplícalo en el borde derecho del teléfono durante dos minutos.
-
Inserta una púa de apertura cerca del borde superior del teléfono, donde ya cortaste el adhesivo.
-
Guía lentamente la púa alrededor de la esquina derecha.
-
Desliza con cuidado la púa por el borde derecho del teléfono para cortar el adhesivo.
-
Repite el paso para el borde izquierdo del teléfono.
-
-
-
-
Retira los siguientes tornillos que aseguran el marco medio a la parte posterior:
-
Siete tornillos negros T5 de 4 mm
-
Dos tornillos T5 plateados de 3 mm
-
-
-
Inserta una púa de apertura separada en el borde derecho del teléfono, cerca de la parte inferior.
-
Empuja lentamente la púa hacia arriba a lo largo de la costura hasta que se suelte el primer clip.
-
Una vez que hayas soltado el clip, deja la púa de apertura en su lugar para evitar que el marco medio se vuelva a sellar.
-
-
Este paso está sin traducir. Ayuda a traducirlo
-
Use the point of a spudger to pry up and disconnect the battery connector.
-
Bend the battery flex cable slightly so that it will not accidentally touch the motherboard.
-
-
Este paso está sin traducir. Ayuda a traducirlo
-
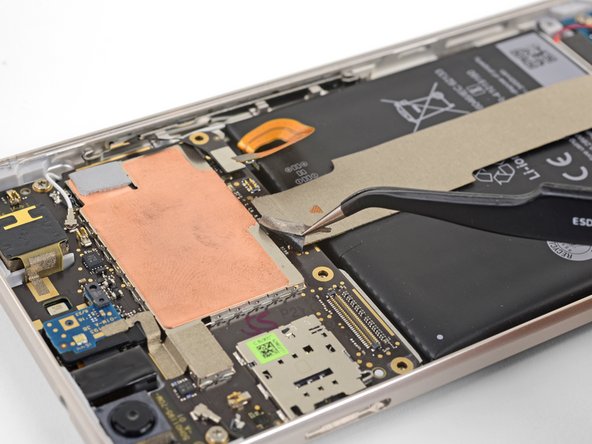
Use tweezers to peel up the tape at the top of the interconnect cable.
-
-
Este paso está sin traducir. Ayuda a traducirlo
-
Use the point of a spudger to pry up and disconnect the interconnect cable from the motherboard.
-
-
Este paso está sin traducir. Ayuda a traducirlo
-
Use the point of a spudger to pry up and disconnect the interconnect cable from the bottom daughterboard.
-
Continue peeling the interconnect cable from the bottom daughterboard.
-
Remove the interconnect cable.
-
-
Este paso está sin traducir. Ayuda a traducirlo
-
Use the edge of an opening tool to carefully push the vibration motor connector out of its socket.
-
-
Este paso está sin traducir. Ayuda a traducirlo
-
Remove the two 3 mm T5 screws securing the daughterboard to the frame.
-
-
Este paso está sin traducir. Ayuda a traducirlo
-
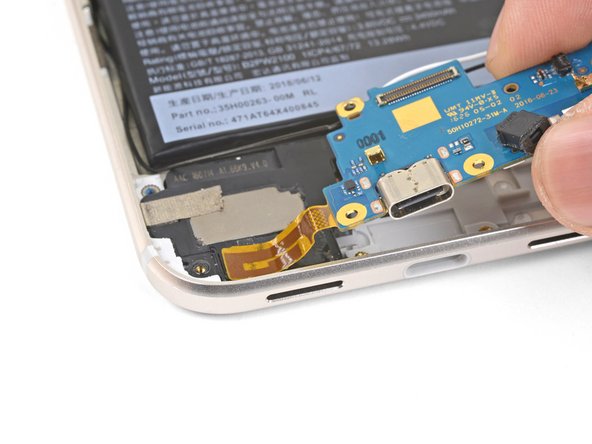
Use the flat end of a spudger to pry up and loosen the right edge of the daughterboard.
-
Swing the daughterboard to the left to move it out of its recess.
-
-
Este paso está sin traducir. Ayuda a traducirlo
-
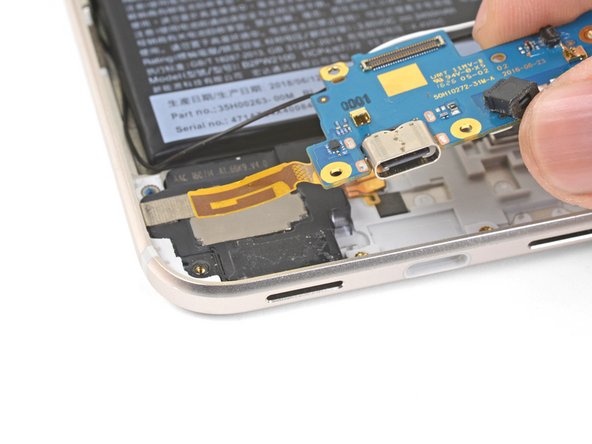
Slowly lift the left edge of the daughterboard up, pulling the antenna patch off of the loudspeaker.
-
You can insert an opening pick under the antenna patch to help separate it from the loudspeaker.
-
-
Este paso está sin traducir. Ayuda a traducirlo
-
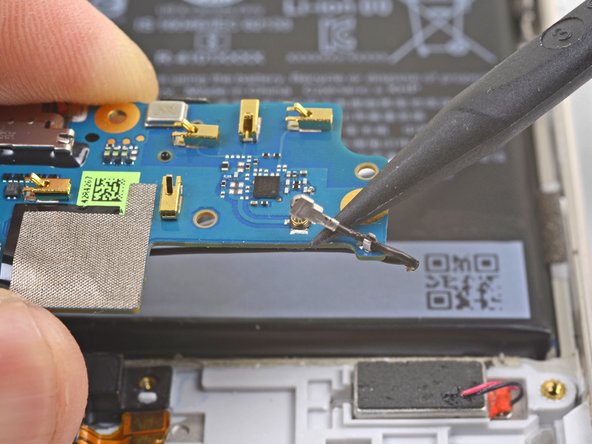
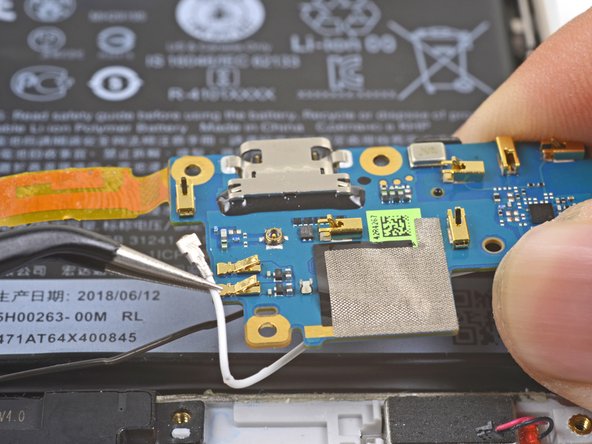
Flip the daughterboard over.
-
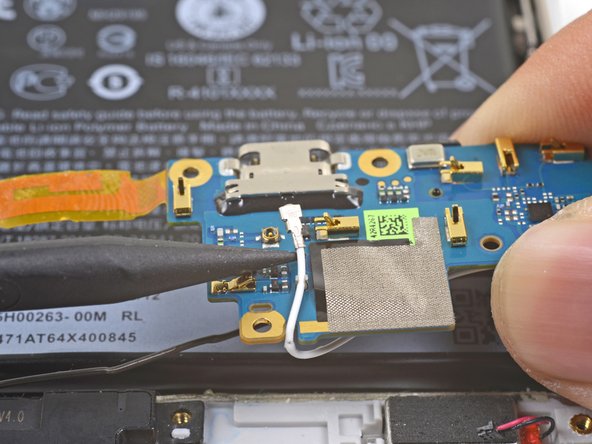
Use the point of a spudger to pry up and disconnect the black antenna cable from its socket.
-
Release the antenna cable from its retaining clip.
-
-
Este paso está sin traducir. Ayuda a traducirlo
-
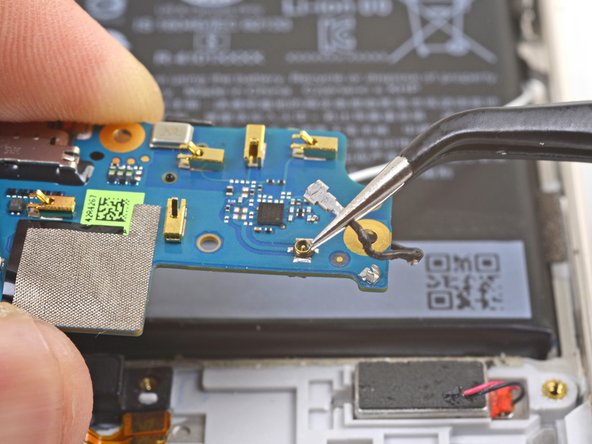
Use the point of a spudger to pry up and disconnect the white antenna cable from its socket.
-
Release the antenna cable from its retaining clip.
-
-
Este paso está sin traducir. Ayuda a traducirlo
-
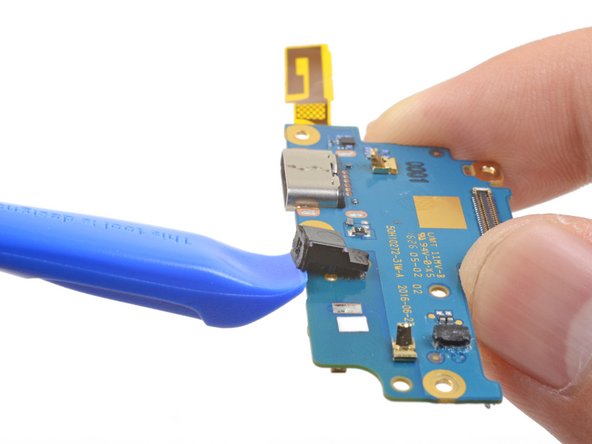
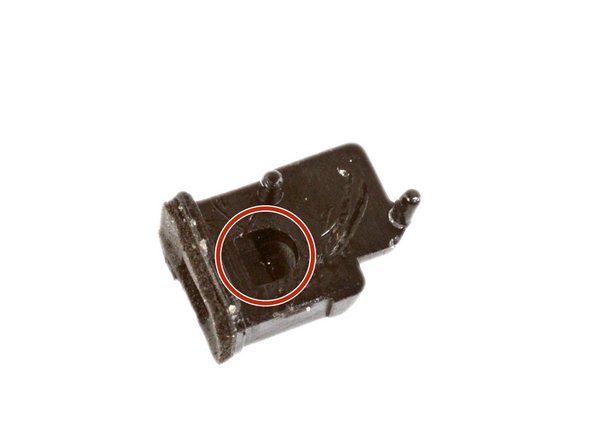
Use the edge of an opening tool to gently push up and loosen the barometric vent from the board.
-
You may need to use some adhesive or double-sided tape in order to attach the vent to the new part. If you do, be sure not to cover the bottom vent hole.
-


Cancelar: No complete esta guía.
17 personas más completaron esta guía.


6 comentarios
There’s no reason to mess with the battery for this repair! Also, the screen breaks more easily than you think, so be super careful. I thought i was being careful and broke the screen.
This guide has been updated!
When reattaching the screen, plug the screen in first, then the battery disconnect. if not, the screen won’t turn on.