Introducción
This repair guide was authored by the iFixit staff and hasn’t been endorsed by Google. Learn more about our repair guides here.
Use this guide to replace the primary loudspeaker in your Pixel 2 XL.
Qué necesitas
-
-
Insert a SIM card eject tool or a paperclip into the small hole in the SIM card tray, located on the left edge of the phone, opposite of the power and volume buttons.
-
Press firmly to eject the tray.
-
-
Paso 3 Opening Procedure
Aviso: los pasos 3-14 provienen de una guía que está marcada como "En progreso".
-
Apply a suction cup as close to the SIM slot edge of the phone as you can while avoiding the curved edge.
-
-
-
Do not insert the pick more than 0.25 inches (6 mm) into the bottom edge of the phone. If the pick contacts the folded portion of the OLED panel, it can damage the display.
-
Do not cut along the left edge; there are delicate display cables that can be damaged.
-
Only make very shallow cuts in the upper left corner; prying deeply can damage the front-facing camera.
-
-
-
-
Remove eleven 3.8 mm Phillips screws securing the midframe.
-
-
-
Insert an opening tool into the notch in the midframe near the volume buttons and pry the midframe up and away from the rest of the phone.
-
Remove the midframe.
How do I reattach the midframe? it seems like there are a lot of tabs that need to be reinserted carefully
Slide in the bottom part at an angle in first since it has some tabs. Otherwise it will get stuck halfway on top
-
-
-
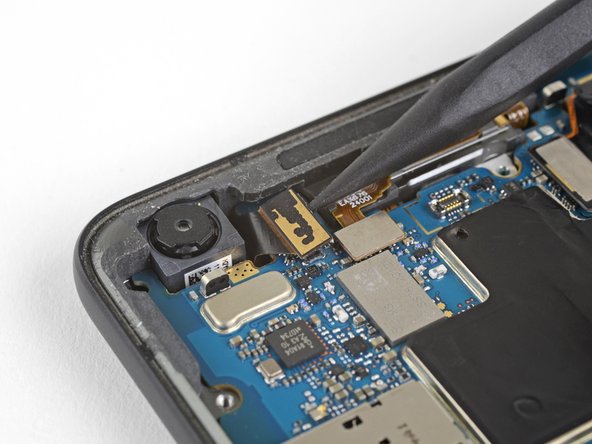
Use the point of a spudger to disconnect the front-facing camera connector.
-
-
-
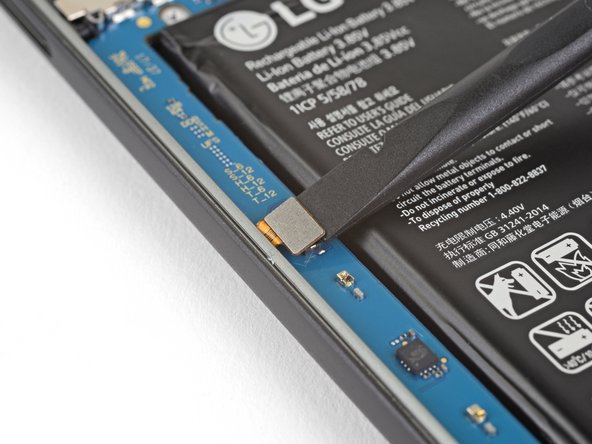
Use the flat end of a spudger to disconnect the right Active Edge sensor connector.
-
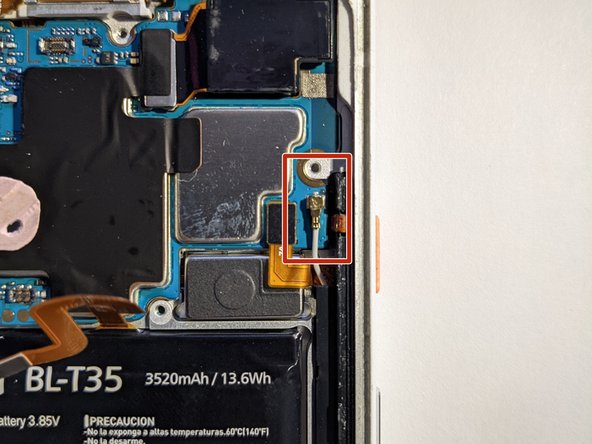
Disconnect the antenna cable.
Also disconnect the antenna cable just to the right of the right Active Edge sensor connector
-
-
-
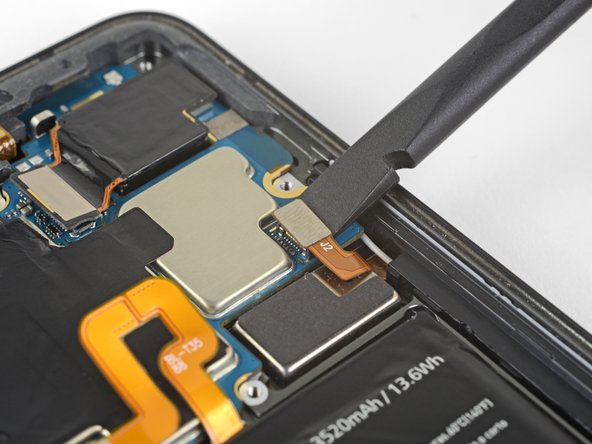
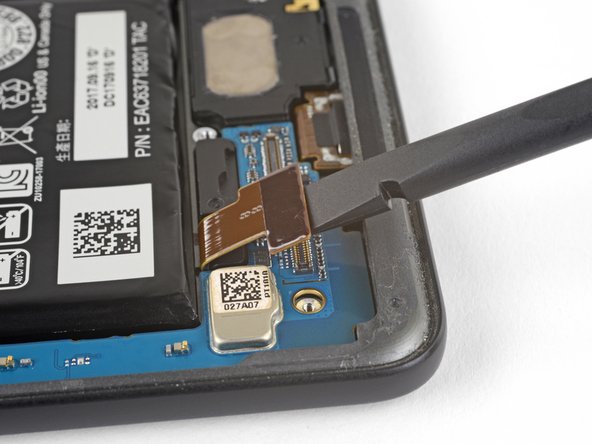
Make sure all the cables and connectors are clear of the board, and use the flat edge of a spudger to gently lift the bottom of the motherboard.
-
Holding the wide part of the motherboard near the SIM card slot, carefully slide the board toward the bottom of the phone while lifting it out of the phone.
-
Remove the motherboard.
-
Try to keep the phone flat with the battery facing up after you remove the motherboard, as the front-facing camera can fall out of the phone case very easily.
Agreed. No mention of the antenna cable.
-
-
-
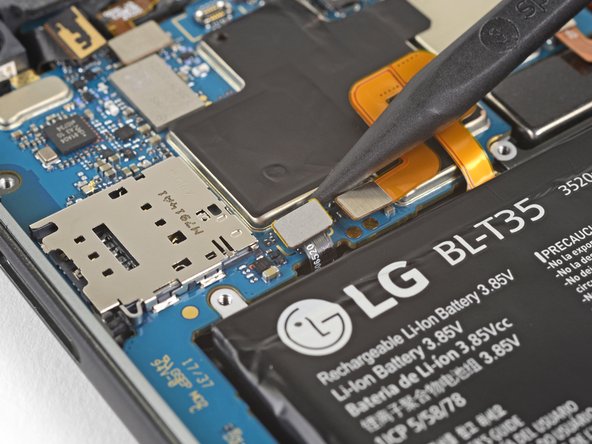
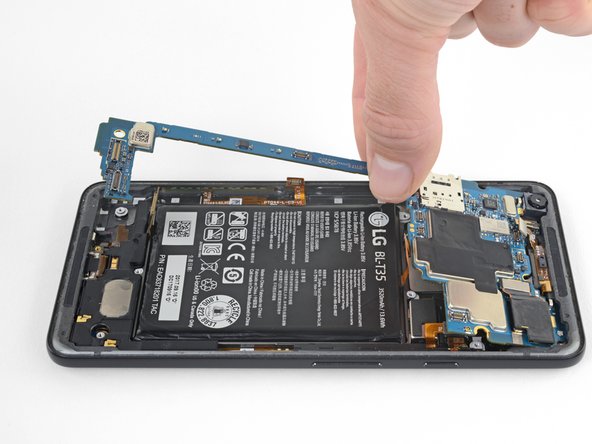
Slide the point of a spudger under the lower left side of the loudspeaker and slowly pry the speaker assembly up from the phone.
This step was very difficult, I believe I just snapped the loudspeaker to the left of silver oval piece
I was just able to remove the loud speaker using the directions provided. The piece sprung out of the phone. The bottom of the piece is flat with pieces of metal and it appears to be slightly bent from my prying. We will see if it still works.
I ended up using my metal silver spudger. It goes in farther without prying on the fragile plastic. I’m replacing the charging circuit anyway, so not too worried about minor damage
This is a difficult step. Pictures indicating other safe pry points would be helpful.
Most stubborn component to remove.
I was able to remove this without great stress on the part by inserting my right thumbnail (thumbprint facing the battery / top of the phone) in between the loudspeaker and the phone body above the silver oval, while at the same time using my left index fingernail to gently lift the long left side protrusion of the loudspeaker. Note that the plastic opening picks were too thick for this. Took twenty minutes or more to figure this out, but about two minutes or less to do it. The fundamental problem seems to be that this part is friction-fit into place, and you won’t get it out all in one motion without risk of breaking it, you have to work at it alternately from every angle. I also added a few drops of everclear (95% ethanol, isopropyl was hard to come by because of COVID), which may or may not have mattered (I have no control for this experiment). I believe there was no damage to the part.
-


Compare your new replacement part to the original part—you may need to transfer remaining components or remove adhesive backings from the new part before installing.
To reassemble your device, follow the above steps in reverse order.
Take your e-waste to an R2 or e-Stewards certified recycler.
Repair didn’t go as planned? Check out our Answers community for troubleshooting help.
Cancelar: No complete esta guía.
7 personas más completaron esta guía.

2 comentarios
Does this method work with the earpiece one as well?
We don’t have official instructions out for the earpiece speaker, but it’s only accessible underneath the glass panel and antenna assembly on the back of the phone so removing it is a bit different. After removing the motherboard you would have to lift this flex cable from the back of the phone, just enough to separate it from the adhesive holding it down. Then you can carefully pry up the glass panel, and remove antenna assembly and the earpiece speaker underneath. You’ll probably need an iOpener, suction cup, and opening picks to remove the panel and everything underneath—they’re all glued down pretty solidly.