Saltar al contenido principal

Dell Optiplex 760

  1. Dell Optiplex 760, Dell Optiplex 760: paso 1, imagen 1 de 3 Dell Optiplex 760, Dell Optiplex 760: paso 1, imagen 2 de 3 Dell Optiplex 760, Dell Optiplex 760: paso 1, imagen 3 de 3
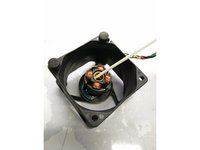
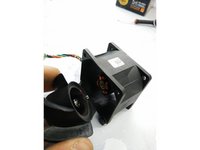
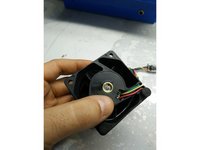
    • Remove the rear sticker from the fan.

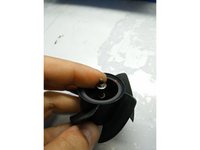
    • Remove the black clip that holds the shaft and washer.

  2. Dell Optiplex 760, Bearings: paso 2, imagen 1 de 3 Dell Optiplex 760, Bearings: paso 2, imagen 2 de 3 Dell Optiplex 760, Bearings: paso 2, imagen 3 de 3
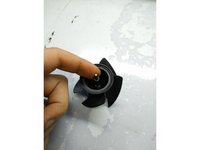
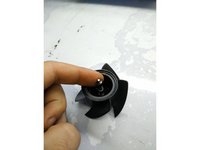
    • Remove bearings and blades

    • Beware of the remaining pieces as they have order and are very small.

  3. Dell Optiplex 760, Lubricate: paso 3, imagen 1 de 2 Dell Optiplex 760, Lubricate: paso 3, imagen 2 de 2
    • Insert the CRC electrode 2-26 electrode and spray carefully.

    • Place the bearings and repeat the process

  4. Dell Optiplex 760, Assembling blades: paso 4, imagen 1 de 3 Dell Optiplex 760, Assembling blades: paso 4, imagen 2 de 3 Dell Optiplex 760, Assembling blades: paso 4, imagen 3 de 3
    • First we set up the dock.

    • Washer

    • And bearing.

  5. Dell Optiplex 760, Mount: paso 5, imagen 1 de 2 Dell Optiplex 760, Mount: paso 5, imagen 2 de 2
    • We attach the blades

    • We close the clips. Ready.

Conclusión

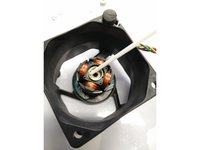
Seguir las instrucciones y nunca mojar las bobinas de cobre.

5 personas más completaron esta guía.

Un agradecimiento especial a estos traductores:

en es

100%

¡ Jesus Salgado nos está ayudando a reparar el mundo! ¿Quieres contribuir?
Empezar a traducir ›

Jesus Salgado

Miembro Desde 12/11/14

421 Reputación

3 Guías creadas

0 comentarios

Agregar Comentario

Ver Estadísticas:

Ultimas 24 horas: 2

Ultimos 7 días: 6

Ultimos 30 días: 11

Todo El Tiempo: 1,152