Esta versión puede contener ediciones incorrectas. Cambiar a la última instantánea verificada.
Qué necesitas
-
Este paso está sin traducir. Ayuda a traducirlo
-
Remove the ten 7.5mm Phillips #00 screws from the bottom of the laptop.
-
Use an opening tool to remove the bottom half of the case from the laptop.
-
-
Este paso está sin traducir. Ayuda a traducirlo
-
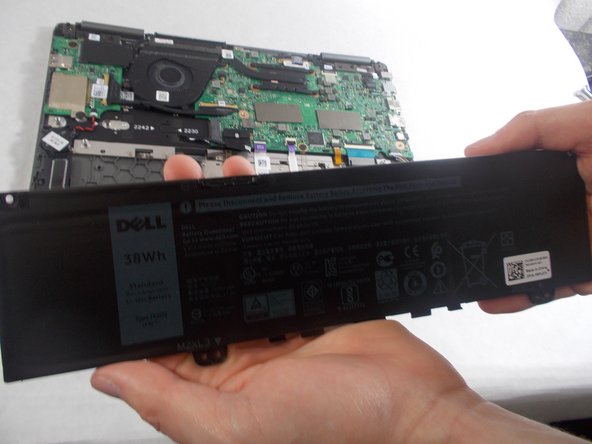
Use a Phillips screwdriver to remove the four screws holding the battery in place.
-
-
Este paso está sin traducir. Ayuda a traducirlo
-
Pull the plastic tab on the battery cable to disconnect the cable from the battery.
-
-
-
Este paso está sin traducir. Ayuda a traducirlo
-
Remove the two screws holding the cover for the fan.
-
-
Este paso está sin traducir. Ayuda a traducirlo
-
Unplug the connector holding the fan’s wires.
-
Remove the fan from the laptop.
-
-
Este paso está sin traducir. Ayuda a traducirlo
-
Use the Phillips #00 screwdriver to remove the single screw holding in the network card.
-
Remove the network card from the laptop.
-
-
Este paso está sin traducir. Ayuda a traducirlo
-
Use the Phillips #00 screwdriver to remove the two 1mm screws holding in the daughterboard.
-
Remove the metal piece holding in the daughterboard.
-
Disconnect the two cable connectors from the daughterboard.
-
If the cables are stuck, gently wiggle them until they disconnect.
-
-
Este paso está sin traducir. Ayuda a traducirlo
-
Remove the seven 2mm screws securing the motherboard.
-
-
Este paso está sin traducir. Ayuda a traducirlo
-
Release the IO Board Cable.
-
Release the Touchpad cable.
-
Release the keyboard back-light cable.
-
Release the keyboard cable.
-
Release the eDP cable.
-
Release the dc-in cable.
-
Release the cable for the LED charging indicator by gently pulling up on the connector.
-


Cancelar: No complete esta guía.
Una persona más ha completado esta guía.
Equipo

UMass Dartmouth, Team S1-G4, O'Connell Fall 2019 Miembro de UMass Dartmouth, Team S1-G4, O'Connell Fall 2019
UMASSD-O'CONNELL-F19S1G4
3 Miembros
5 Guías creadas