Esta versión puede contener ediciones incorrectas. Cambie a la última instantánea verificada.
Qué necesitas
-
Este paso está sin traducir. Ayuda a traducirlo
-
Remove the strap from the camera by pulling the thin cord out, creating a small loop, then pushing the thicker cord back through this loop.
-
-
Este paso está sin traducir. Ayuda a traducirlo
-
Remove the two Phillips screws (2.83 mm) from the left side panel of the camera casing.
-
The left panel can now be removed. However, one piece of tape attaches it to the camera, so a spudger may be required to ease the panels off.
-
Repeat for the right side panel of the camera.
-
-
Este paso está sin traducir. Ayuda a traducirlo
-
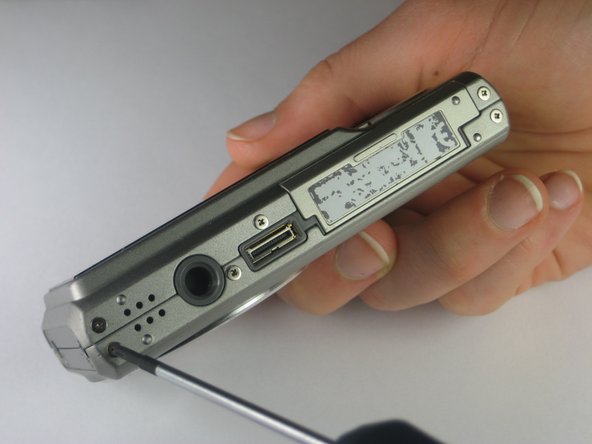
Remove the six Phillips screws (3.69 mm) from the bottom of the camera casing.
-
-
Este paso está sin traducir. Ayuda a traducirlo
-
Remove the two Phillips screws (2.79 mm) on the left side of the camera where the metal panel used to be.
-
Repeat for the two Phillips screws (2.79 mm) right side of the camera.
-
-
Este paso está sin traducir. Ayuda a traducirlo
-
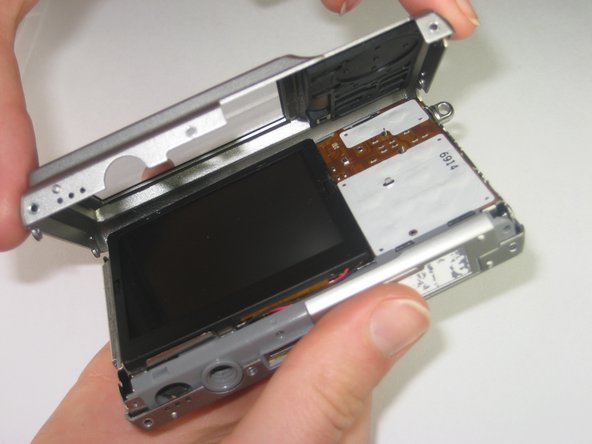
With the LCD screen facing up towards you, start at the bottom of the camera and gently pull off the back of the casing.
-
-
-
Este paso está sin traducir. Ayuda a traducirlo
-
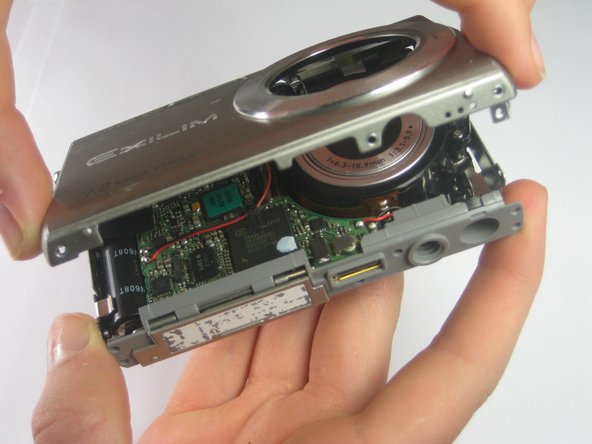
With the front side (with the lens) facing up towards you, start at the bottom of the camera and gently pull off the front of the casing.
-
-
Este paso está sin traducir. Ayuda a traducirlo
-
Slide the labeled piece toward the LCD screen and release.
-
The tab will spring open.
-
-
Este paso está sin traducir. Ayuda a traducirlo
-
Look at the bottom of the camera. Take out the Phillips screw (1.77 mm) holding on the bottom plastic piece.
-
The bottom plastic piece is held on to the main frame of the camera only by two thin wires.
-
-
Este paso está sin traducir. Ayuda a traducirlo
-
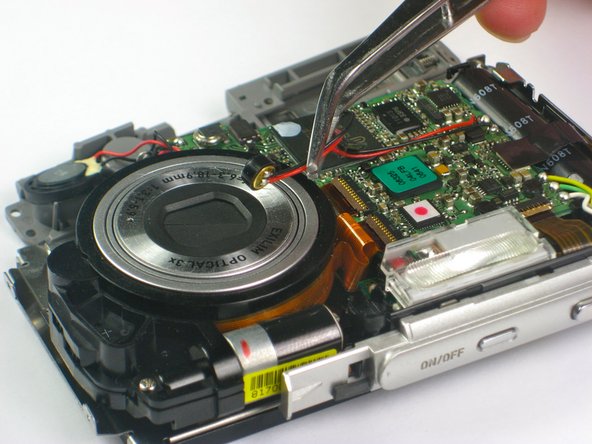
Using a pair of tweezers, gently move the red and black wires away from the lens.
-
-
Este paso está sin traducir. Ayuda a traducirlo
-
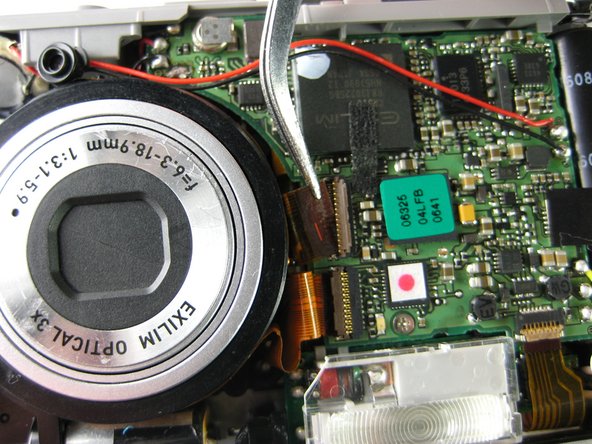
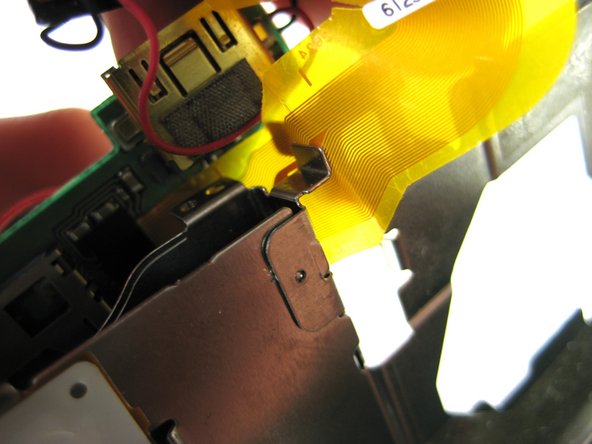
Using tweezers or your finger nails, pull up the brown flaps where the three orange film strips meet the circuit board.
-
Use the tweezers to pull all three orange film strips out of each port. The strips should come out easily.
-
-
Este paso está sin traducir. Ayuda a traducirlo
-
Flip the camera over to the side with the LCD screen.
-
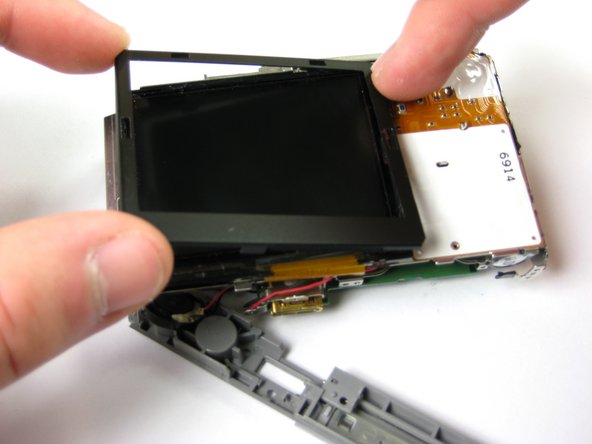
Gently remove the plastic cover that borders the LCD screen starting with the top left corner, then the bottom left corner, and finally the bottom and top right corners.
-
-
Este paso está sin traducir. Ayuda a traducirlo
-
Turn the camera back to the front side, with the lens facing up and the LCD facing down.
-
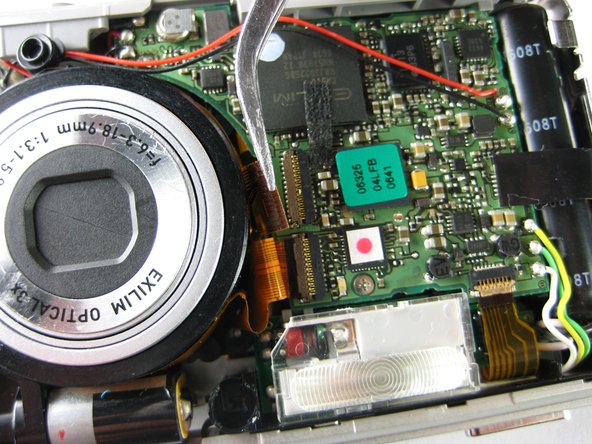
Remove the Phillips screw (3.30 mm) located below the flash on the circuit board.
-
-
Este paso está sin traducir. Ayuda a traducirlo
-
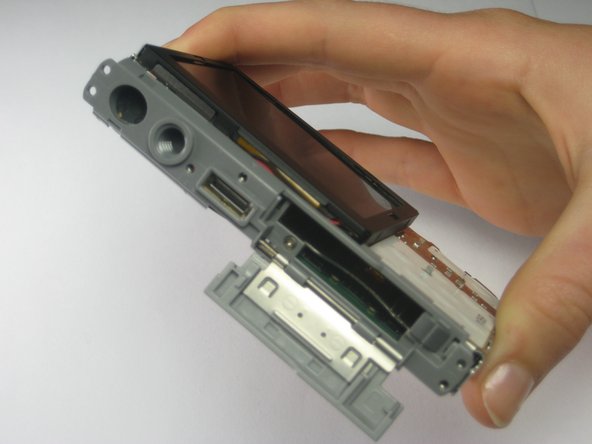
Slide the gold strip that connects the LCD screen to the circuit board through the small gap at the bottom of the camera.
-
-
Este paso está sin traducir. Ayuda a traducirlo
-
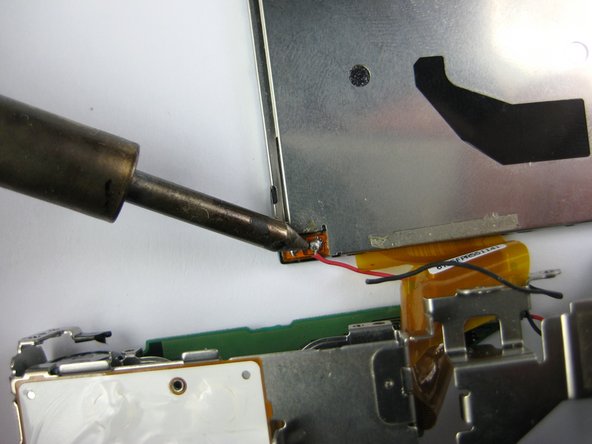
Using a soldering station and solder wick or other solder removing instrument, remove the solder holding the two wires of the LCD screen to the circuit board.
-
You have now completely removed your LCD screen. It can now be replaced or cleaned.
-


Cancelar: No complete esta guía.
Una persona más ha completado esta guía.
Equipo

Cal Poly, Team 17-28, Amido Spring 2012 Miembro de Cal Poly, Team 17-28, Amido Spring 2012
CPSU-AMIDO-S12S17G28
4 Miembros
14 Guías creadas