Saltar al contenido principal
Canon EOS Rebel XTi Flash Module Replacement

Canon EOS Rebel XTi Flash Module Replacement

Luis Calle

Luis Calle y 6 otros contribuidores

Última actualización: January 3, 2025

20 - 30 minutos
Moderado
Necesita más imágenes

Introducción

Ir al paso 1

After long term use, it is possible that the flash module on your camera is stuck in position and can only be opened manually, or the light has burnt out. In either case it is safe to say that the module needs to be replaced. Use caution when removing the module because there are several wire harnesses connecting the module to the motherboard.

Qué necesitas

Herramientas

Ver más…

  1. Canon EOS Rebel XTi Flash Module Replacement, Battery: paso 1, imagen 1 de 1
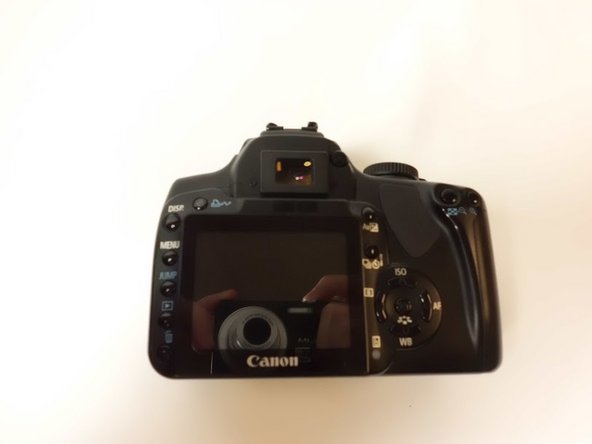
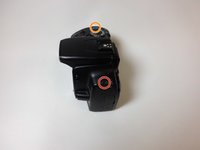
    • Place the camera upside down, and position it to where the back of the camera is visible.

  2. Canon EOS Rebel XTi Flash Module Replacement: paso 2, imagen 1 de 1
    • Pull the orange tab to the right to release the primary battery.

  3. Canon EOS Rebel XTi Flash Module Replacement: paso 3, imagen 1 de 1
    • To remove the secondary battery, reposition the camera to where the display screen is facing upwards.

    • Place your finger inside the empty battery compartment and pull away from the camera on the ridged battery tab.

  4. Canon EOS Rebel XTi Flash Module Replacement, Memory Card: paso 4, imagen 1 de 1
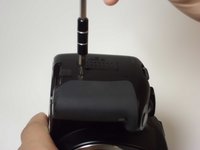
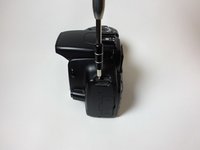
    • Place the camera on its side with the soft touch grip facing up and the top of the camera facing right.

  5. Canon EOS Rebel XTi Flash Module Replacement: paso 5, imagen 1 de 1
    • Slide the memory card door in the direction of the arrow engraved on the camera.

    • Once the door has slid open to its full position, lift up on the door.

  6. Canon EOS Rebel XTi Flash Module Replacement: paso 6, imagen 1 de 1
    • With the door open, push down the small black plunger next to the CF slot. The CF card will disengage from the slot and be ejected far enough that you can grasp it between thumb and forefinger and remove it from the slot.

    • The plunger will stay in its depressed position until a CF card is again inserted in the slot.

  7. Canon EOS Rebel XTi Flash Module Replacement, Back Cover: paso 7, imagen 1 de 1
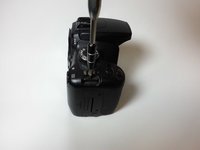
    • Remove the three black M3x4mm JIS #000 screws on the bottom of the camera.

  8. Canon EOS Rebel XTi Flash Module Replacement: paso 8, imagen 1 de 2 Canon EOS Rebel XTi Flash Module Replacement: paso 8, imagen 2 de 2
    • Remove the two black M3x6mm JIS #000 screws from the right side of the camera.

  9. Canon EOS Rebel XTi Flash Module Replacement: paso 9, imagen 1 de 1
    • Remove the two M3x5mm JIS #000 screws on the side of the camera opposite to the hand grip.

  10. Canon EOS Rebel XTi Flash Module Replacement: paso 10, imagen 1 de 1
    • Remove the following screws located in the memory card slot:

    • Two M3x2mm JIS #000 screws

  11. Canon EOS Rebel XTi Flash Module Replacement: paso 11, imagen 1 de 1
    • Gently pry off the back casing.

    • Before completely removing the back casing, be sure to disconnect the single ribbon cable running from the motherboard to the LCD display.

    • Use a spudger to lift the tab on the ribbon cable's ZIF connector.

    • Gently pull the ribbon cable out of the connector.

  12. Canon EOS Rebel XTi Flash Module Replacement, Front Cover: paso 12, imagen 1 de 1
    • Remove the following screws from the bottom of the camera:

    • Two M3x4.5mm JIS #000 screws

    • One M3x3mm JIS #000 screw

  13. Canon EOS Rebel XTi Flash Module Replacement: paso 13, imagen 1 de 1
    • Remove the following screws from the front of the camera:

    • Two M3x6mm JIS #000 screws

  14. Canon EOS Rebel XTi Flash Module Replacement: paso 14, imagen 1 de 1
    • Gently pry off the front casing.

    • There are no ribbon cables to remove for this portion of the disassembly.

  15. Canon EOS Rebel XTi Flash Module Replacement, Top Cover: paso 15, imagen 1 de 3 Canon EOS Rebel XTi Flash Module Replacement, Top Cover: paso 15, imagen 2 de 3 Canon EOS Rebel XTi Flash Module Replacement, Top Cover: paso 15, imagen 3 de 3
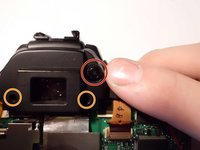
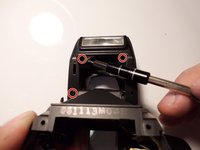
    • Remove the following screws from around the viewfinder:

    • One 10mm JIS #00 diopter screw

    • Two M3x6mm JIS #00 screws

  16. Canon EOS Rebel XTi Flash Module Replacement: paso 16, imagen 1 de 3 Canon EOS Rebel XTi Flash Module Replacement: paso 16, imagen 2 de 3 Canon EOS Rebel XTi Flash Module Replacement: paso 16, imagen 3 de 3
    • Remove the following screws on each side of the camera under the strap hooks:

    • One M3x5mm JIS #00 screw

    • One M3x4.5mm JIS #00 screw

  17. Canon EOS Rebel XTi Flash Module Replacement: paso 17, imagen 1 de 1
    • Separate the top casing from the electrical components enough to expose the wire harnesses that will need to be disconnected.

    • Ensure to remove the casing gently. There are several wire harnesses connecting the motherboard to components on the casing.

  18. Canon EOS Rebel XTi Flash Module Replacement: paso 18, imagen 1 de 1
    • Unplug the yellow connector located on the top of the camera.

  19. Canon EOS Rebel XTi Flash Module Replacement: paso 19, imagen 1 de 1
    • Disconnect the red connector located by the USB port.

  20. Canon EOS Rebel XTi Flash Module Replacement, Flash Module: paso 20, imagen 1 de 1
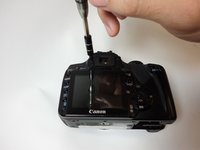
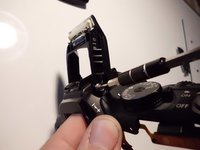
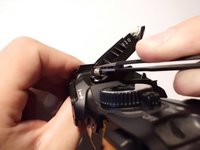
    • Use a JIS #000 screwdriver to remove the two 3 mm screws on the retention arms. There is one arm on each side of the module.

    • Do not lose the washers.

    • Remove the Retention Arms.

  21. Canon EOS Rebel XTi Flash Module Replacement: paso 21, imagen 1 de 2 Canon EOS Rebel XTi Flash Module Replacement: paso 21, imagen 2 de 2
    • Use a JIS #000 screwdriver to remove the three 3 mm screws on the flash cap.

    • Remove the flash cap.

  22. Canon EOS Rebel XTi Flash Module Replacement: paso 22, imagen 1 de 2 Canon EOS Rebel XTi Flash Module Replacement: paso 22, imagen 2 de 2
    Herramienta utilizada en este paso:
    Tweezers
    $4.99
    • Remove the 7mm JIS #000 screw on the flash hinge.

    • Using the straight tweezers remove the spring from the hinge hole.

  23. Canon EOS Rebel XTi Flash Module Replacement: paso 23, imagen 1 de 1
    • Lift the side of the flash module closest to the on/off button towards the opposite side of the camera.

    • Pull the wires gently through the top of the camera to completely remove the flash module.

    • Be Gentle with the wires, even though they have already been disconnected when removing the top casing

Conclusión

To reassemble your device, follow these instructions in reverse order.

Una persona más ha completado esta guía.

Luis Calle

Miembro Desde 08/30/15

416 Reputación

3 Guías creadas

Equipo

USF Tampa, Team 8-6, Eyestone Fall 2015 Miembro de USF Tampa, Team 8-6, Eyestone Fall 2015

USFT-EYESTONE-F15S8G6

3 Miembros

18 Guías creadas

4 comentarios

What is the part number for the Module, or where can it be readily found?

Scott - Contestar

You have got to be kidding me.. my camera would never get to shoot another photo...

ssneed -

Between steps 7 and 8, you left out removing the rest of the body covers. The top won't come off without removing the front, back, and sides.

Marvin Weaver - Contestar

I fixed up the prereqs for this guide

Zephosk -

Agregar Comentario

Ver Estadísticas:

Ultimas 24 horas: 0

Ultimos 7 días: 3

Ultimos 30 días: 9

Todo El Tiempo: 2,590