
Cómo utilizar tubos termorretráctiles

Última actualización: 16 de feb. de 2023
Vistas: 78 k
Ver estadísticas:
- Últimas 24 horas:
- 11
- Últimos 7 días:
- 51
- Últimos 30 días:
- 288
- Todo El Tiempo:
- 77,593
Comentarios: 9
2 comentarios sobre los pasos, 7 comentarios sobre la guía.
Ir a los comentarios de la guíaCompletado: 36 37
36 personas han marcado esta guía como "completada". ¿Serás tú la próxima persona en hacerlo?
37 persona acaba de marcar esta guía como "completada". ¡Incluyéndote, excelente trabajo!
Favoritos: 20 21
20 personas han marcado como "Favorita" y se han suscrito a esta guía. ¿Serás tú la próxima persona en hacerlo?
21 personas marcaron como favorita (y se suscribieron) esta guía, ¡incluyéndote a ti!
Introducción
Ir al paso 1 ↓Usa esta guía para aprender a usar tubos termorretráctiles para reparar el revestimiento deshilachado de un alambre o cable.
Qué necesitas
Partes
Herramientas


-
-
-
Mide el diámetro del cable y luego elije un trozo de termorretráctil que sea lo suficientemente grande como para deslizarse sobre el cable antes de calentarlo, pero que aún proporcione un ajuste perfecto una vez calentado. El diámetro reducido debe ser un poco más pequeño que el diámetro del cable para garantizar un ajuste perfecto.
 Pregunta a FixBot
-
-
-
Mide una longitud de tubo termorretráctil que sea un poco más larga que la sección dañada del cable.
-
-
-
-
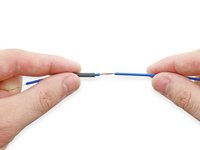
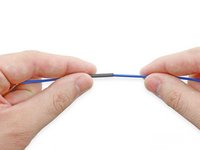
Desliza el tubo sobre el cable para que cubra la sección dañada/expuesta.
-
-
-
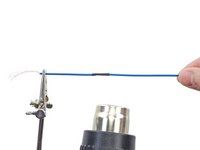
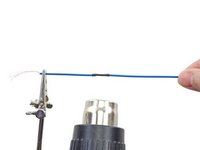
Utiliza una pistola de calor para encoger el tubo.
-
Continúa calentando el tubo hasta que esté bien sujeto al cable.
-
-




Cancelar: No complete esta guía.
36 personas más completaron esta guía.
Un agradecimiento especial a estos traductores:
100%

¡ Francisco Javier Saiz Esteban nos está ayudando a reparar el mundo! ¿Quieres contribuir?
Empezar a traducir ›

7Guía Comentarios
I find that using a rectangular, one-sided razor blade instead of scissors makes for straighter/cleaner ends, especially vs. larger diameter tubing.
Some alternate heat sources for heat-shrink tubing:
* Soldering iron. Hold the iron close to, but not touching the wrap. You may have to apply heat to multiple sides of the wrap, as the convection may not evenly reach all sides of the wrap.
* Cigarette lighter or candle flame. Not a great solution, but works if no better sources are available. If you let the flame touch the wrap, you can end up with soot depsoited on it. Soot will wipe off easily, but it is easy to burn the wrap and wire, even setting the insulation on fire, if you are careless and let the flame sit too long in one spot or for too long.
I want to repair a wire but it is attached to a hefty plug one end, and adapter at the other, and the heat shrink I’ve got won’t fit over these. Any suggestions?
You would be better off using electrical tape, Heat Shrink is designed to be used on new connections such as 2 wires soldered together and has to be slid on before connecting the wires together or before a larger end connector is attached , it also needs to be the correct size for the wire being covered since it will only shrink to 2 or 3 times its original size,
In your case you would have to cut the cable, slip on the heat shrink and then solder the wires back together before using the heat shrink to cover the bare wires or you could just use a shielded connector designed to connect cables together and forget the heat shrink
