Introducción
Here you can fix common problems like keyboard replacement, dirty vents, and thermal paste replacement.
I am not responsible for damages that may be caused. This is for informational purposes only. Follow at your own risk.
This is my first guide so please be kind.
Qué necesitas
-
Herramienta utilizada en este paso:Tweezers$4.99
-
Welcome to the Alienware M11xR3 disassembly. Below, I will describe the necessary tools and steps to disassemble the Alienware M11xR3. This disassembly applies to all M11x, including the R1, R2, and R3.
-
Required tools:
-
1x Phillips #1 and #00 Screwdriver
-
1x Flathead Screwdriver
-
1x Small Needle Nose Pliers or Tweezers
-
1x Thermal Paste and Finger Stalls Optional: Small water balloons (to spread thermal paste without getting dirty)
-
1x Anti-Static Mat
-
-
-
Gently flip over the laptop so that the bottom side is facing up.
-
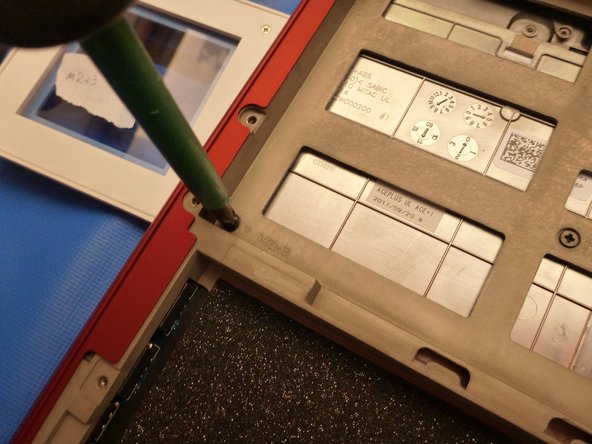
Use a Phillips #1 screwdriver to remove the 8 screws securing the base-plate.
-
-
-
Remove the battery cable on the plate by pulling vertically.
-
Unscrew and remove the screws retaining the battery.
-
-
-
Remove the hard drive mounting bracket by removing the three screws with the Phillips #1 screwdriver.
-
Pull out the hard drive by lifting up on the black tab.
-
-
-
In order to remove the hard drive from the mounting bracket, remove the four screws at each corner with the Phillips #1 screwdriver.
-
-
-
Pull the tabs away from RAM.
-
Carefully pull the RAM module to remove.
-
Depending on the configuration that you have on your Alienware, there may be another RAM module.
-
Number of Sockets: 2
-
Max memory: 16384 MB (16GB)
-
Memory Comments: PC3-10600 1333Mhz DDR3 SDRAM SO-DIMM 204-pin
-
-
-
Remove the aerial cables vertically with Tweezers or Small Needle Nose Pliers.
-
Once the aerial cables are removed, extract the screws.
-
Remove the WLAN card.
-
-
-
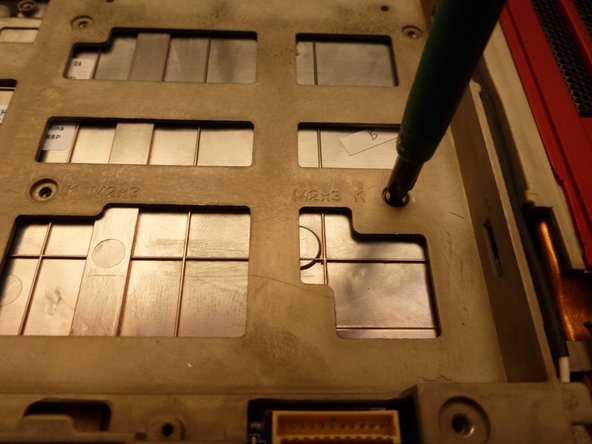
Remove the chassis screws using a Phillips #1 screwdriver.
-
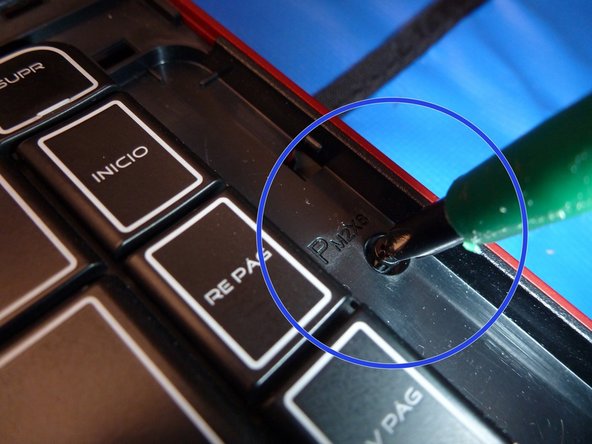
Remove the keyboard screws using a Phillips #1 screwdriver.
-
-
-
-
Use a small flat screwdriver to carefully pry the cover from the chassis.
-
Next, use your finger as a lever to extract the cover. The cover has tabs that attach it to the chassis.
-
-
-
Lift the tab to a vertical position to free the bus cable as shown.
-
-
-
Free the keyboard bus data cable as you did for the RGB bus data cable.
-
Remove the keyboard to replace it; it has pressure points like the previous cover.
-
-
-
Continue taking out the chassis by unscrewing the 3 shown screws.
-
First one to the left of the RGB bus data cable.
-
Second one at bottom near the touchpad.
-
Third one on the right edge of the laptop.
-
-
-
Lift the tab to disconnect the touchpad data bus cable.
-
-
-
Extract the bus cable with needle nose pliers by lifting the tab and pulling it away.
-
-
-
Remove the display connector by pulling vertically.
-
-
-
Unscrew the screws in the correct order by using the numbers near the holes.
-
-
-
Pass the cable from the bottom of the laptop through the hole carefully.
-
-
-
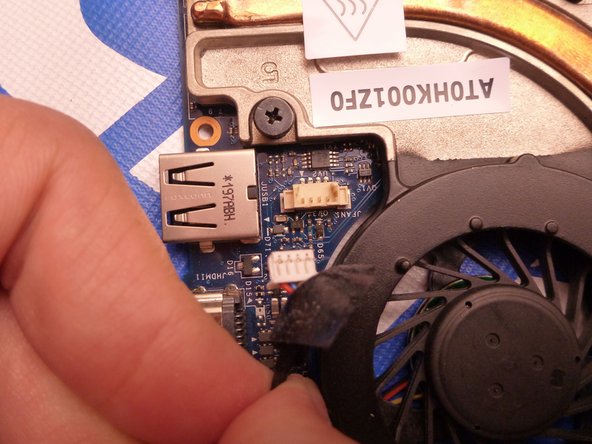
Remove the four screws, marked by red circles, to remove the motherboard.
-
-
-
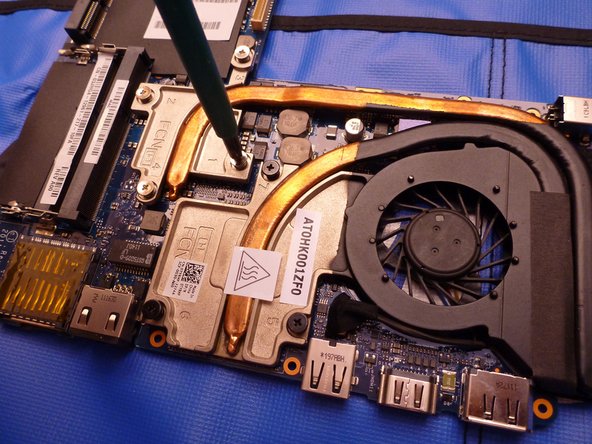
To remove the heatsink and replace thermal paste, remove the screws in the correct order (marked with a number on the heatsink).
-
Rescrew in the correct order (refer to the numbers on the heat sink).
-


Cancelar: No complete esta guía.
7 personas más completaron esta guía.
2 comentarios
I needed to modify it so i t would work for my M11X R1
but after all, pretty goosd tutorial.