thats just the base
i dont feel the tablet is worth the risk rn.
tools required:
a double edge razor so squeeze between the base plate and the body
a hairdryer (safer than hot air rework station)
a plastic knife to pry
a t4 screw driver
4-5 hours of work
double edge razor is also really effective at removing leftover double sided tape.
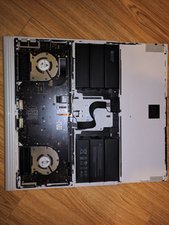
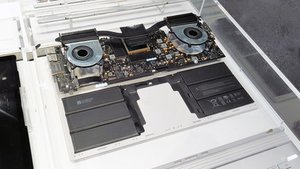
when prying, appropriate heat and patience will make sure that you dont bend the backplate. both batteries are surrounded by double sided tape.
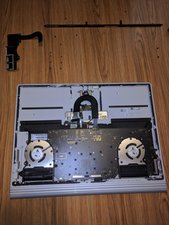
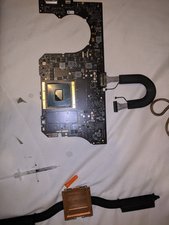
the usb board overlaps the gpu board, and needs to be pulled back, gently, amd then lift around 45 degree, and out. then take the gpu board out.
screws were alot, but no hidden ribbons that you can rip out (but 2 lvds at the top that can be cut if you use anything sharp, hence the plastic knife).
oh, and, theres this one lil screw thats besides the 2 usb ports, its head is small af, and it broke coz i tried to tighten it too tight. so for others, keep that in mind. its right btwn the memcard and usbA port
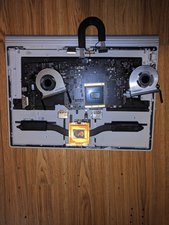
IF YOU ARE APPLYING LIQUID THERMAL, USE LESS THAN 1ML “ON A COTTON SWAB/Q-TIP" AND USE THE QTIP TO APPLY. “DO NOT APPLY DIRECTLY TO THE GPU DIE" even a tiny 0.5ml drop on swab was enough to cover the die. even lesser was needed to cover the heatsink.


2 comentarios
Is it possibal to upgrade the SSD, Ram, or Grapics card? I have a surface book 2 preformance base 2nd modle from original 2017 surface book 2 release.
- de joe
Only the SSD is upgradeable.
- de Tom Chai