Saltar al contenido principal

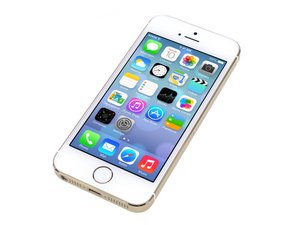
El iPhone 5s de Apple fue anunciado el 10 de Septiembre, 2013. La reparación de este dispositivo es similar a los modelos anteriores y requiere destornilladores y herramientas de palanca. Disponible como GSM o CDMA /16, 32, o 64 GB / Plata, Oro, y Gris Espacial.

Preguntas 3530 Ver todo

Microsoldering, BGA Reballing IC Touchscreen?

Hi, Im new to the forum. I am an independent iPhone tech and I own a repair shop. Im trying to learn more about micro soldering, I understand that when the IC touchscreen fails it needs to be replaced.

I have a spare iPhone 5s laying about with a touchscreen issue (Definetly not the screen, tested already.) and also another locked 5s with a functional touch screen. I would like to replace the IC. I have read many tutorials/guides/advices/videos and I feel confident about doing it my self.

Now, the part im not sure about is the reballing. I understand the IC needs to be heated up with a solder flux then carefully remove the IC with tweezers. Once it is removed it what should I do next? How do I reball? Do I apply solder paste and solder them onto the board using solder ribbon? and once I reball it do I solder the new replacement IC onto it?

I am a bit lost, and I want to make sure everything before I go ahead with my practices. Please do share any advices, tips or tutorial sources.

Thank you.

Contestado! Ver respuesta Yo también tengo este problema

Es esta una buena pregunta?

Puntuación 0
Agregar un comentario

1 Respuesta

Solución Elegida

It's not easy to convey via written text so this short (very short!) video probably does it best.

In essence, once you remove the IC, you want to clean it with your iron (~250C) to remove any underfill (if applicable) and also to remove any old lead-free solder. Some people like to wick away everything but wicking is inherently abrasive and if you can damage the IC if you're too agressive. Others like to use a concave tip and allow new leaded solder to naturally leave a light coating of solder on the pads. This same logic applies to the pads on the logic board BTW. In the linked video, you can see the IC has a light coat of solder on it.

Then you put the stencil over the IC and apply (leaded) solder paste. It's better when it's a bit dry, like in the video. Most solder paste is quite wet (the solders balls are in suspension in solder flux) so you have to let it dry a bit. Wet solder paste tends to expand and flow, therefore cross contaminating the holes in the stencil and you end up with an non-uniform distribution.

Then you heat the stencil, indirectly, with hot air until all the wells have molten. Remove the stencil and give another shot of hot air to reshape them properly and voila!

Now practice this 50 times and you might even be good at it ;>)! It is deceptively difficult and is an art form all it's own.

Fue útil esta respuesta?

Puntuación 3
Agregar un comentario

Añadir tu respuesta

Mike Yates estará eternamente agradecido.
Ver Estadísticas:

Ultimas 24 horas: 1

Ultimos 7 días: 7

Ultimos 30 días: 13

Todo El Tiempo: 842