Saltar al contenido principal

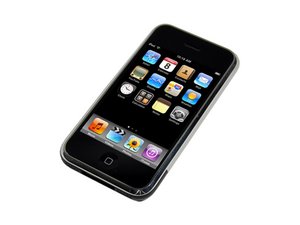
El primer modelo de iPhone, modelo A1203 con 4, 8 o 16 GB de capacidad y una parte posterior de aluminio. La reparación requiere una cantidad significativa de destreza, y puede requerir un poco de soldadura.

Preguntas 224 Ver todo

What to look out for when soldering the battery wires

I've got a iPhone 1st Gen that I'm trying to get the battery changed.

After desoldering the old battery out and soldering the new battery in, the phone wouldn't charge.

When I plug the charging cable in, the apple logo shows for a bit, then disappears. And that's all it'll do.

I know I've got the black cable correctly soldered as there is contact between it and the big metal cover above it.

How do I go about testing the red and white cable if they are soldered in correctly?

Contesta esta pregunta Yo también tengo este problema

Es esta una buena pregunta?

Puntuación -1
Agregar un comentario

2 Respuestas

Respuesta Más Útil

Sounds like the boat I just stepped off of.

I had a similar problem when I replaced my battery initially. When I lifted the battery out, the leads just came right off of the communications board. I attempted scraping the first layer of the PCB (lightly) in that spot in order to find traces for the connections. Sadly, if those leads come off it is nigh-impossible to resurrect IMHO. Long story short, my iPhone showed the exact same symptoms as you described (When plugged in, logo would come up and it would look as if the screen lost power and the logo would fade) and the communications board needed to be replaced.

I contacted iFixIt and they did not have the parts required in stock. I did find them through a retailer (LaptopAid) on eBay and their part worked like a charm! A new communications board + presoldered battery was only $45US through them and they have quick shipping.

Hope this helps!

Fue útil esta respuesta?

Puntuación 1
Agregar un comentario

I would make sure you have not created a solder bridge (shorted out) between the red and the white wire solder points.

AND make double sure you have not pinched the wires on the shield - I found it hard to rout them properly.

Test it with the back off, making sure the wires are free and not touching anything for starters

Fue útil esta respuesta?

Puntuación 0
Agregar un comentario

Añadir tu respuesta

riDerz estará eternamente agradecido.
Ver Estadísticas:

Ultimas 24 horas: 0

Ultimos 7 días: 0

Ultimos 30 días: 0

Todo El Tiempo: 1,985