Traduciendo paso 4
Paso 4


-
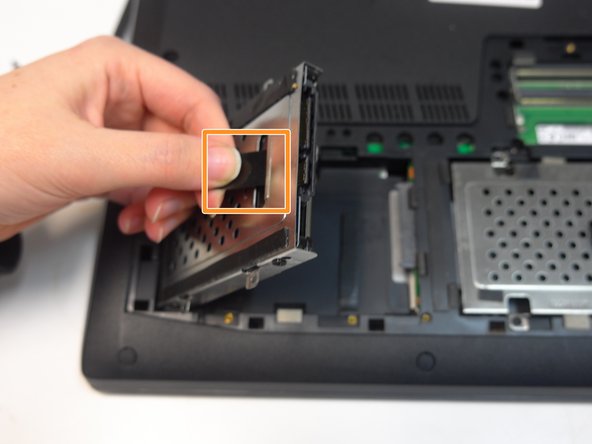
Use the black tab as leverage to slide the metal hard drive casing all the way to the left.
-
Still holding the black tab, pull the hard drive casing up to remove it from the laptop.
Tus contribuciones son autorizadas bajo la licencia de código abierto de Creative Commons.