Saltar al contenido principal

Remplacement de l'écran du Google Pixel

Aviso: Estás editando una guía de requisitos previos. Cualquier cambio que realices afectará a todas las 6 guías que incluyen este paso.

Inglés
Francés
Paso 4
Google Pixel Display Replacement: paso 0, imagen 1 de 3 Google Pixel Display Replacement: paso 0, imagen 2 de 3 Google Pixel Display Replacement: paso 0, imagen 3 de 3
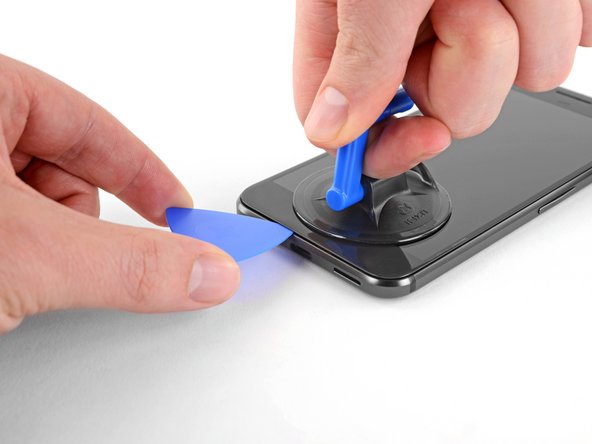
  • Insert an opening pick or a playing card into the gap between the chassis and the display assembly.

  • Begin to slide the opening pick around the edge of the display, cutting through the adhesive that secures it.

  • Do not try to lift or pry the screen off with the pick. Simply slide it around to detach the adhesive.

  • The display panel is extremely fragile. If you plan to re-use your display, take care to insert your tool only as far as necessary to separate the adhesive. Inserting the tool any further can damage the OLED panel under the glass.

Insérez un médiator ou une carte en plastique dans l'espace entre le châssis et l'écran.

Commencez à faire glisser votre outil le long du bord de l'écran pour trancher l'adhésif qui le fixe.

N'essayez pas de soulever ou de faire levier sur l'écran avec le médiator. Faites-le simplement glisser pour décoller l'adhésif.

L'écran est extrêmement fragile. Si vous prévoyez de réutiliser votre écran, veillez à insérer votre outil uniquement jusqu'à la profondeur nécessaire pour séparer l'adhésif. L'insertion de l'outil au-delà peut endommager le panneau OLED sous le verre.

Tus contribuciones son autorizadas bajo la licencia de código abierto de Creative Commons.