Aviso: Estás editando una guía de requisitos previos. Cualquier cambio que realices afectará la guía que incluye este paso.
Traduciendo paso 2
Paso 2
-
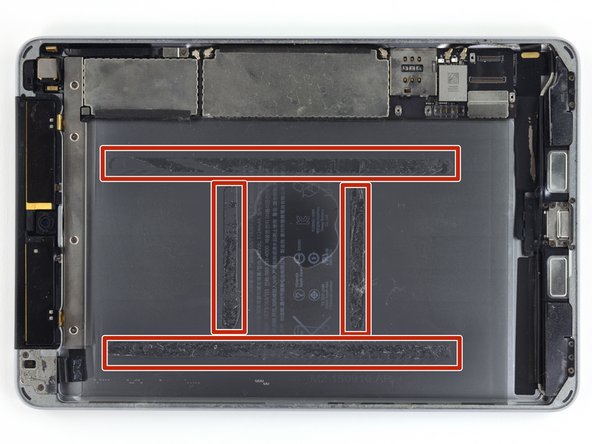
In the following steps you will be cutting the adhesive under the battery, and prying it off of the rear case.
-
The adhesive is laid out as shown in this image: two strips along the long edges, and two shorter strips perpendicular in the center.
-
To avoid damaging the battery, use plastic tools, heat, and patience. Do not puncture, bend, or overheat the battery.
-
Do not pry near the logic board, you could damage your iPad.
Tus contribuciones son autorizadas bajo la licencia de código abierto de Creative Commons.