Aviso: Estás editando una guía de requisitos previos. Cualquier cambio que realices afectará la guía que incluye este paso.
Traduciendo paso 5
Paso 5


-
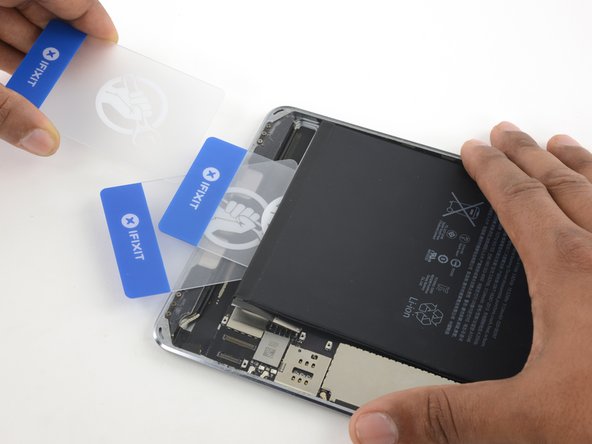
Insert a third plastic card between the first and second ones, this time aligned with the left edge of the battery.
-
Continue to cut the adhesive under the battery until the battery is freed.
-
Reheat and reapply your iOpener when prying becomes difficult. Be sure to wait for the iOpener to cool between sessions.
Tus contribuciones son autorizadas bajo la licencia de código abierto de Creative Commons.