Aviso: Ahora estás editando un requisito previo de la guía que estabas viendo. Cualquier cambio que realices afectará a todas las 2 guías que incluyen este paso.
Traduciendo paso 22
Paso 22


-
Use the plastic spudger to remove the ribbon cable from the motherboard by placing the spudger under the ribbon cable connector and pulling up.
-
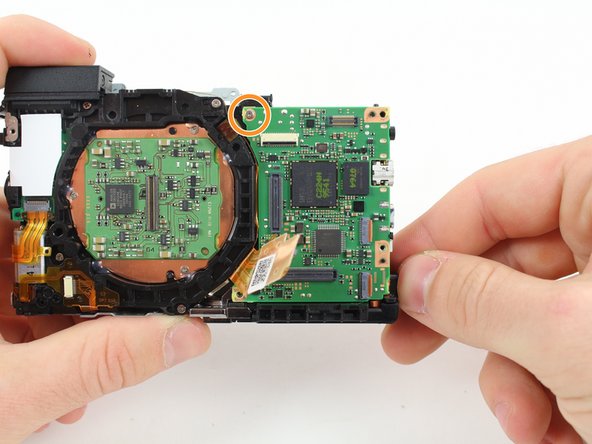
Remove the 2.8mm screw from the motherboard.
-
Carefully rotate the motherboard upward.
-
Use the plastic spudger to remove the ribbon cable from the bottom of the motherboard by placing the spudger under the ribbon cable connector and pulling up.
Tus contribuciones son autorizadas bajo la licencia de código abierto de Creative Commons.