Saltar al contenido principal

Desmontaje Nexus 5X

Inglés
Español
Paso 4
Nexus 5X Teardown: paso 0, imagen 1 de 3 Nexus 5X Teardown: paso 0, imagen 2 de 3 Nexus 5X Teardown: paso 0, imagen 3 de 3
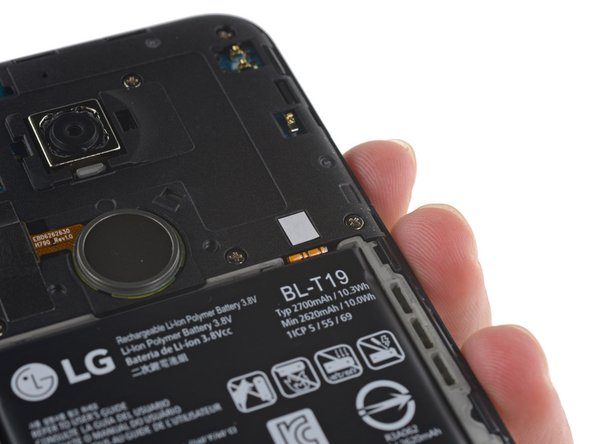
  • That wasn't so bad! Things are looking up for the 5X as we get our first glimpse at the interior of the phone.

  • The Wi-Fi, MIMO, and GPS antennae still reside on the rear case, along with the NFC antenna which formerly lived on its own control board. Unfortunately, those super convenient labels from the Nexus 5 have transformed into cryptic codes.

  • Luckily, this sticker on the inside of the back panel has all the essentials: IMEI, country of origin, and the model number: LG-H790.

  • Our spirits soared as we spied the 2700 mAh battery sitting in plain view—a removable battery is hard to come by these days.

  • But alas, it was not to be. The battery connector is squirreled away beneath the midframe, and it's totally inaccessible for now.

¡Eso no estuvo tan mal! Las cosas van mejorando para el 5X al avistar por primera vez el interior del teléfono.

Las antenas de Wi-Fi, MIMO y GPS todavía residen en la caja trasera, junto a la antena NFC que anteriormente vivía sola en el panel de control. Desafortunadamente, esas etiquetas súper convenientes del Nexus 5 se han transformado en códigos crípticos.

Por suerte, esta etiqueta adhesiva en la parte interior del panel trasero tiene todo lo esencial: IMEI, país de origen y el número de modelo: LG-H790.

Nuestro ánimo mejoró cuando espiamos la batería de 2700 mAh a simple vista—es difícil encontrar una batería removible en esta época.

Pero... no fue así. El conector de la batería está guardada debajo del marco medio, y está totalmente inaccesible por ahora.

Tus contribuciones son autorizadas bajo la licencia de código abierto de Creative Commons.