Traduciendo paso 5
Paso 5


-
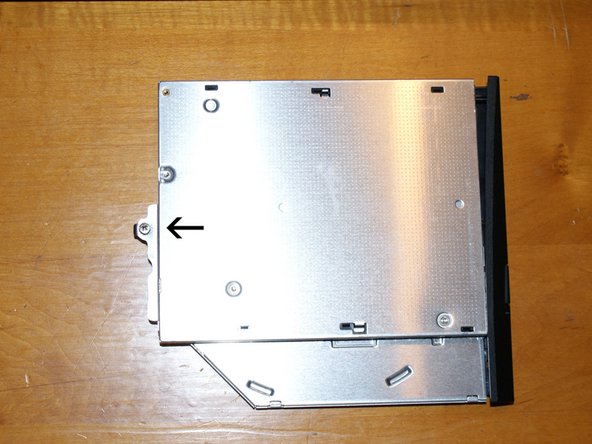
Indicated by the white arrow is the screw to remove to allow you to pull the optical drive. Also visible beneath the screw hole is a silver tab. Push this to the right to get a grip on the drive door and pull it the rest of the way out. When the drive is removes, put the screw back in the hole in the drive, to keep track of it.
Tus contribuciones son autorizadas bajo la licencia de código abierto de Creative Commons.