Saltar al contenido principal

ClickN Kids Tablet Touch Screen Display Replacement

Inglés
Español
Paso 4
ClickN Kids Tablet Touch Screen Display Replacement: paso 0, imagen 1 de 2 ClickN Kids Tablet Touch Screen Display Replacement: paso 0, imagen 2 de 2
  • Potential for device damage. Be careful not to damage any wires or ribbon cables during this step.

  • There are two ribbon cables to remove during this step. Each is connected to a base on the motherboard.

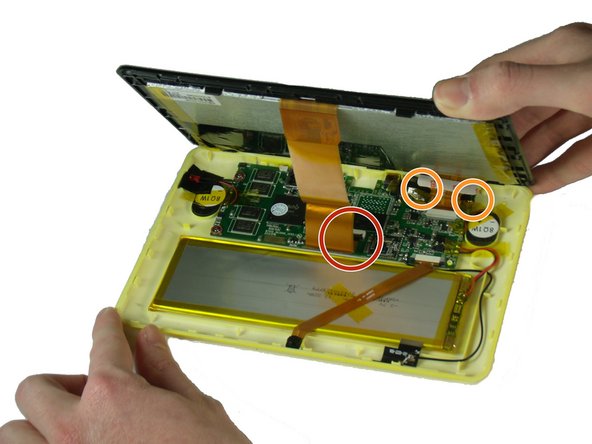
  • There is a black tab behind the long ribbon cable. Lift up the black tab.

  • For the ribbon cable in the back, pull the black tabs on the side out.

  • Detach the ribbon cables connecting the screen to the motherboard.

  • Remove any tape that is holding down the ribbon cables. Set it aside.

  • Once the ribbon cables are freed, separate the top and bottom sides.

Insertar traducción aquí

Insertar traducción aquí

Insertar traducción aquí

Insertar traducción aquí

Insertar traducción aquí

Insertar traducción aquí

Insertar traducción aquí

Tus contribuciones son autorizadas bajo la licencia de código abierto de Creative Commons.