Aviso: Estás editando una guía de requisitos previos. Cualquier cambio que realices afectará a todas las 8 guías que incluyen este paso.
Traduciendo paso 7
Paso 7


-
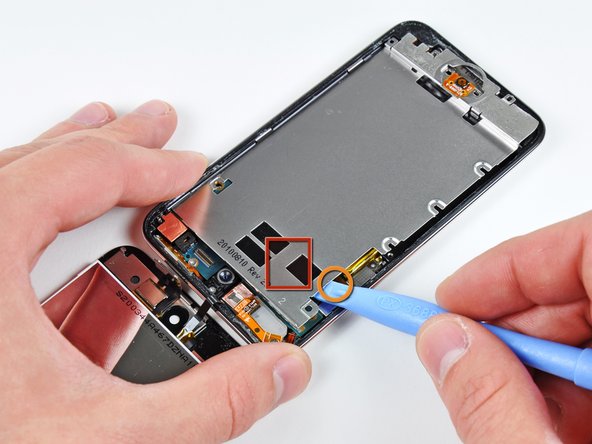
Insert the edge of an opening tool under the steel mid plate near the bottom left corner of the Touch.
-
Slowly pry upward to separate the plate from the adhesive securing it to the plastic inner case.
-
If the plate is still attached to the logic board, re-warm the area to loosen the adhesive, then slowly separate the plate from the logic board using the opening tool.
-
There is a thin, fragile ribbon cable underneath the plate. As you pry the plate up, be very careful not to rip the cable.
Tus contribuciones son autorizadas bajo la licencia de código abierto de Creative Commons.