Saltar al contenido principal

Reemplazo de la batería del iPhone 13

Inglés
Español
Paso 8
iPhone 13 Battery Replacement: paso 0, imagen 1 de 3 iPhone 13 Battery Replacement: paso 0, imagen 2 de 3 iPhone 13 Battery Replacement: paso 0, imagen 3 de 3
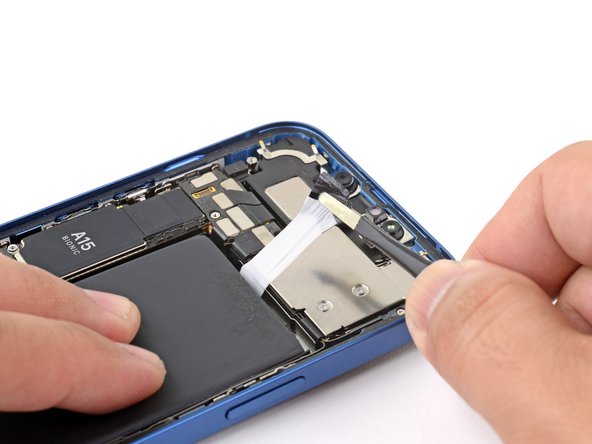
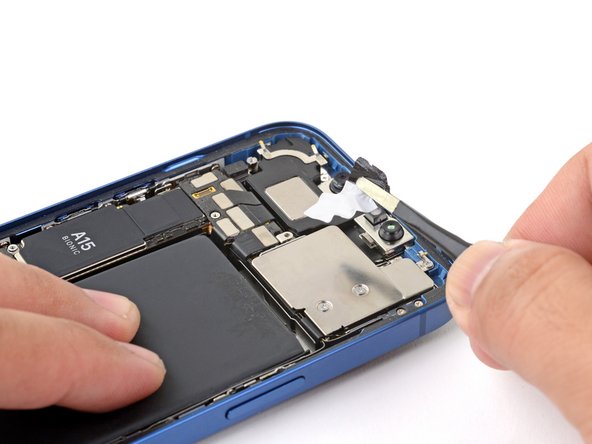
  • Lightly place two fingers on the center of the battery to prevent it from flinging out while removing the final adhesive strip.

  • Don't press down on the battery with excessive force.

  • Use a pair of blunt tweezers to pull and stretch the remaining tab to remove the final adhesive strip holding the battery in place.

  • If you removed all the adhesive strips successfully, skip the next step.

  • Otherwise, continue with the next step below.

Coloca ligeramente dos dedos en el centro de la batería para evitar que salga despedida mientras retiras la última tira adhesiva.

No presiones la batería con excesiva fuerza.

Usa un par de pinzas sin punta para tirar y estirar la lengüeta restante para retirar la última tira adhesiva que sujeta la batería .

Si has quitado todas las tiras adhesivas con éxito, salta el siguiente paso.

De lo contrario, continúa con el siguiente paso.

Tus contribuciones son autorizadas bajo la licencia de código abierto de Creative Commons.