Traduciendo paso 3
Paso 3


-
Insert the flat end of a spudger under the loudspeaker at the gap on the left side.
-
Work the spudger under the loudspeaker to seperate it from the adhesive and remove the loudspeaker.
-
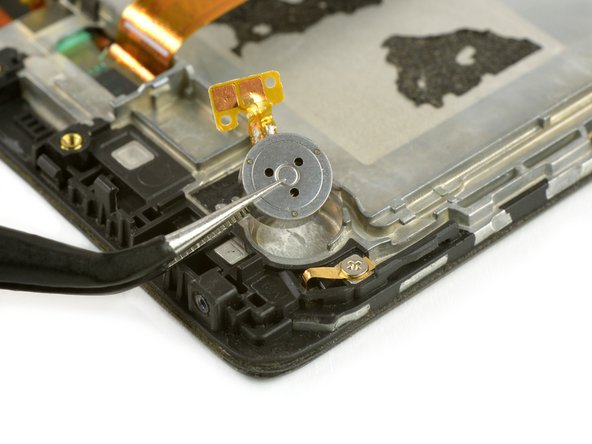
Use tweezers to take the vibration unit out of its housing.
| [* black] Insert the flat end of a spudger under the loudspeaker at the gap on the left side. | |
| [* black] Work the spudger under the loudspeaker to seperate it from the adhesive and remove the loudspeaker. | |
| - | [* black] Use tweezers to take the vibration unit out of its housing. |
| + | [* black] Use [product|IF145-020|tweezers] to take the vibration unit out of its housing. |
Tus contribuciones son autorizadas bajo la licencia de código abierto de Creative Commons.