Introducción
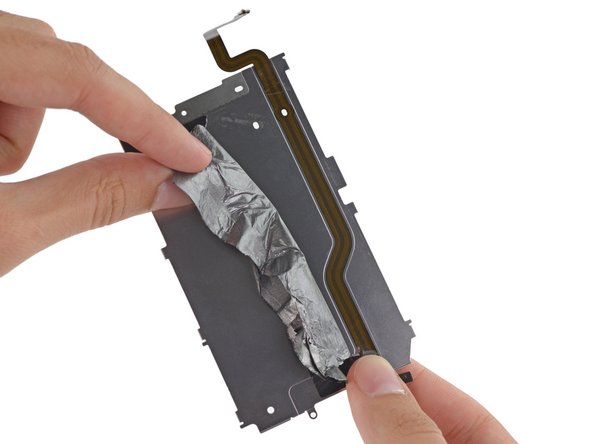
Use this guide to remove or replace the metal shielding on the back of the iPhone 6 front panel.
You can also use this guide to replace the following parts:
Qué necesitas
-
-
Power off your iPhone before beginning disassembly.
-
Remove the two 3.6 mm-long P2 Pentalobe screws next to the Lightning connector.
-
-
-
Pull the blue handle backwards to unlock the Anti-Clamp's arms.
-
Slide the arms over either the left or right edge of your iPhone.
-
Position the suction cups near the bottom edge of the iPhone just above the home button—one on the front, and one on the back.
-
Squeeze the cups together to apply suction to the desired area.
-
-
-
If you don't have an Anti-Clamp, use a single suction cup to lift the front panel:
-
Press a suction cup onto the screen, just above the home button.
-
-
-
While holding the iPhone down with one hand, pull up on the suction cup to slightly separate the front panel assembly from the rear case.
-
Using a plastic opening tool, begin to gently pry the rear case down, away from the display assembly, while continuing to pull up with the suction cup.
-
-
-
Open the iPhone by swinging the home button end of the front panel assembly away from the rear case, using the top of the phone as a hinge.
-
-
-
Remove the following Phillips screws from the battery connector bracket:
-
One 2.2 mm screw
-
One 3.2 mm screw
-
-
-
-
Use a plastic opening tool to gently pry the battery connector up from its socket on the logic board.
-
-
-
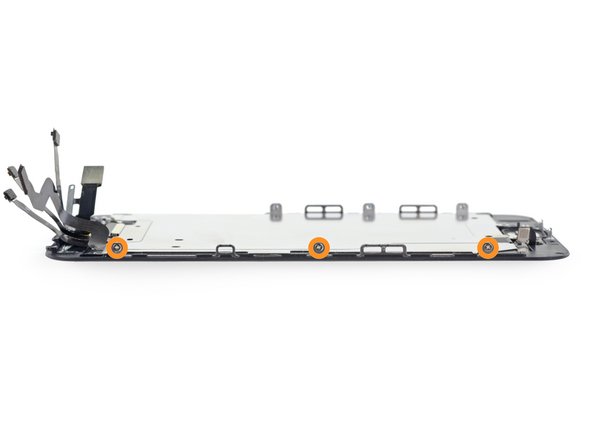
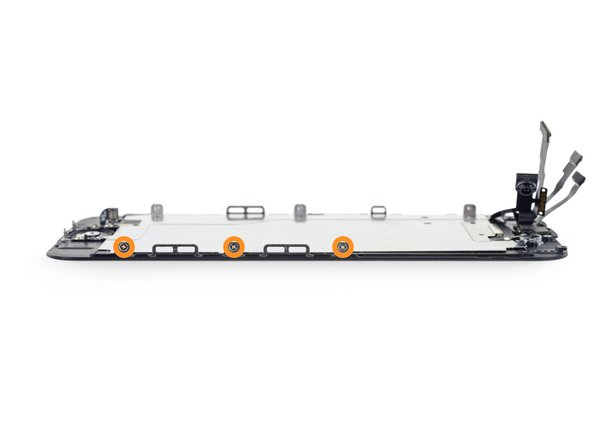
Remove the following five Phillips screws securing the front panel assembly cable bracket:
-
Three 1.2 mm screws
-
One 1.7 mm screw
-
One 3.1 mm screw
-
-
-
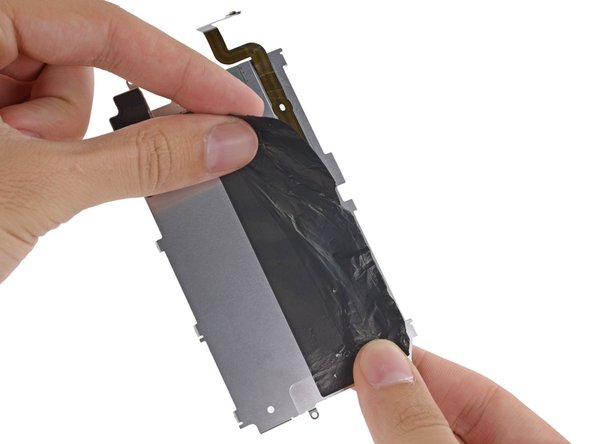
Remove the front panel assembly from the rear case.
-
-
-
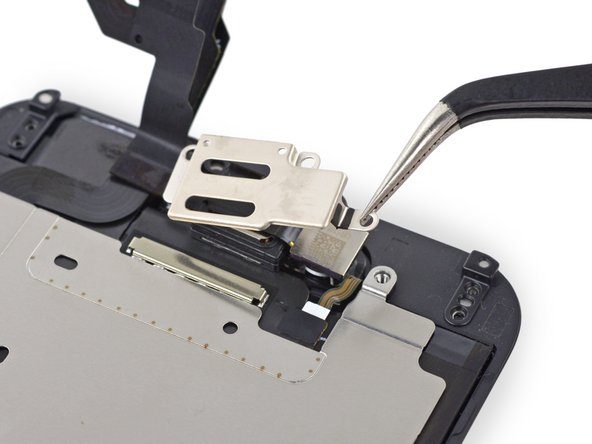
Remove the following Phillips screws from the earpiece speaker/front-facing camera bracket:
-
One 2.3 mm screw
-
One 3.0 mm screw
-
One 2.2 mm screw
-


To reassemble your device, follow these instructions in reverse order.
To reassemble your device, follow these instructions in reverse order.
Cancelar: No complete esta guía.
194 personas más completaron esta guía.


21 comentarios
I have this in video.
When changing the shield plate do you need to keep the original home button cable ? I don't want to brick the phone. I know you need to keep the original home button but was not sure about shield plate. Also any new news on how to fix the error 53 ? I saw something on you tube but it was in Chinese. I attached the video maybe you can tell what he is doing..