Introducción
If your wi-fi signal is poor, you may need to replace the wi-fi antenna, or the interconnect cable on the logic board. Follow this guide to replace the interconnect cable and restore wi-fi signal to your phone.
Qué necesitas
-
-
Power off your iPhone before beginning disassembly.
-
Remove the two 3.6 mm-long P2 Pentalobe screws next to the Lightning connector.
-
-
Herramienta utilizada en este paso:Clampy - Anti-Clamp$24.95
-
Pull the blue handle backwards to unlock the Anti-Clamp's arms.
-
Slide the arms over either the left or right edge of your iPhone.
-
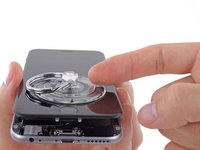
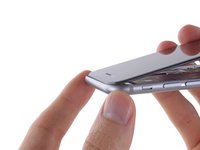
Position the suction cups near the bottom edge of the iPhone just above the home button—one on the front, and one on the back.
-
Squeeze the cups together to apply suction to the desired area.
-
-
Herramienta utilizada en este paso:Clampy - Anti-Clamp$24.95
-
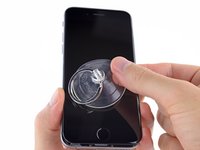
If you don't have an Anti-Clamp, use a single suction cup to lift the front panel:
-
Press a suction cup onto the screen, just above the home button.
-
-
-
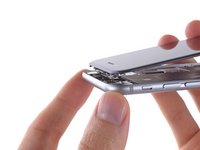
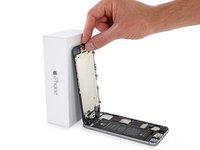
While holding the iPhone down with one hand, pull up on the suction cup to slightly separate the front panel assembly from the rear case.
-
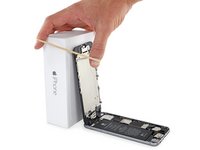
Using a plastic opening tool, begin to gently pry the rear case down, away from the display assembly, while continuing to pull up with the suction cup.
-
-
-
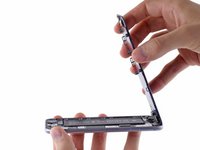
Open the iPhone by swinging the home button end of the front panel assembly away from the rear case, using the top of the phone as a hinge.
-
-
Herramienta utilizada en este paso:Magnetic Project Mat$19.95
-
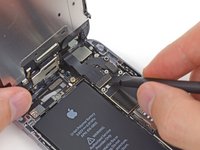
Remove the following Phillips screws from the battery connector bracket:
-
One 2.2 mm screw
-
One 3.2 mm screw
-
-
-
Use a plastic opening tool to gently pry the battery connector up from its socket on the logic board.
-
-
-
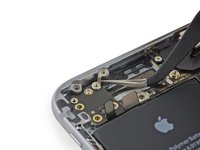
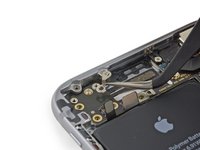
Remove the following five Phillips screws securing the front panel assembly cable bracket:
-
Three 1.2 mm screws
-
One 1.7 mm screw
-
One 3.1 mm screw
-
-
-
-
Remove the front panel assembly from the rear case.
-
-
-
Insert a SIM card eject tool or a paperclip into the small hole in the SIM card tray.
-
Press to eject the tray.
-
-
-
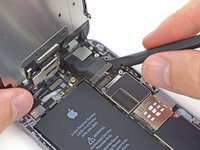
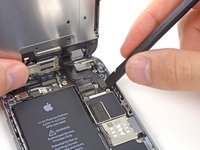
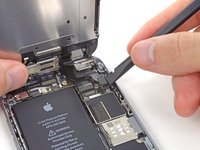
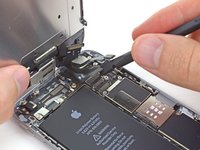
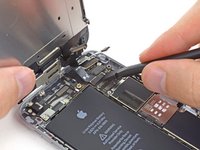
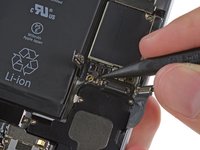
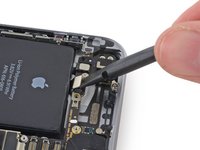
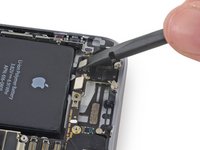
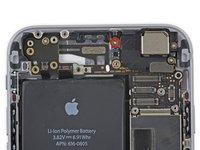
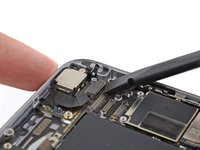
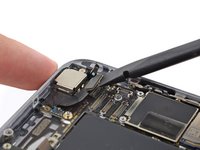
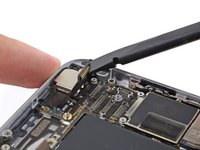
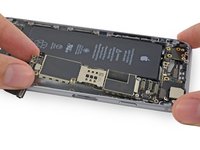
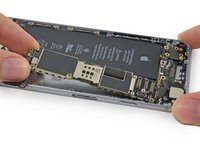
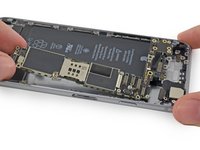
Use the flat end of a spudger to disconnect the Lightning connector assembly cable and fold it out of the way of the speaker.
-
-
Herramienta utilizada en este paso:Tweezers$4.99
-
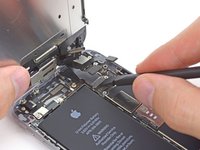
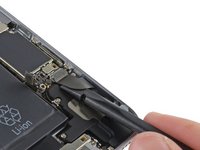
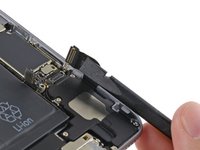
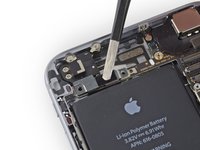
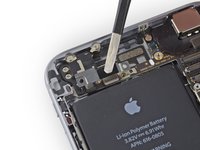
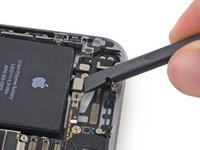
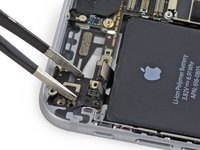
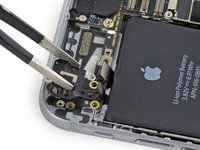
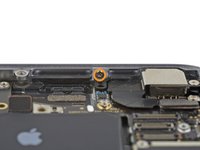
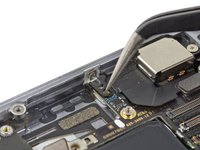
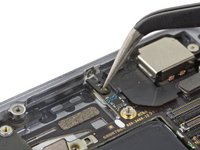
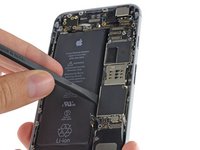
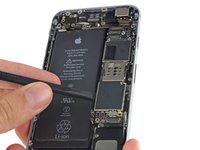
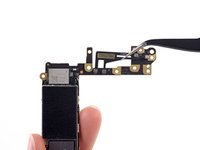
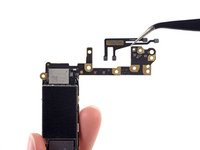
Flip the logic board over to expose the antenna on the back side.
-
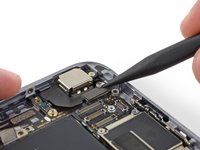
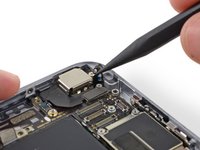
Disconnect the four coaxial connectors from the logic board and remove the antenna cable from the logic board.
-


Compare your new replacement part to the original part—you may need to transfer remaining components or remove adhesive backings from the new part before installing.
To reassemble your device, follow the above steps in reverse order.
Take your e-waste to an R2 or e-Stewards certified recycler.
Repair didn’t go as planned? Check out our Answers community for troubleshooting help.
Cancelar: No complete esta guía.
414 personas más completaron esta guía.


147 comentarios
Great Guide, GPS Antenna and WIFI antenna replaced!!! a little sweat... but i did it
Hi,
Where are the GPS antenna and the GPS chip please ?
Thks
ccTEST -
This part and replacement guide saved my iPhone. I thought the phone was just getting old and on its way out since the bluetooth and gps were incredibly awful. Bluetooth only worked within direct line of sight within one foot, and gps had stopped working almost completely. It took some time to perform this repair, but I following the guide carefully and patiently fixed the problem completely. This part and guide worked perfectly. Thank you very much ifixit!
EXCELLENT Instructions! 1:15 first time. Worked great, saved me the cost of a new phone. The "genius bar" said it couldn't be fixed, talk about self serving "you will have to buy a new phone!"
KEY GUIDANCE
0) Be careful when taking the front off, I snapped off one of two pieces near the lightening connector!
1) Print out the instructions (yes its a lot of pages, but trust me)
2) As you take off screws and pieces tape them to the instructions where they go
3) YOU will thank me later.
If I had not done this I think it would have been twice as long, and likely made mistakes and perhaps damaged something with the wrong length screw. I kept like screws together under one piece of tape, next to each color indicator.