Saltar al contenido principal

Insignia Flex 10.1 NS-P16AT10 Screen Replacement

Inglés
Español
Paso 13
Insignia Flex 10.1 NS-P16AT10 Screen Replacement: paso 0, imagen 1 de 3 Insignia Flex 10.1 NS-P16AT10 Screen Replacement: paso 0, imagen 2 de 3 Insignia Flex 10.1 NS-P16AT10 Screen Replacement: paso 0, imagen 3 de 3
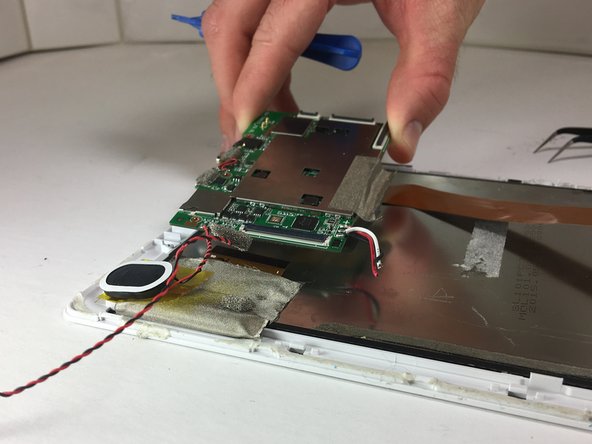
  • Gently lift the gray mesh tape up that holds the motherboard down to the front case.

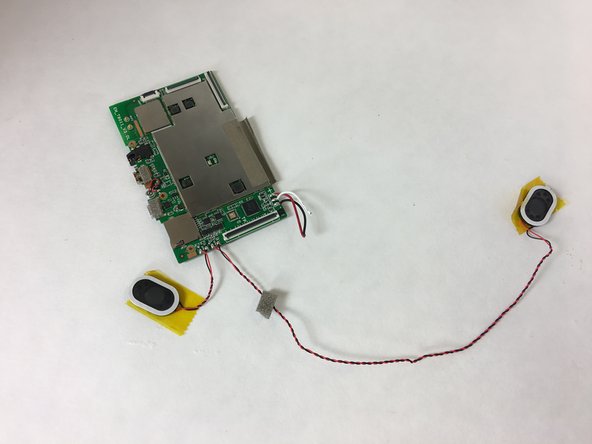
  • Lift the motherboard up from the front case.

  • The speakers are directly connected to the motherboard and will come up with the motherboard.

Insertar traducción aquí

Insertar traducción aquí

Insertar traducción aquí

Tus contribuciones son autorizadas bajo la licencia de código abierto de Creative Commons.