Traduciendo paso 11


-
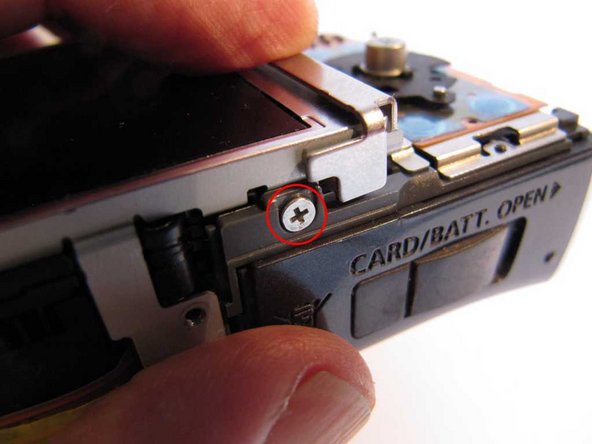
Remove a screw from the bottom of the LCD frame.
-
Remove 5 screws retaining the LCD frame. Note that one is recessed at the top right hand corner. This is a very slightly different size - keep it separate from the other 4.
-
Remove the LCD frame, and a supplementary piece of metal (3rd photo) on the bottom right hand side of the frame, which covers a pair of snap-on connectors and prevents them working loose. Note that on reassembly, it’s easy to forget this additional piece of metal.
-
If you simply need to access the sensor or the infrared filter, you only need remove the supplementary piece of metal. Then, follow instructions in the companion guide Canon PowerShot SX200 IS Lens Disassembly.
Tus contribuciones son autorizadas bajo la licencia de código abierto de Creative Commons.