Saltar al contenido principal

Google Pixel 3 XL Motherboard Replacement

Aviso: Estás editando una guía de requisitos previos. Cualquier cambio que realices afectará a todas las 2 guías que incluyen este paso.

Inglés
Español

Traduciendo paso 3

Paso 3
Google Pixel 3 XL Motherboard Replacement, Transfer the rear-facing camera: paso 0, imagen 1 de 3 Google Pixel 3 XL Motherboard Replacement, Transfer the rear-facing camera: paso 0, imagen 2 de 3 Google Pixel 3 XL Motherboard Replacement, Transfer the rear-facing camera: paso 0, imagen 3 de 3
Transfer the rear-facing camera
  • If you are installing a new motherboard, follow these instructions to transfer the rear-facing camera:

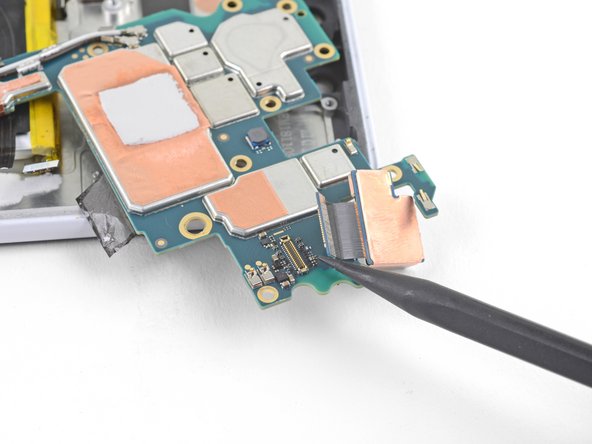
  • Use the point of a spudger to pry up and disconnect the rear-facing camera from its motherboard socket.

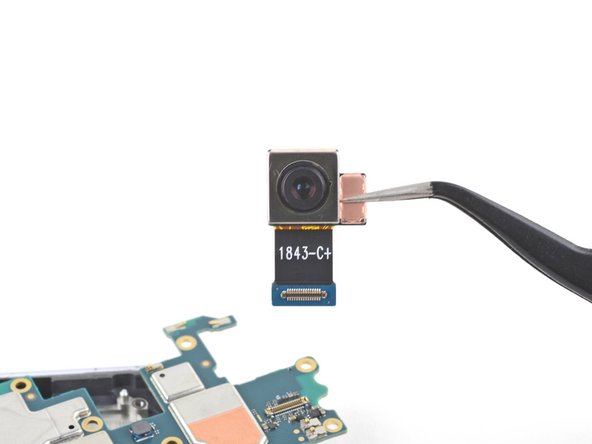
  • Remove the rear-facing camera and transfer it to your replacement motherboard.

  • Compare your new replacement part to the original part. You may need to transfer remaining components or remove adhesive backings from the new part before installing.

Insertar traducción aquí

Insertar traducción aquí

Insertar traducción aquí

Insertar traducción aquí

Tus contribuciones son autorizadas bajo la licencia de código abierto de Creative Commons.