Saltar al contenido principal

Dynex DX-WBRDVD1 Power Supply Board Replacement

Inglés
Español
Paso 3
Dynex DX-WBRDVD1 Power Supply Board Replacement: paso 0, imagen 1 de 2 Dynex DX-WBRDVD1 Power Supply Board Replacement: paso 0, imagen 2 de 2
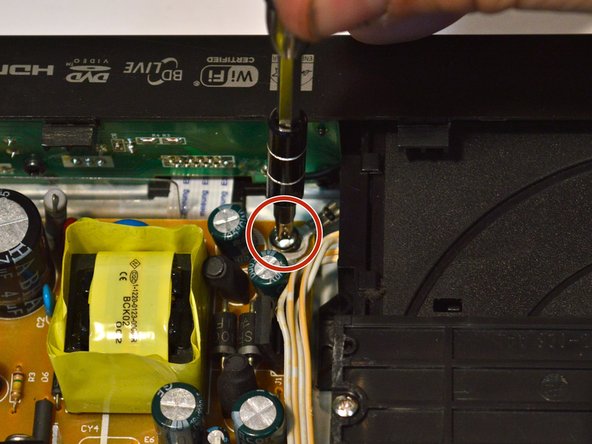
  • Remove the 4 screws holding the power board to the body of the device.

  • Remember to connect a grounding wire to the screw next to the front panel and optical drive when reassembling.

Insertar traducción aquí

Insertar traducción aquí

Tus contribuciones son autorizadas bajo la licencia de código abierto de Creative Commons.