Saltar al contenido principal

Esta versión puede contener ediciones incorrectas. Cambie a la última instantánea verificada.

Qué necesitas

  1. Este paso está sin traducir. Ayuda a traducirlo

    : paso 1, imagen 1 de 1
    • Place the drone on its back, with the runners facing upward.

    • Using the Phillips #00 screwdriver, unscrew the single 2mm screw located on the drone body which connects the headlamp and wiring to the center of the drone frame.

  2. Este paso está sin traducir. Ayuda a traducirlo

    : paso 2, imagen 1 de 1
    • Grasp one of the propeller arms with the fingers of one hand while holding the drone frame with the other hand.

    • Firmly pull the propeller arm upward to separate it from the drone body.

    • Repeat this process to remove the three other propeller arms.

  3. Este paso está sin traducir. Ayuda a traducirlo

    : paso 3, imagen 1 de 1
    • Carefully remove the drone body from the frame.

  4. Este paso está sin traducir. Ayuda a traducirlo

    : paso 4, imagen 1 de 2 : paso 4, imagen 2 de 2
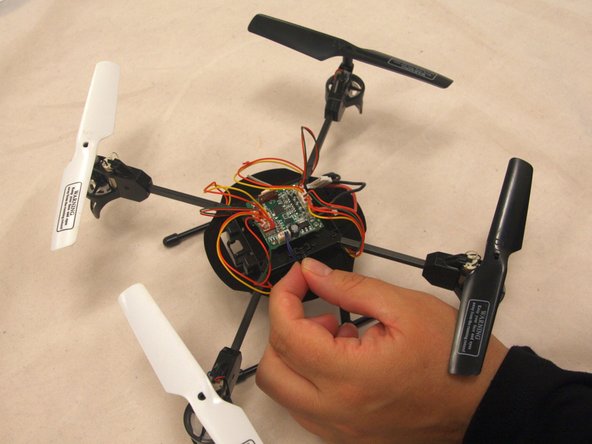
    • Flip the drone body onto the runners so the wires and motherboard are facing upward.

    • Disconnect the black and blue camera wires from the motherboard.

    • You may need to use a pointed metal pick to loosen the red putty that holds the connectors together.

  5. Este paso está sin traducir. Ayuda a traducirlo

    : paso 5, imagen 1 de 1
    • Be careful when separating the camera away from the runners and drone body—the plastic is brittle and may snap, causing injury to the hand.

    • Pry the camera away from the main drone body.

    • Use a spudger for extra leverage if the parts do not easily separate.

Linea de Meta

0 comentarios

Agregar Comentario

Ver Estadísticas:

Ultimas 24 horas: 1

Ultimos 7 días: 9

Ultimos 30 días: 15

Todo El Tiempo: 272