Saltar al contenido principal

Teenage Engineering OP-Z Function Key Plastic Buttons Replacement

Qué necesitas

  1. Teenage Engineering OP-Z Function Key Plastic Buttons Replacement, Back Cover: paso 1, imagen 1 de 3 Teenage Engineering OP-Z Function Key Plastic Buttons Replacement, Back Cover: paso 1, imagen 2 de 3 Teenage Engineering OP-Z Function Key Plastic Buttons Replacement, Back Cover: paso 1, imagen 3 de 3
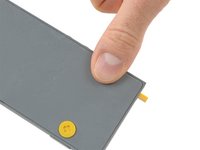
    • Unlock the four rubber feet by turning them 90° counterclockwise using your thumb or finger tip.

    • There is a tiny mark on every foot facing the bottom edge of the OP-Z. After turning them they should face towards the short edge where the on/off switch is.

  2. Teenage Engineering OP-Z Function Key Plastic Buttons Replacement: paso 2, imagen 1 de 2 Teenage Engineering OP-Z Function Key Plastic Buttons Replacement: paso 2, imagen 2 de 2
    • When turning the OP-Z over again the bottom plate should come off by itself (thanks gravity).

    • If the bottom plate won’t come off you might want to make sure every foot is rotated correctly and gently tug on one of them.

  3. Teenage Engineering OP-Z Function Key Plastic Buttons Replacement: paso 3, imagen 1 de 1
    • Remove the bottom plate including the rubber feet.

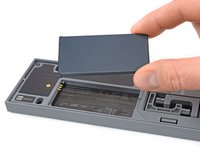
  4. Teenage Engineering OP-Z Function Key Plastic Buttons Replacement, Battery: paso 4, imagen 1 de 2 Teenage Engineering OP-Z Function Key Plastic Buttons Replacement, Battery: paso 4, imagen 2 de 2
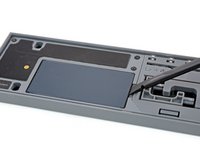
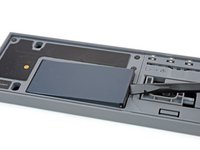
    • Use your fingernail or a spudger to lift the battery on the right side where the notch is.

  5. Teenage Engineering OP-Z Function Key Plastic Buttons Replacement: paso 5, imagen 1 de 2 Teenage Engineering OP-Z Function Key Plastic Buttons Replacement: paso 5, imagen 2 de 2
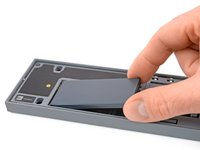
    • Remove the battery.

    • When installing the new battery make sure you put it in contact side first.

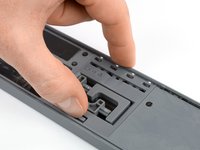
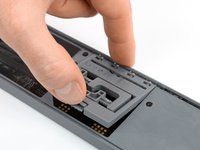
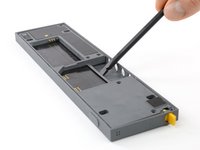
  6. Teenage Engineering OP-Z Function Key Plastic Buttons Replacement, Expansion Module: paso 6, imagen 1 de 2 Teenage Engineering OP-Z Function Key Plastic Buttons Replacement, Expansion Module: paso 6, imagen 2 de 2
    • Use your finger or a spudger to push up on the small tab on the bottom of the module.

    • Lift the module up and out of its recess bottom first.

  7. Teenage Engineering OP-Z Function Key Plastic Buttons Replacement: paso 7, imagen 1 de 1
    • Remove the module.

    • When inserting another module make sure you put it in outputs first. Then push down the bottom part for the tab to engage.

  8. Teenage Engineering OP-Z Function Key Plastic Buttons Replacement, Midframe: paso 8, imagen 1 de 1
    • Remove the five Torx T4 screws.

  9. Teenage Engineering OP-Z Function Key Plastic Buttons Replacement: paso 9, imagen 1 de 2 Teenage Engineering OP-Z Function Key Plastic Buttons Replacement: paso 9, imagen 2 de 2
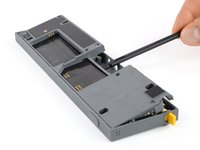
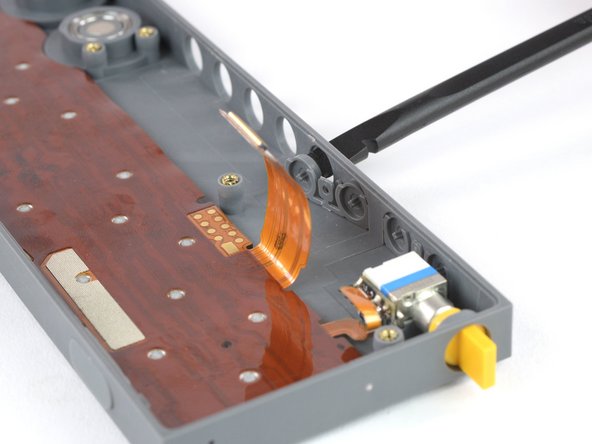
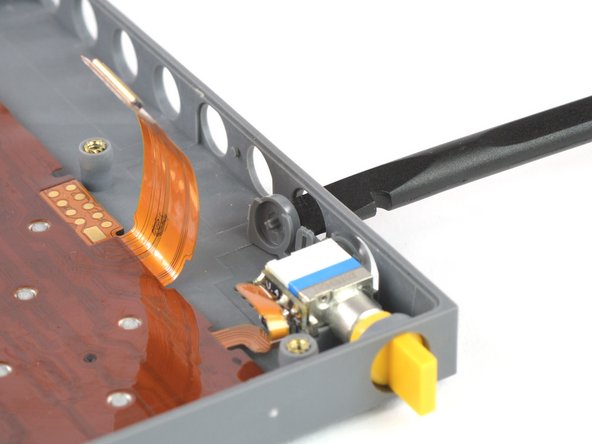
    • Place a spudger in the cutout of the extension module to lift the midframe.

    • Be careful not to damage the highway flex cable underneath.

    • Don’t remove the midframe yet. It is still connected to the rest of the OP-Z.

  10. Teenage Engineering OP-Z Function Key Plastic Buttons Replacement: paso 10, imagen 1 de 3 Teenage Engineering OP-Z Function Key Plastic Buttons Replacement: paso 10, imagen 2 de 3 Teenage Engineering OP-Z Function Key Plastic Buttons Replacement: paso 10, imagen 3 de 3
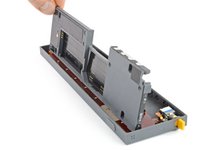
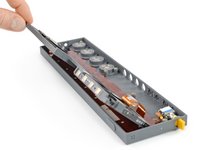
    • Flip the midframe over to gain access to the flex cable connector underneath.

  11. Teenage Engineering OP-Z Function Key Plastic Buttons Replacement: paso 11, imagen 1 de 2 Teenage Engineering OP-Z Function Key Plastic Buttons Replacement: paso 11, imagen 2 de 2
    • Use the flat end of a spudger to disconnect the flex cable from the front panel assembly.

  12. Teenage Engineering OP-Z Function Key Plastic Buttons Replacement, Function Key Plastic Buttons: paso 12, imagen 1 de 2 Teenage Engineering OP-Z Function Key Plastic Buttons Replacement, Function Key Plastic Buttons: paso 12, imagen 2 de 2
    • Use a spudger to push the first set of function buttons inwards.

  13. Teenage Engineering OP-Z Function Key Plastic Buttons Replacement: paso 13, imagen 1 de 1
    • Remove the first set of function buttons.

    • This pair has a circular alignment post between the buttons and a dot mark on one of the buttons.

  14. Teenage Engineering OP-Z Function Key Plastic Buttons Replacement: paso 14, imagen 1 de 2 Teenage Engineering OP-Z Function Key Plastic Buttons Replacement: paso 14, imagen 2 de 2
    • Use a spudger to push the second set of function buttons inwards.

  15. Teenage Engineering OP-Z Function Key Plastic Buttons Replacement: paso 15, imagen 1 de 1
    • Remove the second set of function buttons.

    • This pair has an elliptical alignment post between the buttons and a straight mark on one of the buttons.

Conclusión

To reassemble your device, follow these instructions in reverse order.

Tobias Isakeit

Miembro Desde 03/31/14

117,622 Reputación

188 Guías creadas

Equipo

Master Techs Miembro de Master Techs

Community

322 Miembros

2,539 Guías creadas

Un comentario

Torx t4 screwdriver doesn’t work! Seems too big. Wasting too much money so far to fix something that shouldn’t have worn to breaking point so quickly. Gutted.
Sam Lsn - Contestar

Agregar Comentario

Ver Estadísticas:

Ultimas 24 horas: 1

Ultimos 7 días: 7

Ultimos 30 días: 25

Todo El Tiempo: 1,626