Saltar al contenido principal

Sony SRS-XB43 Port Housing PCB Replacement

Qué necesitas

  1. Sony SRS-XB43 Port Housing PCB Replacement, Faceplate: paso 1, imagen 1 de 2 Sony SRS-XB43 Port Housing PCB Replacement, Faceplate: paso 1, imagen 2 de 2
    • Insert the metal spudger into the mesh's seam/opening located at the bottom of the speaker.

    • Begin applying pressure, prying along the run of the seam until the mesh cover begins to come loose.

    • Fully open the hinged mesh cover and pry it off the unit.

  2. Sony SRS-XB43 Port Housing PCB Replacement: paso 2, imagen 1 de 1
    • Turn the speaker so the back is facing you.

    • Remove the factory tamper seal below the speaker volume toggle to reveal a single screw.

    • Remove the single screw using a T8 Torx.

  3. Sony SRS-XB43 Port Housing PCB Replacement: paso 3, imagen 1 de 1
    • Remove all ten screws using a Phillips #1 screwdriver.

  4. Sony SRS-XB43 Port Housing PCB Replacement: paso 4, imagen 1 de 2 Sony SRS-XB43 Port Housing PCB Replacement: paso 4, imagen 2 de 2
    • Slowly lift the speaker face off of the housing unit.

    • Unplug the six wires connecting the faceplate to the motherboard.

  5. Sony SRS-XB43 Port Housing PCB Replacement, Battery: paso 5, imagen 1 de 2 Sony SRS-XB43 Port Housing PCB Replacement, Battery: paso 5, imagen 2 de 2
    • Orient the speaker's backplate so that the plastic chassis and internal electronics are facing upwards.

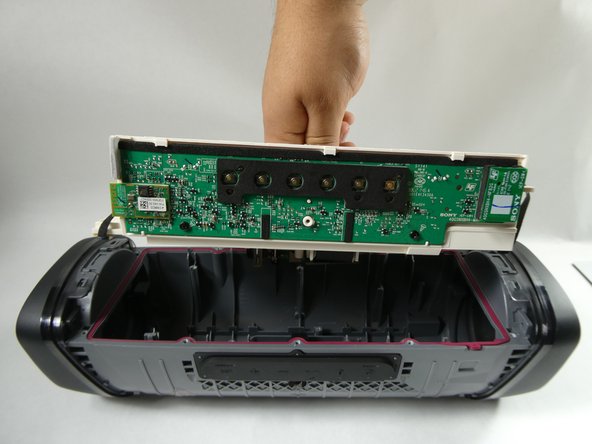
    • Remove the eight 10 mm screws securing the motherboard chassis to the backplate using a Phillips #1 screwdriver.

    • Grab the motherboard chassis and gently remove it from the backplate of the speaker.

  6. Sony SRS-XB43 Port Housing PCB Replacement: paso 6, imagen 1 de 3 Sony SRS-XB43 Port Housing PCB Replacement: paso 6, imagen 2 de 3 Sony SRS-XB43 Port Housing PCB Replacement: paso 6, imagen 3 de 3
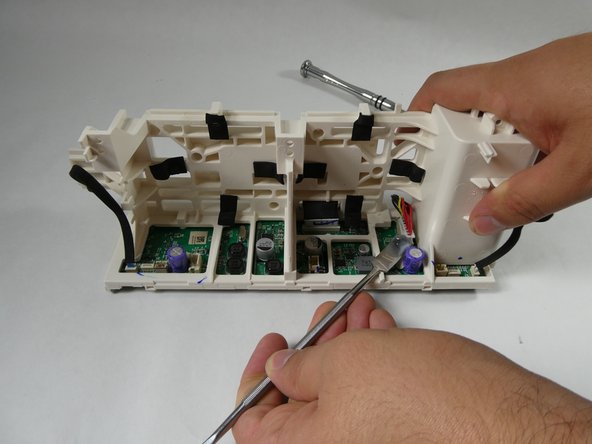
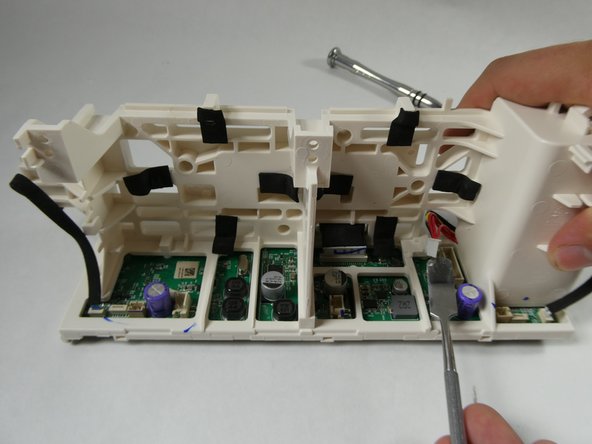
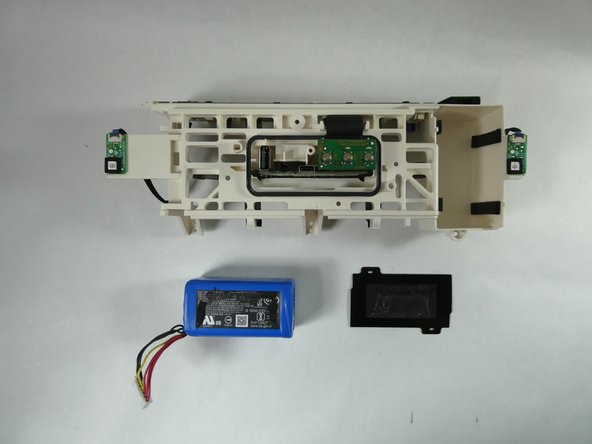
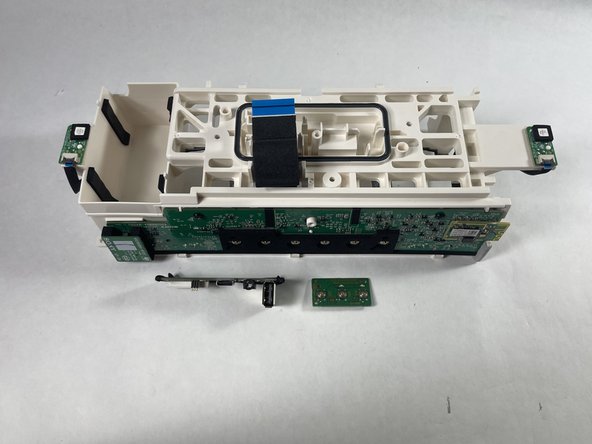
    • Orient the motherboard chassis so that the side with the six buttons is facedown on the table and the opposite side is visible to you.

    • Disconnect the seven-prong cable (the one with red, yellow, and black wires) plugged into the motherboard by prying on its edge/extruding lip with a spudger.

  7. Sony SRS-XB43 Port Housing PCB Replacement: paso 7, imagen 1 de 2 Sony SRS-XB43 Port Housing PCB Replacement: paso 7, imagen 2 de 2
    • Orient the plastic chassis so that the port housing PCB is facing upward.

    • Remove the plastic black film covering the battery, leaving the blue battery exposed.

  8. Sony SRS-XB43 Port Housing PCB Replacement: paso 8, imagen 1 de 2 Sony SRS-XB43 Port Housing PCB Replacement: paso 8, imagen 2 de 2
    • Lightly pull the seven-prong cable upwards until the battery is angled in such a way that you can get a proper grip on both sides with your fingers.

    • Using your fingers, pull upwards until the battery is removed from its enclosure.

    • Do not use a spudger or other flat tools to pry in between the seam of the battery and the battery compartment, as it is possible to damage the battery.

  9. Sony SRS-XB43 Port Housing PCB Replacement, Port Housing PCB: paso 9, imagen 1 de 2 Sony SRS-XB43 Port Housing PCB Replacement, Port Housing PCB: paso 9, imagen 2 de 2
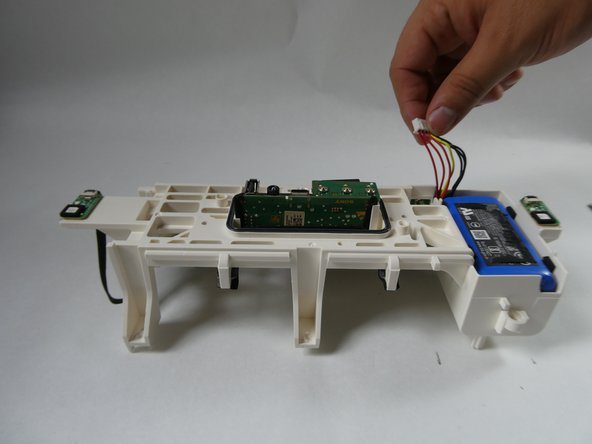
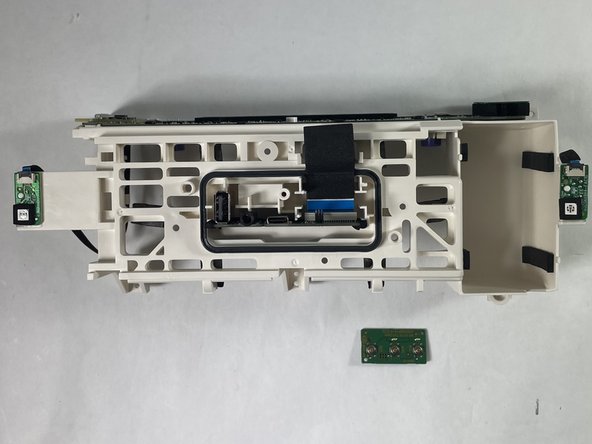
    • Orient the motherboard chassis so that the battery compartment is facing upwards.

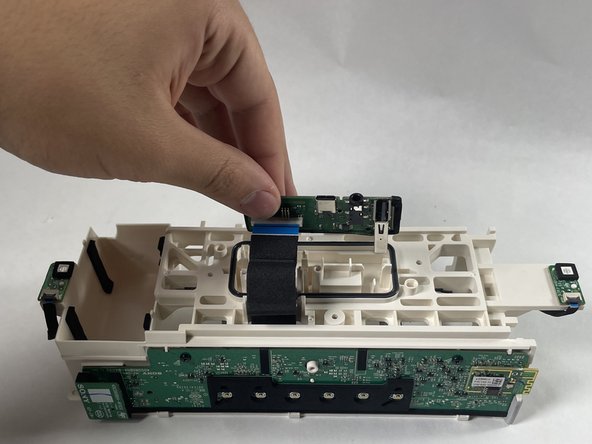
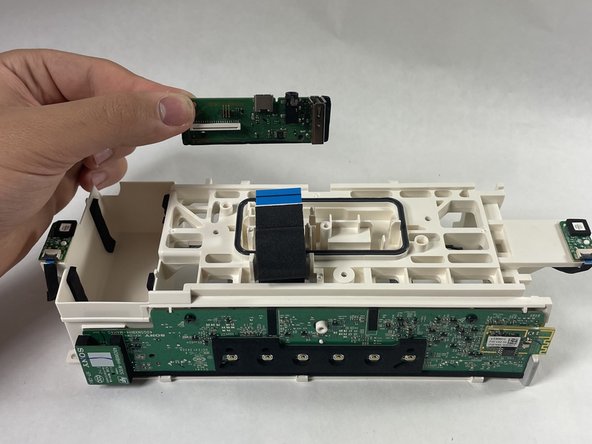
    • Remove the button PCB by grabbing it by its sides and gently pulling it upwards.

  10. Sony SRS-XB43 Port Housing PCB Replacement: paso 10, imagen 1 de 2 Sony SRS-XB43 Port Housing PCB Replacement: paso 10, imagen 2 de 2
    • Grab the port housing PCB and gently pull it upward to remove it from the chassis.

    • To the very left of the PCB, right next to the six metal pins facing upwards, is an empty space big enough to get a firm grip on the circuit board with your fingers which will help while removing it.

  11. Sony SRS-XB43 Port Housing PCB Replacement: paso 11, imagen 1 de 3 Sony SRS-XB43 Port Housing PCB Replacement: paso 11, imagen 2 de 3 Sony SRS-XB43 Port Housing PCB Replacement: paso 11, imagen 3 de 3
    • Locate the black ribbon cable with the blue tip plugged into the port housing PCB.

    • To unplug the ribbon cable from the PCB, grab it from its base and apply a suitable amount of force towards yourself until it becomes loose and disconnects.

Conclusión

To reassemble your device, follow these instructions in reverse order.

Bishoy Mikhail

Miembro Desde 10/26/22

253 Reputación

2 Guías creadas

Equipo

UMass Dartmouth, Team 3-5, Botvin Fall 2022 Miembro de UMass Dartmouth, Team 3-5, Botvin Fall 2022

UMASSD-BOTVIN-F22S3G5

4 Miembros

5 Guías creadas

3 comentarios

Tendría el enlace de compra del pcb?

Jaume3676 - Contestar

Where do you get the port from?

Joseph Valencia - Contestar

bonjour ou je peu acheter la piece avec usb c pour la remplacer merci

batbleu marc - Contestar

Agregar Comentario

Ver Estadísticas:

Ultimas 24 horas: 7

Ultimos 7 días: 21

Ultimos 30 días: 97

Todo El Tiempo: 1,302