Saltar al contenido principal

Sony RM-LVR1 Motherboard Replacement

Qué necesitas

  1. Sony RM-LVR1 Motherboard Replacement, Battery: paso 1, imagen 1 de 1
    • Use a Phillips #00 screwdriver to remove the four (4) screws on the back of the device.

    • If the screws strips or is previously stripped, refer to the stripped screw repair guide.

  2. Sony RM-LVR1 Motherboard Replacement: paso 2, imagen 1 de 1
    • Battery is the rectangular and silver object in the center of device.

    • Remove battery with finger by prying at the rear.

    • If unable to remove battery, pry out using spudger.

  3. Sony RM-LVR1 Motherboard Replacement, LCD Screen: paso 3, imagen 1 de 2 Sony RM-LVR1 Motherboard Replacement, LCD Screen: paso 3, imagen 2 de 2
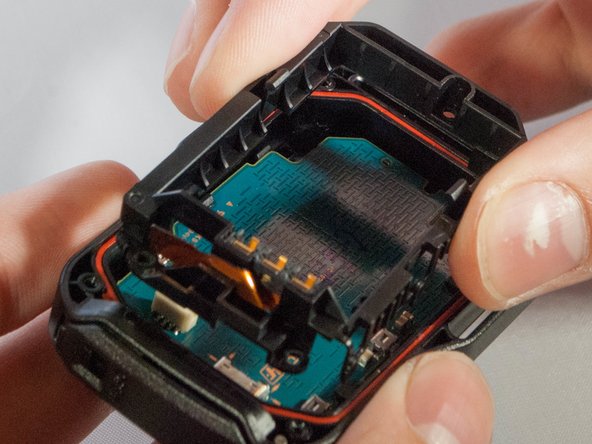
    • Unscrew the 3 (three) screws holding the bracket in place.

    • Then remove the bracket by prying one end up.

    • Do not rip the ribbon cable connecting the bracket to the motherboard.

  4. Sony RM-LVR1 Motherboard Replacement: paso 4, imagen 1 de 1
    • With tweezers, unplug the ribbon cable from the white connector.

  5. Sony RM-LVR1 Motherboard Replacement: paso 5, imagen 1 de 1
    • Remove motherboard from the device by pulling upward gently, with fingers or tweezers.

  6. Sony RM-LVR1 Motherboard Replacement: paso 6, imagen 1 de 1
    • Gently push out on these two clips holding the LCD to the motherboard

    • Once you have the first two off, ever so carefully, push the LCD towards the remaining two clips.

    • There is a ribbon cable underneath the LCD connecting it to the motherboard. Avoid sharp, sudden movements to prevent it from being damged

  7. Sony RM-LVR1 Motherboard Replacement: paso 7, imagen 1 de 2 Sony RM-LVR1 Motherboard Replacement: paso 7, imagen 2 de 2
    • Undo the ribbon cable attached between the motherboard and screen by prying up black tab which holds the cable, using spudger. (See pictures)

  8. Sony RM-LVR1 Motherboard Replacement: paso 8, imagen 1 de 1
    • Remove the screen from the motherboard.

Conclusión

To reassemble your device, follow these instructions in reverse order.

Una persona más ha completado esta guía.

Un comentario

Hello

Thank you for your tutorial.

My question is about the rubber cap of the push button

Can it be changed? Spare part ?

Regards

gilbert keiser - Contestar

Agregar Comentario

Ver Estadísticas:

Ultimas 24 horas: 0

Ultimos 7 días: 0

Ultimos 30 días: 1

Todo El Tiempo: 265