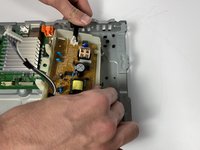
Saltar al contenido principal

Sony BDP-s7200 Power Supply Board Replacement

Qué necesitas

  1. Sony BDP-s7200  Power Supply Board Replacement, Back Cover: paso 1, imagen 1 de 1
    • Remove the disk tray cover from the device.

  2. Sony BDP-s7200  Power Supply Board Replacement: paso 2, imagen 1 de 2 Sony BDP-s7200  Power Supply Board Replacement: paso 2, imagen 2 de 2
    • Using the Phillips #2 Screwdriver, remove the five 9mm from the bottom of the device.

    • Remove the metal cover.

  3. Sony BDP-s7200  Power Supply Board Replacement: paso 3, imagen 1 de 2 Sony BDP-s7200  Power Supply Board Replacement: paso 3, imagen 2 de 2
    • Using the Phillips #2 Screwdriver, remove the six 9mm screws from the back of the device.

  4. Sony BDP-s7200  Power Supply Board Replacement: paso 4, imagen 1 de 1
    • Pull off the back panel and remove it from the device.

  5. Sony BDP-s7200  Power Supply Board Replacement, Front Panel Cover: paso 5, imagen 1 de 3 Sony BDP-s7200  Power Supply Board Replacement, Front Panel Cover: paso 5, imagen 2 de 3 Sony BDP-s7200  Power Supply Board Replacement, Front Panel Cover: paso 5, imagen 3 de 3
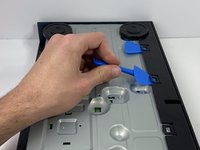
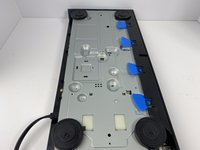
    • Using the plastic opening tool, open one of the tabs on the bottom of the device.

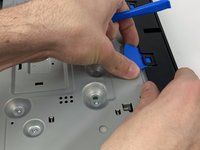
    • While keeping the tab open, insert a opening pick in between the opening tool and tab.

    • Repeat this for the 3 other tabs.

  6. Sony BDP-s7200  Power Supply Board Replacement: paso 6, imagen 1 de 2 Sony BDP-s7200  Power Supply Board Replacement: paso 6, imagen 2 de 2
    • Place your hands on the two black circles on the bottom of the device.

    • Pull on the black circles to remove the device from its front panel cover.

  7. Sony BDP-s7200  Power Supply Board Replacement: paso 7, imagen 1 de 3 Sony BDP-s7200  Power Supply Board Replacement: paso 7, imagen 2 de 3 Sony BDP-s7200  Power Supply Board Replacement: paso 7, imagen 3 de 3
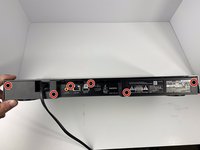
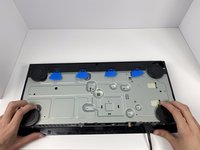
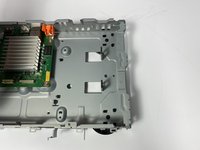
    • Using the Phillips #2 Screwdriver, remove the seven 9mm screws from the top of the device.

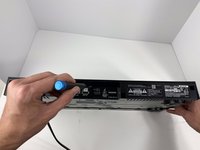
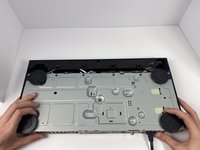
    • Using the same screwdriver, remove the three 9mm screws from the back of the device.

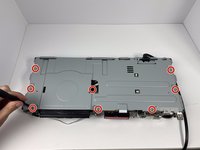
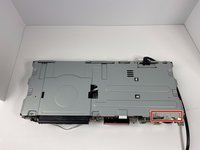
    • Using the same screwdriver, remove the one 9mm screw still connecting the small metal clip to the front of the device.

  8. Sony BDP-s7200  Power Supply Board Replacement: paso 8, imagen 1 de 2 Sony BDP-s7200  Power Supply Board Replacement: paso 8, imagen 2 de 2
    • Remove the small metal clip on the front of the device.

    • Remove the metal cover on the top of the device.

  9. Sony BDP-s7200  Power Supply Board Replacement, Power Supply Board: paso 9, imagen 1 de 1
    • Remove the ribbon cables that connect to the front panel board.

    • Pull firmly, but not too hard as to not damage the ribbon cable.

  10. Sony BDP-s7200  Power Supply Board Replacement: paso 10, imagen 1 de 1
    • Remove the power supply board cable connected to the motherboard.

    • Pull firmly, but not too hard as to not damage the ribbon cable.

  11. Sony BDP-s7200  Power Supply Board Replacement: paso 11, imagen 1 de 1
    • Remove the 2 screws using the Phillips #2 screwdriver

    • Slide the power cord out of it's slot in the frame.

  12. Sony BDP-s7200  Power Supply Board Replacement: paso 12, imagen 1 de 2 Sony BDP-s7200  Power Supply Board Replacement: paso 12, imagen 2 de 2
    • Remove the Power Supply Board.

Conclusión

To reassemble your device, follow these instructions in reverse order.

2 personas más completaron esta guía.

0 comentarios

Agregar Comentario

Ver Estadísticas:

Ultimas 24 horas: 0

Ultimos 7 días: 6

Ultimos 30 días: 14

Todo El Tiempo: 847