Saltar al contenido principal

Samsung RF28R7201SG Refrigerator Wi-Fi Card Replacement

Qué necesitas

  1. Samsung RF28R7201SG Refrigerator Wi-Fi Card Replacement, Unplug your refrigerator: paso 1, imagen 1 de 1
    • Unplug your refrigerator before you begin your repair.

  2. Samsung RF28R7201SG Refrigerator Wi-Fi Card Replacement, Remove the hinge cover: paso 2, imagen 1 de 1
    • Use a Phillips screwdriver to remove the three 18.5 mm-long screws securing the hinge cover on the top of the refrigerator.

  3. Samsung RF28R7201SG Refrigerator Wi-Fi Card Replacement: paso 3, imagen 1 de 1
    • Lift the edges of the hinge cover to loosen it from the refrigerator.

    • Don't try to fully remove the cover, as it's still attached to the refrigerator by a few cables.

    • Flip the hinge cover over to access the cables underneath.

  4. Samsung RF28R7201SG Refrigerator Wi-Fi Card Replacement: paso 4, imagen 1 de 2 Samsung RF28R7201SG Refrigerator Wi-Fi Card Replacement: paso 4, imagen 2 de 2
    • Use your fingers to squeeze and disconnect the blue wire connector.

    • Use your fingers to squeeze and disconnect the white wire connector.

  5. Samsung RF28R7201SG Refrigerator Wi-Fi Card Replacement: paso 5, imagen 1 de 1
    • Remove the hinge cover.

  6. Samsung RF28R7201SG Refrigerator Wi-Fi Card Replacement, Remove the Wi-Fi card: paso 6, imagen 1 de 3 Samsung RF28R7201SG Refrigerator Wi-Fi Card Replacement, Remove the Wi-Fi card: paso 6, imagen 2 de 3 Samsung RF28R7201SG Refrigerator Wi-Fi Card Replacement, Remove the Wi-Fi card: paso 6, imagen 3 de 3
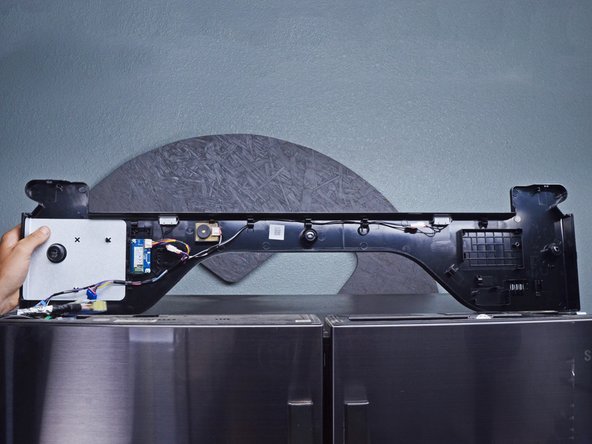
    • The Wi-Fi card is attached to the hinge cover.

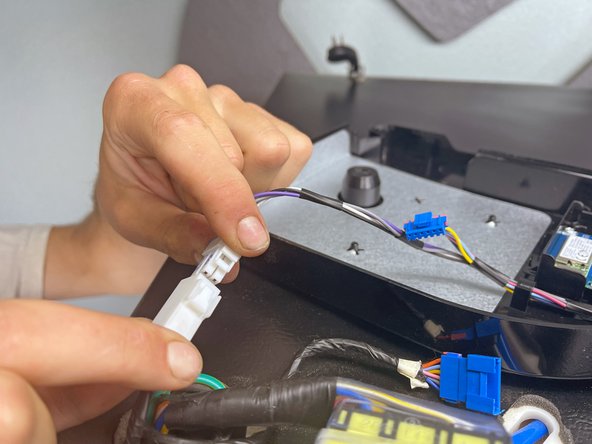
    • Use your fingers to squeeze and slide the Wi-Fi cable connector out of its socket.

  7. Samsung RF28R7201SG Refrigerator Wi-Fi Card Replacement: paso 7, imagen 1 de 1
    • Use a Phillips screwdriver to remove the two 9.7 mm-long screws securing the Wi-Fi card to the hinge cover.

  8. Samsung RF28R7201SG Refrigerator Wi-Fi Card Replacement: paso 8, imagen 1 de 1
    • Lift and remove the Wi-Fi card.

Conclusión

To reassemble your device, follow these instructions in reverse order.

Take your e-waste to an R2 or e-Stewards certified recycler.

Repair didn’t go as planned? Ask our Answers community for help.

nicO

Miembro Desde 04/14/15

15,927 Reputación

88 Guías creadas

Equipo

Global Fixers Miembro de Global Fixers

Community

33 Miembros

576 Guías creadas

0 comentarios

Agregar Comentario

Ver Estadísticas:

Ultimas 24 horas: 0

Ultimos 7 días: 0

Ultimos 30 días: 8

Todo El Tiempo: 84