Saltar al contenido principal

Samsung Galaxy Note Antenna Replacement

Guía Archivada
Esta guía se mantiene únicamente para fines históricos. Utiliza la última versión de la guía para llevar a cabo tu reparación.

Qué necesitas

  1. Samsung Galaxy Note Antenna Replacement, Battery: paso 1, imagen 1 de 3 Samsung Galaxy Note Antenna Replacement, Battery: paso 1, imagen 2 de 3 Samsung Galaxy Note Antenna Replacement, Battery: paso 1, imagen 3 de 3
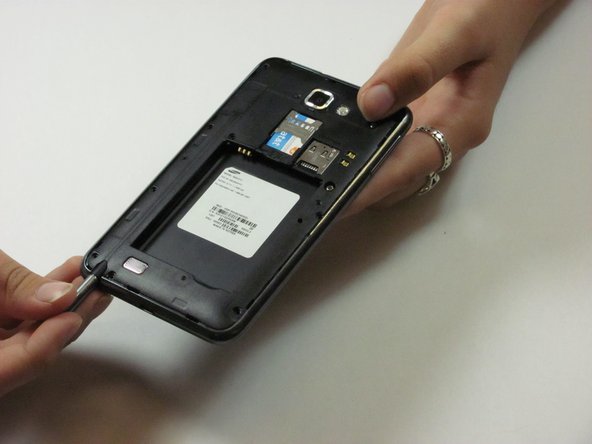
    • Make sure the screen is face-down and the camera is opposite you.

    • Insert the flat end of a spudger into the phone's top right rectangular slot.

    • Use the spudger as a lever to pry open the back of the phone.

  2. Samsung Galaxy Note Antenna Replacement: paso 2, imagen 1 de 1
    • With the spudger still inserted, carefully slide the spudger down the side of the phone.

    • Gently peel off the back cover with your hand.

  3. Samsung Galaxy Note Antenna Replacement: paso 3, imagen 1 de 1
    • Place the spudger in the battery's bottom right slot.

    • Gently pry to remove the battery.

  4. Samsung Galaxy Note Antenna Replacement, Midframe: paso 4, imagen 1 de 1
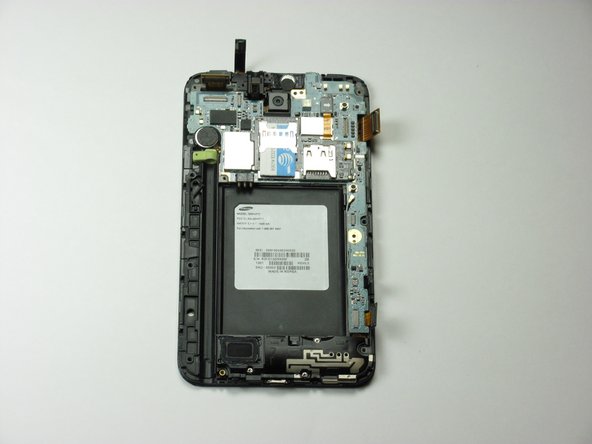
    • Remove the nine 3mm screws on the perimeter of the phone with a Phillips #00 screwdriver.

  5. Samsung Galaxy Note Antenna Replacement: paso 5, imagen 1 de 1
    • Remove the stylus from the bottom of the phone.

  6. Samsung Galaxy Note Antenna Replacement: paso 6, imagen 1 de 3 Samsung Galaxy Note Antenna Replacement: paso 6, imagen 2 de 3 Samsung Galaxy Note Antenna Replacement: paso 6, imagen 3 de 3
    • Pry all the way around the sides with a plastic pry tool and gently pop off the midframe.

    • If the cover does not come off easily, continue to pry along the phone's perimeter.

    • This step can take some patience. Prying too hard or forcing the screen off can crack or scratch the screen and break the thin plastic around the stylus case.

    • Separate the midframe from the phone. The midframe should now pull off easily.

  7. Samsung Galaxy Note Antenna Replacement, Antenna: paso 7, imagen 1 de 1
    • Remove the two 3mm screws surrounded by a gold border with a Phillips #00 screwdriver.

  8. Samsung Galaxy Note Antenna Replacement: paso 8, imagen 1 de 2 Samsung Galaxy Note Antenna Replacement: paso 8, imagen 2 de 2
    • Use the spudger to pry up all six flex ribbons that hold the motherboard in place. They should pop off easily.

  9. Samsung Galaxy Note Antenna Replacement: paso 9, imagen 1 de 1
    • Use the spudger to pull off the white wire with the gold connector.

  10. Samsung Galaxy Note Antenna Replacement: paso 10, imagen 1 de 1
    • Lift the motherboard (PCB) directly up with your hands.

    • If the screws are all removed, the motherboard should come off easily.

  11. Samsung Galaxy Note Antenna Replacement: paso 11, imagen 1 de 2 Samsung Galaxy Note Antenna Replacement: paso 11, imagen 2 de 2
    • Use a Phillips #00 screwdriver to remove the three 3mm screws on the black rectangular bracket located towards the bottom of the phone.

  12. Samsung Galaxy Note Antenna Replacement: paso 12, imagen 1 de 1
    • Use the spudger's flat end to disconnect the other end of the antenna.

Conclusión

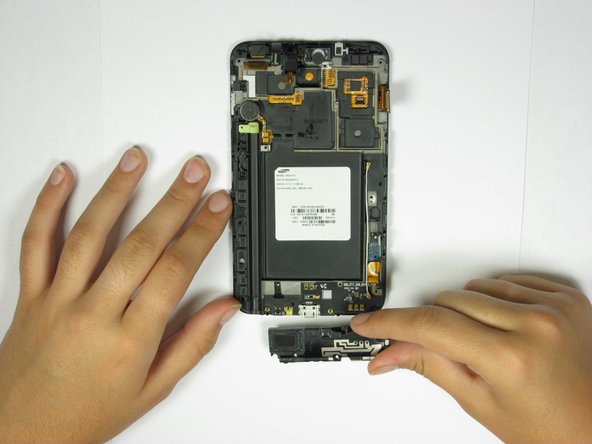
To reassemble your device, follow these instructions in reverse order.

13 personas más completaron esta guía.

David Ritter

Miembro Desde 04/14/13

758 Reputación

6 Guías creadas

Equipo

Cal Poly, Team 3-45, Amido Spring 2013 Miembro de Cal Poly, Team 3-45, Amido Spring 2013

CPSU-AMIDO-S13S3G45

4 Miembros

7 Guías creadas

0 comentarios

Agregar Comentario

Ver Estadísticas:

Ultimas 24 horas: 0

Ultimos 7 días: 0

Ultimos 30 días: 0

Todo El Tiempo: 4,638