Saltar al contenido principal

Esta guía ha sufrido modificaciones. Revisa la última versión sin revisar.

Samsung Galaxy Attain 4G Logic Board Replacement

Qué necesitas

  1. Samsung Galaxy Attain 4G Logic Board Replacement, Placement: paso 1, imagen 1 de 1
    • Begin by turn the device over to it's back, with the screen facing down.

  2. Samsung Galaxy Attain 4G Logic Board Replacement, Battery Door Removal: paso 2, imagen 1 de 2 Samsung Galaxy Attain 4G Logic Board Replacement, Battery Door Removal: paso 2, imagen 2 de 2
    • At the top of the device there is a small notch that is used to remove the battery door.

    • Using a pry tool or your fingernail, pry off the battery door from the main housing.

  3. Samsung Galaxy Attain 4G Logic Board Replacement, Battery Removal: paso 3, imagen 1 de 3 Samsung Galaxy Attain 4G Logic Board Replacement, Battery Removal: paso 3, imagen 2 de 3 Samsung Galaxy Attain 4G Logic Board Replacement, Battery Removal: paso 3, imagen 3 de 3
    • Place the battery door to the side.

    • Using a pry tool or your fingernail, pry the battery up towards you.

    • You have now removed the battery!

  4. Samsung Galaxy Attain 4G Logic Board Replacement, Heads Up!: paso 4, imagen 1 de 1
    • Make sure when replacing the battery that the arrow on the bottom is facing down.

  5. Samsung Galaxy Attain 4G Logic Board Replacement, Screw Removal: paso 5, imagen 1 de 1
    • Remove the 6 Phillips head screws that hold the rear housing in place.

  6. Samsung Galaxy Attain 4G Logic Board Replacement, Prying: paso 6, imagen 1 de 1
    • Using a spudger or plastic pry tool, slowly go around the phone between the display & rear housing to release the clips.

  7. Samsung Galaxy Attain 4G Logic Board Replacement, Remove Housing: paso 7, imagen 1 de 1
    • Lift the rear housing from the display assembly.

  8. Samsung Galaxy Attain 4G Logic Board Replacement, Logic Board: paso 8, imagen 1 de 2 Samsung Galaxy Attain 4G Logic Board Replacement, Logic Board: paso 8, imagen 2 de 2
    • Using your spudger/plastic pry tool, disconnect the headphone jack flex cable.

  9. Samsung Galaxy Attain 4G Logic Board Replacement: paso 9, imagen 1 de 2 Samsung Galaxy Attain 4G Logic Board Replacement: paso 9, imagen 2 de 2
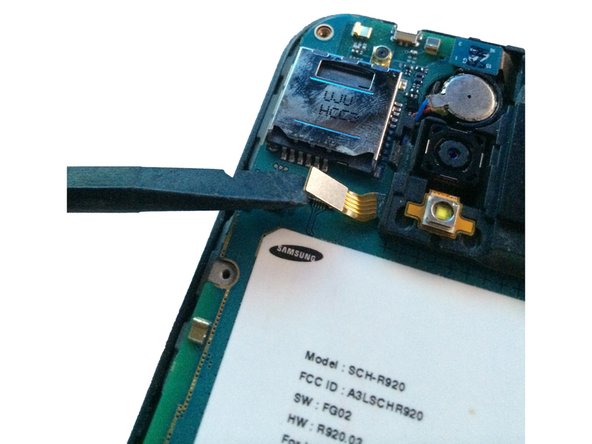
    • Using your spudger/plastic pry tool, disconnect the rear speaker flex cable.

  10. Samsung Galaxy Attain 4G Logic Board Replacement: paso 10, imagen 1 de 1
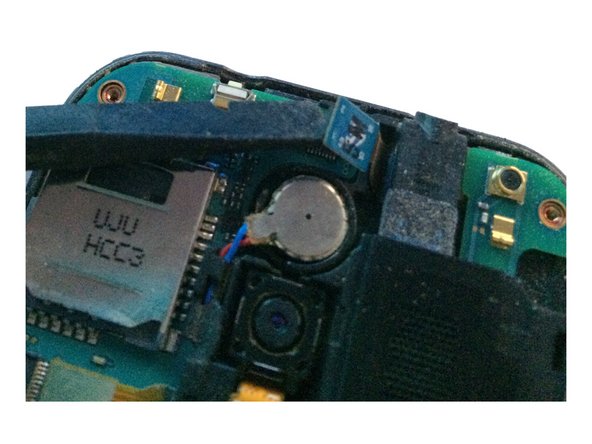
    • Using a spudger/pry tool, carefully remove the vibration motor from its housing. This has a mild adhesive on the bottom.

  11. Samsung Galaxy Attain 4G Logic Board Replacement: paso 11, imagen 1 de 2 Samsung Galaxy Attain 4G Logic Board Replacement: paso 11, imagen 2 de 2
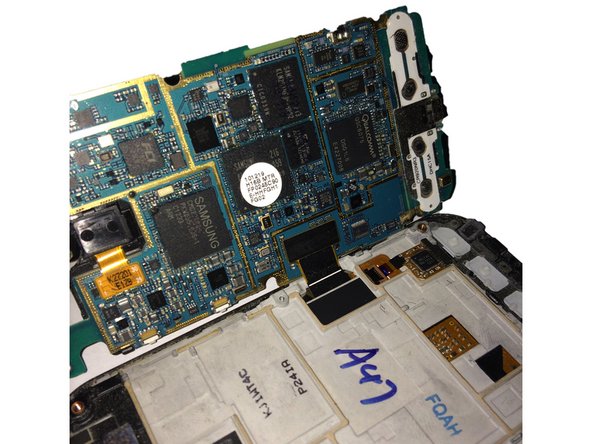
    • After removing both flex cables, slowly move the logic board to the left of the screen assembly.

    • Do not try and remove the logic board all the way, as you still have to remove the display assembly flex cable!

  12. Samsung Galaxy Attain 4G Logic Board Replacement: paso 12, imagen 1 de 1
    • Using your spudger/plastic pry tool, disconnect the LCD/Digitizer flex cable.

  13. Samsung Galaxy Attain 4G Logic Board Replacement: paso 13, imagen 1 de 2 Samsung Galaxy Attain 4G Logic Board Replacement: paso 13, imagen 2 de 2
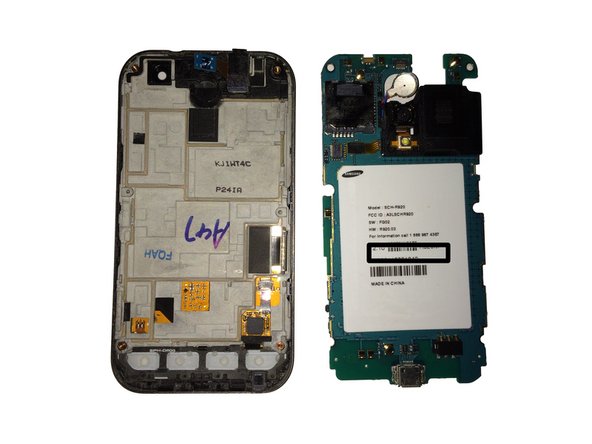
    • You have now removed the logic board from the display assembly.

Conclusión

To reassemble your device, follow these instructions in reverse order.

2 personas más completaron esta guía.

Josh Forester

Miembro Desde 11/28/10

2,497 Reputación

10 Guías creadas

0 comentarios

Agregar Comentario

Ver Estadísticas:

Ultimas 24 horas: 0

Ultimos 7 días: 0

Ultimos 30 días: 1

Todo El Tiempo: 501