Saltar al contenido principal

Samsung Galaxy A5 (2016) Back Cover Replacement

Qué necesitas

  1. Samsung Galaxy A5 (2016) Back Cover Replacement, Back Cover: paso 1, imagen 1 de 3 Samsung Galaxy A5 (2016) Back Cover Replacement, Back Cover: paso 1, imagen 2 de 3 Samsung Galaxy A5 (2016) Back Cover Replacement, Back Cover: paso 1, imagen 3 de 3
    • Start by switching off your phone.

    • Take an iOpener to heat up and soften the glue behind the back cover.

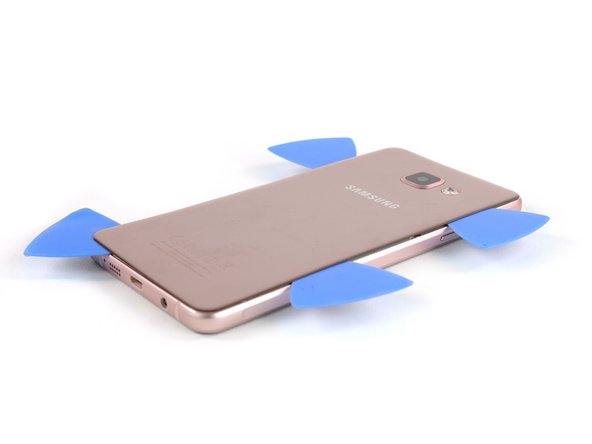
    • With a suction handle lift the back cover to insert an opening pick.

  2. Samsung Galaxy A5 (2016) Back Cover Replacement: paso 2, imagen 1 de 3 Samsung Galaxy A5 (2016) Back Cover Replacement: paso 2, imagen 2 de 3 Samsung Galaxy A5 (2016) Back Cover Replacement: paso 2, imagen 3 de 3
    • Slide the pick up to the middle to separate the back cover from the frame.

    • Insert a second opening pick and move around the right corner along the bottom and around the left corner.

  3. Samsung Galaxy A5 (2016) Back Cover Replacement: paso 3, imagen 1 de 3 Samsung Galaxy A5 (2016) Back Cover Replacement: paso 3, imagen 2 de 3 Samsung Galaxy A5 (2016) Back Cover Replacement: paso 3, imagen 3 de 3
    • Take another opening pick and continue towards the top corner.

    • Here you want to use one more pick for the last part at the top.

  4. Samsung Galaxy A5 (2016) Back Cover Replacement: paso 4, imagen 1 de 3 Samsung Galaxy A5 (2016) Back Cover Replacement: paso 4, imagen 2 de 3 Samsung Galaxy A5 (2016) Back Cover Replacement: paso 4, imagen 3 de 3
    Herramienta utilizada en este paso:
    Plastic Cards
    $2.99
    Comprar
    • Insert a plastic card at the bottom and slide it underneath the back cover.

  5. Samsung Galaxy A5 (2016) Back Cover Replacement: paso 5, imagen 1 de 3 Samsung Galaxy A5 (2016) Back Cover Replacement: paso 5, imagen 2 de 3 Samsung Galaxy A5 (2016) Back Cover Replacement: paso 5, imagen 3 de 3
    • Heat up the back cover once again so you can slide the plastic card towards the top.

    • Always take a peek underneath the back cover to not damage any parts like the NFC antenna.

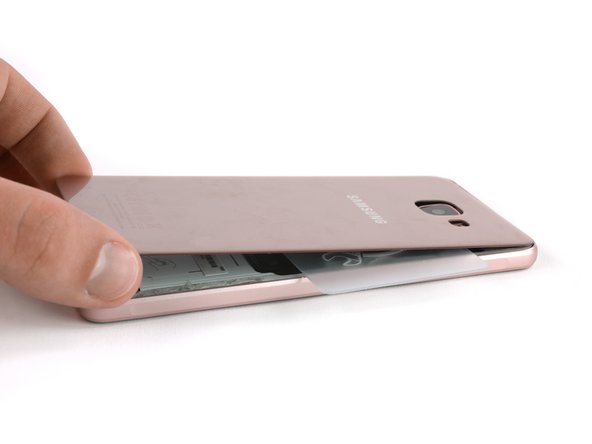
    • Move the plastic card until you reach the camera bump. Now slowly lift up the back cover and finally remove it.

    • Be sure to remove any residue from the glue and apply new adhesive when reassembling.

Conclusión

To reassemble your device, follow these instructions in reverse order.

24 personas más completaron esta guía.

Tobias Isakeit

Miembro Desde 03/31/14

117,669 Reputación

188 Guías creadas

Equipo

Master Techs Miembro de Master Techs

Community

322 Miembros

2,539 Guías creadas

0 comentarios

Agregar Comentario

Ver Estadísticas:

Ultimas 24 horas: 2

Ultimos 7 días: 10

Ultimos 30 días: 44

Todo El Tiempo: 48,299