Saltar al contenido principal

SVP 5800 Front Casing Replacement

Qué necesitas

  1. SVP 5800 Front Casing Replacement, Strap Hook: paso 1, imagen 1 de 3 SVP 5800 Front Casing Replacement, Strap Hook: paso 1, imagen 2 de 3 SVP 5800 Front Casing Replacement, Strap Hook: paso 1, imagen 3 de 3
    • Locate the two 3.5 mm screws on the side of the device.

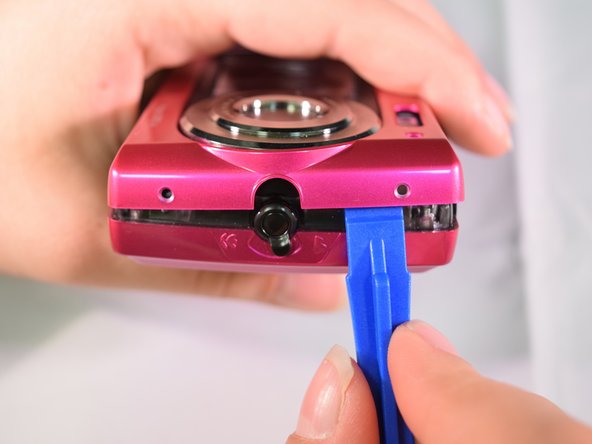
    • Apply pressure to the PH J000 philips head screwdriver and turn in a counter clockwise motion until the screw becomes loose enough to pull out.

  2. SVP 5800 Front Casing Replacement, Front Casing: paso 2, imagen 1 de 2 SVP 5800 Front Casing Replacement, Front Casing: paso 2, imagen 2 de 2
    • Once you have properly removed the strap hook, locate the two 3 mm screws located on the opposite side of the strap hook.

    • Refer to the prerequisite guide on removing the strap hook for instructions.

    • Place the PH J000 phillips head screwdriver on the head of screw; apply pressure and turn in a counter clockwise motion until screws come loose.

  3. SVP 5800 Front Casing Replacement: paso 3, imagen 1 de 2 SVP 5800 Front Casing Replacement: paso 3, imagen 2 de 2
    • Place the plastic opening tool on the crack between the front and back casings.

    • Apply pressure by pulling down on the plastic opening tool to pry the case apart.

  4. SVP 5800 Front Casing Replacement: paso 4, imagen 1 de 2 SVP 5800 Front Casing Replacement: paso 4, imagen 2 de 2
    • Wedge your fingers in the opening and slowly pull the front casing away from the bottom casing until it complete separates from the device.

    • Using too much force in this step can damage your device.

Conclusión

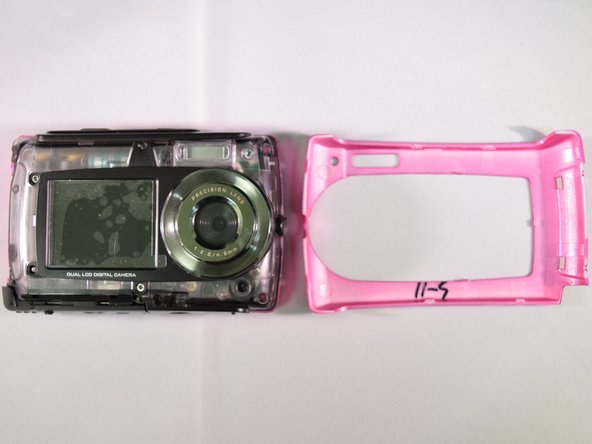
To reassemble your device, follow these instructions in reverse order.

Una persona más ha completado esta guía.

Equipo

Marist, Team 1-3, Laflen Spring 2016 Miembro de Marist, Team 1-3, Laflen Spring 2016

MARS-LAFLEN-S16S1G3

2 Miembros

5 Guías creadas

0 comentarios

Agregar Comentario

Ver Estadísticas:

Ultimas 24 horas: 0

Ultimos 7 días: 0

Ultimos 30 días: 1

Todo El Tiempo: 325