Saltar al contenido principal

Esta guía ha sufrido modificaciones. Revisa la última versión sin revisar.

Removing Dell Inspiron 1150 Optical drive

Qué necesitas

  1. Removing Dell Inspiron 1150 Optical drive, Removing Dell Inspiron 1150 Battery: paso 1, imagen 1 de 3 Removing Dell Inspiron 1150 Optical drive, Removing Dell Inspiron 1150 Battery: paso 1, imagen 2 de 3 Removing Dell Inspiron 1150 Optical drive, Removing Dell Inspiron 1150 Battery: paso 1, imagen 3 de 3
    • Place the laptop upside down on a clean, flat surface.

    • Locate the battery release button with the padlock symbol above it.

    • Slide the battery release button towards the padlock symbol and hold it there. Note that the button is spring loaded and will return if released.

    • The battery is now released from the battery compartment.

    • Gently remove the battery from the side of the laptop.

  2. Removing Dell Inspiron 1150 Optical drive, Removing Dell Inspiron 1150 Palm Rest: paso 2, imagen 1 de 2 Removing Dell Inspiron 1150 Optical drive, Removing Dell Inspiron 1150 Palm Rest: paso 2, imagen 2 de 2
    • Position the computer upside down.

    • Remove the twelve M2.5 x 8-mm screws.

    • Remove the M2.5 x 4-mm screw from the battery bay

  3. Removing Dell Inspiron 1150 Optical drive: paso 3, imagen 1 de 2 Removing Dell Inspiron 1150 Optical drive: paso 3, imagen 2 de 2
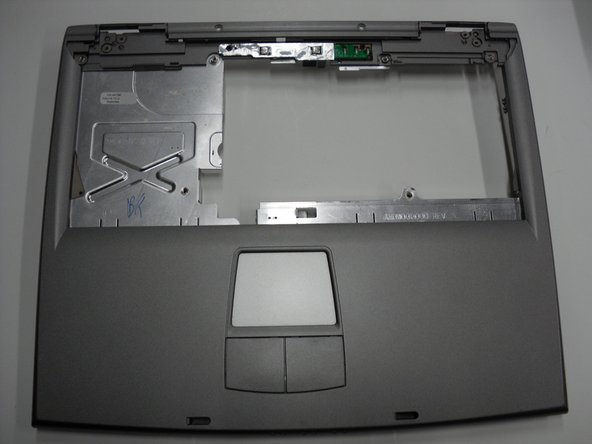
    • Position the computer keyboard side up.

    • Remove the two M2.5 x 5-mm screws from the top of the palm rest.

    • Disconnect the mouse pad cable from the main board.

    • Separate the palm rest from the base by lifting its inside edge. Start at the back center.

    • Be careful to avoid damaging the palm rest while separating it from the base.

  4. Removing Dell Inspiron 1150 Optical drive, Removing Dell Inspiron 1150 Optical drive: paso 4, imagen 1 de 3 Removing Dell Inspiron 1150 Optical drive, Removing Dell Inspiron 1150 Optical drive: paso 4, imagen 2 de 3 Removing Dell Inspiron 1150 Optical drive, Removing Dell Inspiron 1150 Optical drive: paso 4, imagen 3 de 3
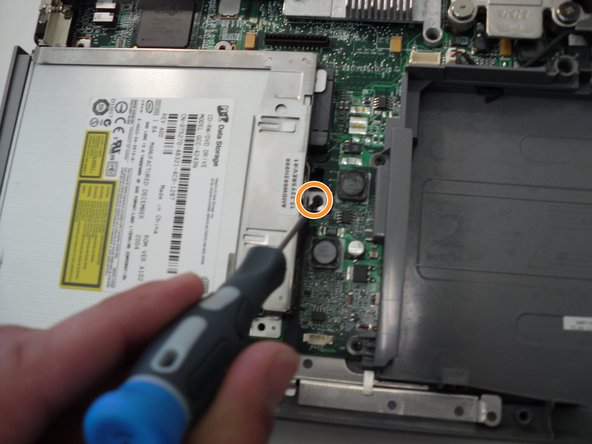
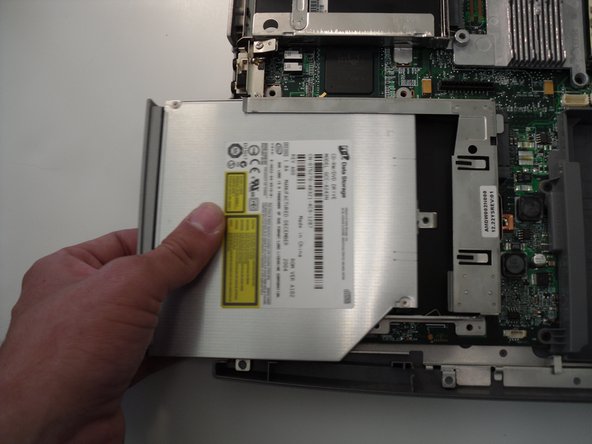
    • Locate the optical disk drive on the bottom left hand side of the laptop.

    • Remove the single screw holding the optical disk drive in the chassis.

    • Remove the optical disk drive by gently pulling on the outer edge.

Conclusión

To reassemble your device, follow these instructions in reverse order.

Daniel

Miembro Desde 04/25/10

87 Reputación

2 Guías creadas

Equipo

Cal Poly, Team 16-2, Maness Spring 2010 Miembro de Cal Poly, Team 16-2, Maness Spring 2010

CPSU-MANESS-S10S16G2

4 Miembros

9 Guías creadas

Un comentario

This guide is incorrect, please see http://support.dell.com/support/edocs/sy... for a version that will actually take the promised two minutes.

Nick - Contestar

Agregar Comentario

Ver Estadísticas:

Ultimas 24 horas: 0

Ultimos 7 días: 2

Ultimos 30 días: 3

Todo El Tiempo: 5,872