Introducción
Usa esta guía para remover o reemplazar la pantalla en un Asus ROG G751JL.
Qué necesitas
-
-
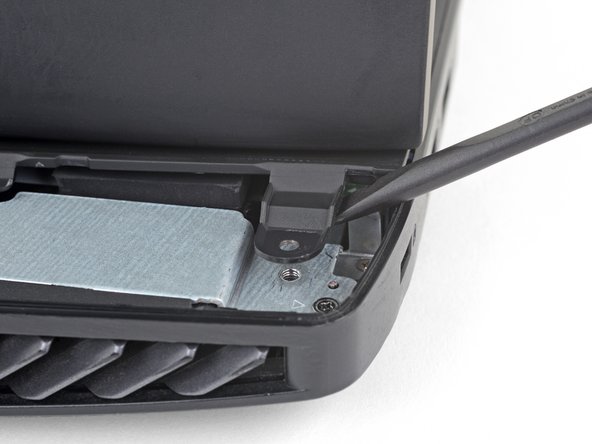
Usa una herramienta de apertura para levantar la tapa de goma pequeña en la esquina superior derecha de la puerta de acceso de RAM.
-
-
-
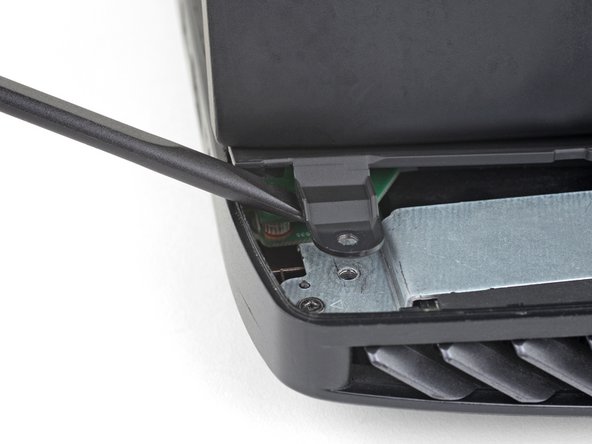
Inserta la punta de una púa de apertura en la costura cerca de la esquina superior derecha de la puerta de acceso a la memoria RAM y levanta la puerta ligeramente.
-
La puerta se mantiene en su lugar con pequeños clips alrededor de sus bordes. Haz una palanca hasta que sientas que los clips más cercanos se sueltan.
-
-
-
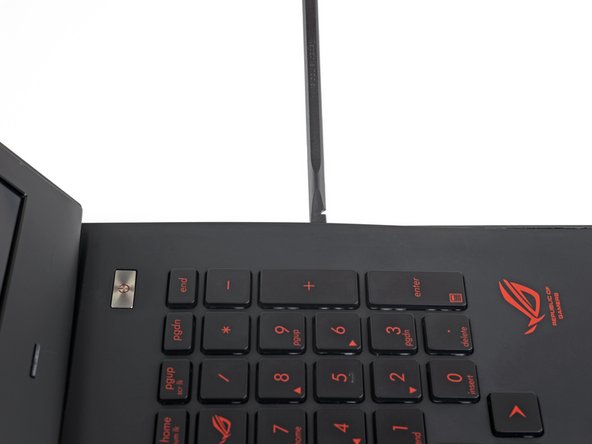
Inserta el borde ancho de una púa de apertura en una nueva parte de la costura entre la puerta y la computadora.
-
Levanta la puerta para liberar los clips más cercanos a la púa.
-
Continúa deslizando la púa a lo largo de la costura alrededor de la puerta, haciendo palanca a medida que avanzas, hasta que se hayan liberado todos los clips que sujetan la puerta.
-
-
-
Remueve el tornillo Phillips #00 de 5.2 mm que sujetan el disco óptico.
-
-
-
Usa la punta de un spudger para levantar los once tapones de goma que cubren los tornillos en la parte inferior de la laptop.
-
-
-
Remueve los 18 tornillos Phillips #00 de los siguientes largos:
-
Ocho tornillos de 8.8 mm
-
Siete tornillos de 5.2 mm
-
Tres tornillos
Step 9: on my model the 2 lower left most red 8.8 mm screws appear to be 5.2 mm orange screws.
-
-
-
-
Voltea la laptop hacia arriba.
-
Use an opening pick to pry the left and right edges of the battery cover away from the laptop enough that you can grip the cover with your fingers.
-
-
-
Tira de los conectores de los altavoces directamente para desconectar el cable de los altavoces.
-
-
-
Abre la pantalla de la computadora portátil a un ángulo de 90°.
-
Usa un spudger para hacer palanca contra una de las pestañas de tornillo en la parte posterior del ensamblaje de la caja superior.
-
Repite este procedimiento con la otra lengüeta.
-
-
-
Utiliza la punta de un spudger para levantar la pequeña pestaña de bloqueo del conector ZIF del cable de retroiluminación del teclado.
-
Saca suavemente el cable de su zócalo.
-
-
-
Repite el paso anterior para el teclado, los botones y los cables del panel táctil que se sujetan con conectores ZIF.
Gently pry up onwards each of the white plastic connector just above the ribbon cable (or near the gray rib on the wider ribbon cable).
-
-
-
Tira del cable de la batería en la misma dirección que los cables individuales para desconectar la batería.
-
-
-
Agarra la cinta negra que está pegada al cable de la pantalla y tira hacia arriba para desconectar el cable de la pantalla.
Before trying to remove the display connector, gently lift tape holding speaker cable and temporarily push cable aside to allow more access to the tape holding the display cable. Then proceed to lift the display cable.
-
-
-
Levanta el monitor y remuévelo.
Please add the step to unplug both wifi antenna cables and the display connector before removing the monitor. Both just pop up.
Hi this comment is correct. This guide completely skips the important step of removing and replacing the wifi cables. Without this step the computer is unable to retain its wifi functions
ggrinste -
How to replace the lcd?
I have to agree with Sam Torres on this. I reached the same spot where the screen was off, but then which wire goes to which connector. The picture is too fuzzy to be completely clear. It looks like the one further to the back (lcd screen) might be the white one and the one closer to the front of the laptop (touchpad) might be teh black one but the only way to tell is to assemble everything and then get the bad or good news.
-


Para volver a ensamblar tu dispositivo, sigue los pasos de arriba en orden inverso.
Lleva tus desechos electrónicos a un centro de reciclaje certificado.
¿La reparación no salió como planificaste? Consulta nuestra comunidad de respuestas para ayuda en la resolución de problemas.
Para volver a ensamblar tu dispositivo, sigue los pasos de arriba en orden inverso.
Lleva tus desechos electrónicos a un centro de reciclaje certificado.
¿La reparación no salió como planificaste? Consulta nuestra comunidad de respuestas para ayuda en la resolución de problemas.
Cancelar: No complete esta guía.
4 personas más completaron esta guía.
Un agradecimiento especial a estos traductores:
100%

¡ Mariana Roca nos está ayudando a reparar el mundo! ¿Quieres contribuir?
Empezar a traducir ›
Equipo

USF Tampa, Team 2-1, Sullivan Fall 2016 Miembro de USF Tampa, Team 2-1, Sullivan Fall 2016
USFT-SULLIVAN-F16S2G1
4 Miembros
20 Guías creadas
3 comentarios
You have left out TWO very important steps. A) tools needed: a - fine tweezer and b - magnifier glass [ and a lot of patience }.
With the open computer facing you. On the left side two gold electrode wires connect to the motherboard, note the wire placement of the two.
On the right side there is a ribbon connector on the right side. NOTE, when the monitor is lifted out, these will COME OFF. If you are a notice, you will be lost. My guess the new monitor will have these connector. To rebuild: place the set screws for the monitor and then the left and right rear brackets. Go back to front view and insert the back ribbon connector to the motherboard on the right backside. Take a break. Use the magnifier glass and tweezer and attempt to align the SMALL ELECTRODE heads. When aligned they can be pressed on, a light snap will be heard. Please be carefull. This step took me 1 hour. After these steps, continue re-assembly.
Regard,
D C
Would the display connector be the same for the touchscreen model? Or is there an additional cable/different connector?
TUTO remarquable de clarté